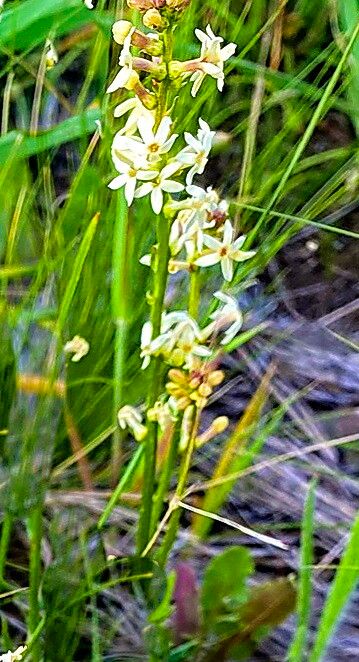
Hello fellow garden enthusiasts! It’s so lovely to have you here. Today, we’re diving into the wonderful world of propagating Stackhousia monogyna, a truly delightful plant that brings such joy to any garden. If you’re looking for something a little different, with its pretty, delicate flowers and a lovely scent, you’ve come to the right place.
Why Propagate Stackhousia Monogyna?
I find propagating plants incredibly rewarding. It’s like magic, watching a tiny piece transform into a whole new life. Stackhousia monogyna, often called Lily-of-the-Valley Bush, is particularly fun to propagate because it’s quite responsive. For beginners, I’d say it’s moderately easy – with a little guidance, you’ll be successful!
The Best Time to Start
Timing is everything in gardening, isn’t it? For Stackhousia monogyna, late spring to early summer is your golden window. This is when the plant is actively growing, full of vigor, and best equipped to recover and root. You’re looking for stems that are semi-hardwood – not brand new and floppy, but not old and woody either.
Supplies You’ll Need
Gathering your tools beforehand makes the whole process smoother. Here’s what I usually have on hand:
- Sharp, clean pruning shears or a craft knife: Sterilize them with rubbing alcohol between cuts to prevent disease.
- Rooting hormone powder: This isn’t strictly mandatory, but it really gives your cuttings a boost. I like to have a good quality one on hand.
- A good quality seed-starting mix or a blend of perlite and peat moss: This ensures excellent drainage, which is crucial.
- Small pots or seed trays: Clean ones, of course!
- Watering can or spray bottle: For gentle watering.
- Plastic bags or a propagator: These create a mini-greenhouse effect.
- (Optional) Bottom heat mat: This can significantly speed up rooting.
Propagation Methods
Let’s get our hands dirty! I typically have the most success with stem cuttings for Stackhousia monogyna.
Stem Cuttings
- Take Your Cuttings: In late spring or early summer, select healthy, non-flowering stems. Using your clean shears, take cuttings about 10-15 cm long. Make the cut just below a leaf node (where a leaf attaches to the stem).
- Prepare the Cuttings: Gently remove the lower leaves from the bottom half of the cutting. You want to expose the nodes, as this is where the roots will emerge. You can leave a couple of leaves at the top to help the cutting photosynthesize.
- Apply Rooting Hormone: Dip the cut end of each stem into your rooting hormone powder. Tap off any excess.
- Potting Them Up: Fill your small pots or trays with your well-draining potting mix. Make a small hole in the center with your finger or a pencil.
- Insert Cuttings: Place the prepared cuttings into the holes, firming the soil gently around them to ensure good contact.
- Water Gently: Water the soil thoroughly but gently. You don’t want to dislodge the cuttings.
- Create a Humid Environment: Cover the pots with a plastic bag or place them in a propagator. Make sure the leaves aren’t touching the plastic if possible. If the leaves do touch the plastic, it can encourage rot. You can use small stakes to hold the bag up.
- Placement: Place your pots in a bright, warm location, but out of direct, harsh sunlight.
The “Secret Sauce” (Pro Tips)
Over the years, I’ve learned a few tricks that can make all the difference.
- Don’t Overcrowd: Give your cuttings a bit of breathing room. If they’re too close together, they can compete for resources and air circulation, increasing the risk of disease.
- Bottom Heat is Your Friend: If you have a bottom heat mat, use it! Stackhousia monogyna absolutely loves a bit of warmth from below. It mimics natural conditions and significantly speeds up root development. Aim for a soil temperature of around 20-24°C (70-75°F).
- Observe, Don’t Disturb: It’s tempting to constantly poke and prod, but try to resist! You’ll see new growth or a gentle tug resistance when roots have formed. Over-handling can damage fragile new roots.
Aftercare & Troubleshooting
Once you start seeing signs of new growth – tiny leaves unfurling at the top – that’s a great indicator that roots are forming below.
Caring for Your New Plants:
- Gradually Acclimatize: Once roots are established, slowly start to remove the plastic cover over a week or so. This helps the new plant adjust to normal humidity levels.
- Keep Watering Consistently: Keep the soil consistently moist, but not soggy. Overwatering is the quickest way to invite rot.
- Transplant When Ready: Once your cuttings are a decent size with a good root system, you can transplant them into slightly larger individual pots.
Troubleshooting:
- Wilting: This can be due to not enough water, or sometimes too much (root rot). Check the soil moisture. If it’s dry, water well. If it’s soggy, gently remove the cutting and see if the base is mushy.
- Rotting: This is usually caused by excess moisture and poor air circulation. Ensure your soil mix is very free-draining, and don’t let the leaves sit in water. If a cutting rots, unfortunately, it’s unlikely to recover.
- No Growth: Be patient! Some cuttings take longer than others. If there’s no sign of rot or wilting, and they’re in the right conditions, they might just be taking their sweet time.
Keep Nurturing
Propagating plants is such a rewarding journey, and Stackhousia monogyna is a wonderful subject to practice on. Remember to be patient, observe your cuttings, and don’t be discouraged if a few don’t make it. Every gardener has lost plants! The joy of seeing those first new roots emerge and then watching your new plant grow is truly a special feeling. Happy gardening!
Resource:
https://identify.plantnet.org/k-world-flora/species/Stackhousia%20monogyna%20Labill./data