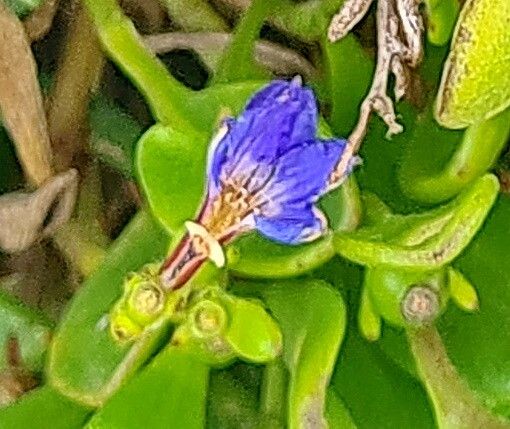
Oh, Scaevola calendulacea! Isn’t it just a delight? Those lovely, fan-shaped purple-blue flowers, like little bursts of sunshine, are hard to resist. And the way they tumble over the edges of pots or spill out of garden beds? Pure magic. I’ve been growing this beauty for years, and one of the most rewarding things is being able to share it. Propagating it yourself is a fantastic way to not only get more of these charmers for your own garden but also to pass on that joy to friends. For beginners, I’d say Scaevola is quite forgiving, making it a wonderful plant to try your hand at propagation.
The Best Time to Start
My personal favorite time to get started with Scaevola propagation is when the plant is actively growing, usually in late spring or early summer. The days are getting longer, the sun is warmer, and the plant has plenty of energy to put towards developing new roots. You want to take cuttings from healthy, non-flowering stems. If your plant is already busy flowering, it’s putting its energy into those blooms, not into making new roots.
Supplies You’ll Need
Here’s a little kit you’ll want to gather before you dive in:
- Sharp, clean pruning shears or a sterile knife: A clean cut is essential to prevent disease.
- Rooting hormone (optional but recommended): This little helper can significantly boost your success rate.
- Small pots or cell trays: About 3-4 inches is a good size.
- Well-draining potting mix: I like to use a mix of peat moss, perlite, and a little bit of coarse sand. This ensures good aeration and prevents waterlogging. You can also buy a specific propagation mix.
- Plastic bags or a clear propagation dome: This creates a humid environment for your cuttings.
- Labels and a marker: Keep track of what you’ve potted!
- A watering can or spray bottle: For gentle watering.
Propagation Methods
I find that taking stem cuttings is the most reliable and straightforward method for Scaevola calendulacea.
Stem Cuttings:
- Select your cuttings: Look for healthy, vigorous, non-flowering stems. Aim for stems that are about 4-6 inches long.
- Make the cut: Using your sharp shears or knife, make a clean cut just below a leaf node (where a leaf attaches to the stem). This is where roots are most likely to form.
- Prepare the cutting: Remove the lower leaves from the cutting, leaving just a few at the top. This prevents them from rotting when buried in the soil.
- Apply rooting hormone: If you’re using it, dip the cut end of the stem into the rooting hormone powder, tap off any excess.
- Plant the cuttings: Fill your pots or trays with the prepared potting mix. Make a small hole with your finger or a pencil and gently insert the cutting, burying the leaf nodes that you’ve cleared. Firm the soil gently around the stem.
- Water gently: Water the soil thoroughly after planting. You want it moist but not soggy.
- Create humidity: Cover the pots with a plastic bag or a propagation dome. This is crucial for keeping the cuttings from drying out. If using a bag, you might want to prop it up with a few small sticks so it doesn’t touch the leaves.
- Place in bright, indirect light: Find a spot that gets plenty of light but no direct hot sun.
The “Secret Sauce” (Pro Tips)
Here are a couple of things I’ve learned over the years that really make a difference:
- Don’t let those leaves touch the water! When you’re watering your cuttings, be gentle. If you’re doing water propagation (though I usually stick to soil for Scaevola), make sure only the stem is submerged, not the leaves. Rot is the enemy, and waterlogged leaves are an invitation for it.
- Bottom heat is your friend. If you have a heat mat designed for propagation, using it under your pots can really speed things up. It encourages root development from the bottom up. Even placing your pots on top of a warm appliance (like a router, if it’s safe and not too hot!) can sometimes provide that gentle warmth.
Aftercare & Troubleshooting
Once your cuttings are planted, give them a good misting and cover them. Check the soil moisture regularly and mist if it starts to feel dry. You’ll want to ventilate them occasionally by lifting the plastic bag for a few minutes to allow for air circulation and prevent fungal issues.
You’re looking for signs of new growth, like new leaves appearing at the top, and gentle tugging on the cutting which should reveal resistance – that’s your cue that roots have formed! This usually takes 3-6 weeks, sometimes a bit longer.
The most common problem you might encounter is rot. This usually happens if the soil is too wet, there’s not enough air circulation, or the cuttings are getting too much direct sun. If you see a cutting looking limp, mushy, or blackening, it’s usually a sign of rot, and unfortunately, it’s best to discard it to prevent it from spreading. Don’t be discouraged if some don’t make it – it’s all part of the learning process!
A Encouraging Closing
Growing plants from cuttings is such a rewarding experience. It requires a little patience, a touch of hope, and a whole lot of love. Don’t be afraid to experiment, and remember that every gardener has had their share of failures. Just keep trying, observe your little cuttings, and soon you’ll be surrounded by beautiful Scaevola plants that you grew yourself. Happy propagating!
Resource:
https://identify.plantnet.org/k-world-flora/species/Scaevola%20calendulacea%20(Andrews)%20Druce/data