Hello, fellow plant enthusiasts! Today, I want to talk about a real gem in the orchid world: Epidendrum ciliare. If you’ve ever admired its delicate, fringed flowers and lovely fragrance, you’re not alone. Propagating these beauties can feel a little daunting at first, but I promise, with a bit of care and understanding, it’s a wonderfully rewarding process. Think of it as giving the gift of more beautiful blooms to your home! For beginners, Epidendrum ciliare falls into the “moderately easy” category. It’s not as fuss-free as a pothos, but it’s certainly achievable with a little patience.
The Best Time to Start
The sweet spot for propagating Epidendrum ciliare is typically in the spring or early summer. This is when the plant is in a more active growth phase. You’ll see new shoots emerging, and the energy is flowing. Waiting until after your orchid has finished blooming is also a good idea; you don’t want to take cuttings from a plant that’s putting all its effort into those gorgeous flowers. Look for healthy, mature pseudobulbs that have at least a couple of leaves.
Supplies You’ll Need
Here’s your handy checklist to gather before we get our hands dirty:
- Sharp, sterile pruning shears or a clean knife: For making clean cuts. Sterilize with rubbing alcohol between cuts.
- Orchid bark mix: A well-draining mix is crucial. I like a blend with fine to medium bark, perlite, and a bit of charcoal.
- A small, well-draining pot: Terracotta or plastic pots with plenty of drainage holes work well.
- Rooting hormone (optional but recommended): A powder or gel can give your cuttings a helpful boost.
- Sphagnum moss (optional): For creating a humid environment.
- Clear plastic bag or propagation dome: To maintain humidity.
- Water: Clean, lukewarm water. Rainwater or distilled water is best if your tap water is very hard.
- Labels and a permanent marker: To keep track of your projects!
Propagation Methods
While Epidendrum ciliare can be propagated in a few ways, the most straightforward for most home growers is division. Let’s dive in.
Division: The Most Reliable Method
This is how you’ll most likely be multiplying your precious Epidendrum ciliare.
- Gently remove the orchid from its pot. If it’s stuck, carefully run a knife around the edge of the pot.
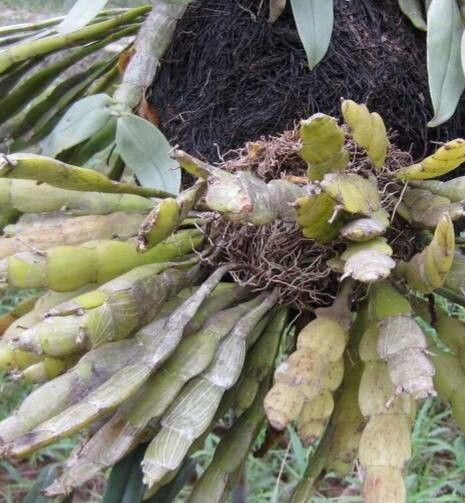
- Shake off excess potting mix. You want to see the roots and pseudobulbs clearly.
- Identify natural divisions. Look for areas where the plant has grown into distinct sections, usually with at least two or three pseudobulbs and a healthy root system attached to each. You’re looking for where new growth can emerge.
- Use your sterile tool to carefully separate the divisions. Make a clean cut through the rhizome (the creeping stem that connects the pseudobulbs). Be as gentle as possible with the roots.
- Inspect each division. Ensure each new piece has at least two healthy pseudobulbs and a decent root system. If a division has very few roots, it might be a bit more challenging but still worth trying!
- Pot up the divisions. Place each division into its own small pot filled with your fresh orchid bark mix. Nestle the pseudobulbs at the surface of the mix, making sure they aren’t buried too deeply.
The “Secret Sauce” (Pro Tips)
Now, for a couple of little tricks that have made all the difference for me over the years:
- Don’t be afraid to trim away dead roots. It might seem counterintuitive, but those mushy, brown roots aren’t doing your plant any good. Clean cuts encourage new, healthy root growth.
- A touch of humidity goes a long way. After potting your divisions, lightly water them. Then, place the pots into a clear plastic bag, loosely sealed, or cover them with a propagation dome. This creates a humid microclimate that encourages rooting without leading to rot, as long as there’s some air circulation.
- Patience is truly a virtue. I know it’s tempting to check every day, but try to resist. Let the plant settle in and focus its energy on establishing itself.
Aftercare & Troubleshooting
Once your divisions are potted, give them a light watering. I like to mist the leaves and the surface of the bark. Then, place them in a location with bright, indirect light. Avoid direct sun, which can scorch the new growth.
For the first few weeks, water sparingly. You want the potting mix to dry out somewhat between waterings, but don’t let it get bone dry. Misting the leaves a couple of times a week can help maintain that crucial humidity, especially if you have them under a plastic bag.
Common signs of failure to watch for:
- Rot: This is the most common problem. If you see pseudobulbs turning mushy and black, or a foul smell, it’s usually a sign of too much moisture or poor drainage. In this case, unpot the plant, trim away any rotten parts with your sterile tool, and repot in fresh, dry mix.
- Wilting leaves: This can indicate either underwatering or that the roots are not yet established enough to take up moisture. Check the moisture level of the mix.
If you see new root tips emerging or tiny green shoots forming on the pseudobulbs, you’re on the right track!
A Encouraging Closing
So there you have it – a roadmap to propagating your own Epidendrum ciliare. Remember, gardening is a journey, and sometimes things don’t go exactly as planned. That’s part of the learning process! Be patient with your new plant babies, offer them consistent care, and soon you’ll be rewarded with beautiful new orchids to enjoy. Happy growing!
Resource:
https://identify.plantnet.org/k-world-flora/species/Epidendrum%20ciliare%20L./data