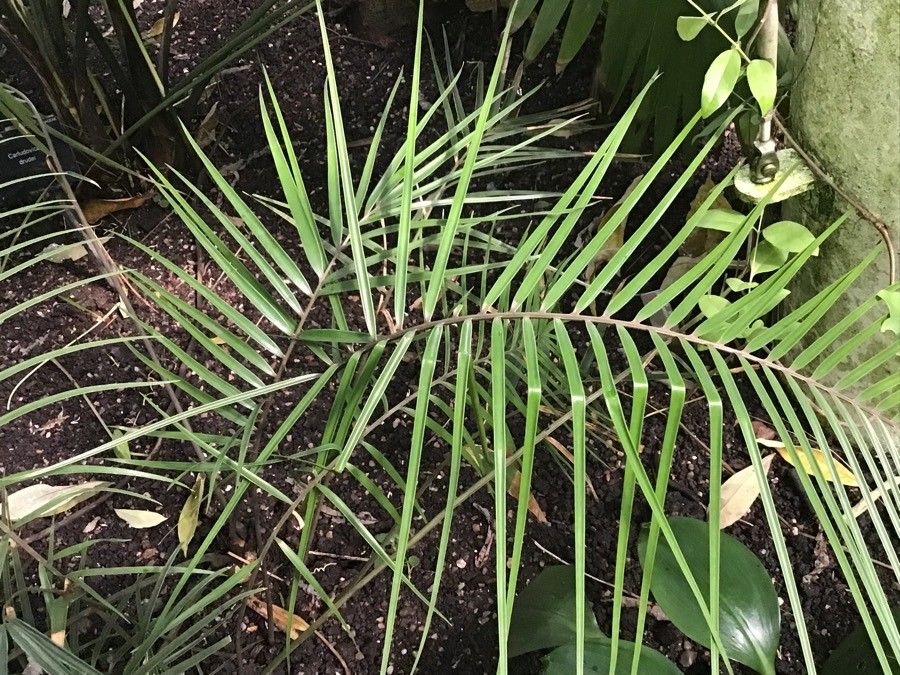
Oh, ceratozamias! What a fascinating group of plants. And Ceratozamia kuesteriana, with its elegant fronds and prehistoric charm, is a particularly lovely specimen to have gracing your garden or indoor space. There’s something incredibly satisfying about nurturing a new life from a parent plant, and with these beauties, it’s a journey that connects you to a truly ancient lineage of flora.
For those of you just dipping your toes into the world of cycad propagation, I’ll be honest, Ceratozamia kuesteriana might lean a little towards the challenging side for absolute beginners. It requires a bit more patience and specific attention than, say, a succulent. But don’t let that deter you! With a little care and these tips, you absolutely can coax new plants into existence. The reward of watching those first new leaves unfurl is simply magnificent.
The Best Time to Start
When it comes to coaxing Ceratozamia kuesteriana to produce new life, spring is your golden ticket. This is when the plant is naturally gearing up for active growth after its dormant period. You’ll see the most vigor, and the developing cones or offsets will be at their most robust, giving you the best chance of success. Think of it as catching them at their most energetic!
Supplies You’ll Need
Gathering your tools before you begin is always a smart move. It makes the whole process smoother, and honestly, it feels a bit like preparing for a special garden ritual. Here’s what I like to have on hand:
- Sharp, sterilized pruning shears or a clean knife: You want precision and to prevent any unwelcome disease introduction.
- Well-draining potting mix: This is crucial. I’m a big fan of a mix that includes coarse sand, perlite, and a good quality potting soil. Something that doesn’t hold excess moisture is key.
- Rooting hormone (optional, but recommended for stem cuttings): This can give your cuttings that extra boost.
- A small pot or tray with drainage holes: For your cuttings or divisions.
- Watering can with a fine rose or a spray bottle: Gentle watering is important.
- Clear plastic bag or a propagation dome: To create a humid environment.
- Rubbing alcohol for sterilizing tools: Keep everything clean!
- Gloves (optional, but some cycads can have irritating sap): It’s always good to be prepared.
Propagation Methods
Ceratozamia kuesteriana does reproduce naturally by producing offsets, or “pups,” near the base of the parent plant. This is by far the most straightforward and successful method for home gardeners. While stem cuttings are possible for some cycads, it’s not generally the preferred or easiest route for Ceratozamia kuesteriana and can be quite difficult. So, we’ll focus on the bounty nature provides.
Method: Division of Offsets (Pups)
- Inspect your parent plant: Look for small, developing offsets near the base of the main trunk. These are miniature versions of the parent, often with their own tiny root systems beginning to form.
- Wait for size: Patience here is a virtue! Ideally, you want offsets that are at least a few inches in diameter and show signs of independent growth. They should look substantial enough to survive on their own.
- Gently excavate: Using a soft brush or your fingers, carefully clear away some of the soil around the base of the offset. You’re trying to expose where it connects to the parent plant.
- Make the cut: This is where your sharp, sterilized tool comes in. Carefully make a clean cut between the offset and the parent plant. You want to sever the connecting tissue cleanly. If the offset has its own visible roots, try to preserve as many as you can.
- Allow to callous: This is a critical step. Place the separated offset in a warm, dry, well-ventilated spot for several days to a week. You want the cut surface to dry out and form a callous. This prevents rot when you replant it.
- Potting up: Fill your chosen pot with your well-draining potting mix. Make a small hole in the center and plant the offset upright, burying its base just enough to be stable. Don’t pack the soil too tightly.
- Initial Watering: Water very sparingly after planting. Just enough to settle the soil around the roots. You don’t want it to be soggy.
The “Secret Sauce” (Pro Tips)
Over the years, I’ve learned a few little tricks that seem to make all the difference. These are the things you perhaps don’t find in every textbook, but they really help.
- Think “Dry Healing”: That callousing step for the offset is non-negotiable. For Ceratozamia, a dry, wound surface before it hits soil is your absolute best defense against rot. I’ve seen people rush this, and it’s usually the undoing of the new plant. Don’t be tempted to plant it immediately after cutting!
- Bottom Heat is Your Friend: If you can, place your potted offset in a spot where it receives gentle bottom heat. A seedling heat mat set to a low temperature (around 70-75°F or 21-24°C) will encourage root development without stressing the plant with too much top warmth. It mimics the warmth of a tropical soil.
- Observe, Don’t Overwater: This is the mantra for most cycad propagation. These plants are adapted to drier conditions. It’s far easier to revive a slightly dry Ceratozamia pup than one suffering from waterlogged roots. You want that soil to dry out mostly between waterings.
Aftercare & Troubleshooting
Once your offset is potted and you’ve given it that initial light watering, the waiting game begins. Place it in a bright spot, but avoid direct, harsh sunlight initially. Filtered light is perfect. Keep the humidity moderately high, which the plastic bag or dome helps with.
You’ll know you’re on the right track when you start to see new growth. This might take weeks, or even months. Don’t panic if nothing happens immediately.
Common Signs of Failure:
- Soft, mushy rot: This is the big one, and it’s almost always caused by too much moisture. The base of the offset will become soft and discolored. If you see this, gently unpot it, cut away all the rotted tissue with a sterilized knife, and let it callous again for longer. You might lose it, but it’s worth a try.
- Shriveling and drying: This could indicate it’s too dry, or it simply didn’t establish roots and is running out of stored energy. Ensure you’re providing adequate, though not excessive, moisture to the soil.
A Little Bit of Patience Goes a Long Way
Propagating Ceratozamia kuesteriana is a project that truly rewards patience and attention to detail. It’s not a fast process, but watching that determined new frond emerge, knowing you helped it happen, is a truly special gardening experience. Be gentle, be observant, and enjoy the journey of growing your own piece of living history. Happy propagating!
Resource:
https://identify.plantnet.org/k-world-flora/species/Ceratozamia%20kuesteriana%20Regel/data