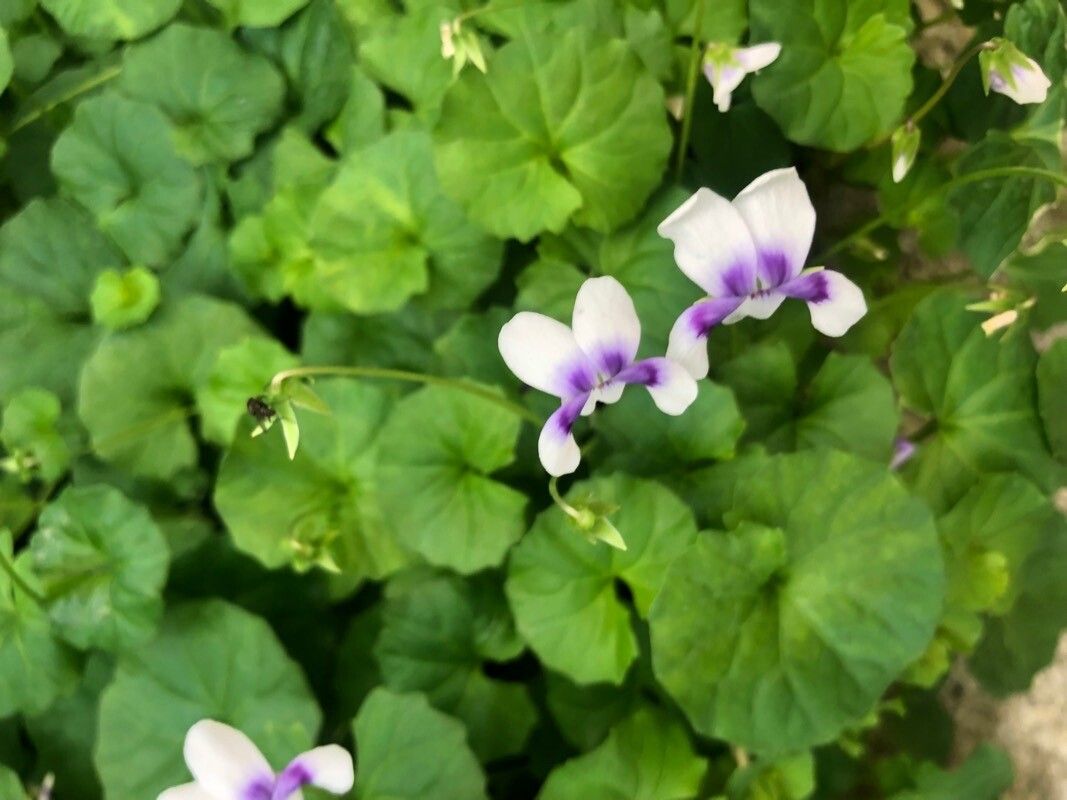
Oh, hello there! I’m so glad you’ve found your way to my little corner of the garden world. Today, we’re going to talk about one of my absolute favorites: Viola banksii. If you haven’t met this beauty yet, imagine delicate, vibrant blooms dancing on cheerful, heart-shaped leaves. It’s just pure joy in plant form, isn’t it? And the best part? It’s wonderfully rewarding to create more of them! You might think propagating a plant sounds a bit daunting, but I promise you, Viola banksii is quite forgiving, making it a fantastic choice even if you’re just starting on your plant-parenting journey.
The Best Time to Start
My experience tells me that the sweet spot for propagating Viola banksii is late spring through early summer. This is when the plant is actively growing, full of energy, and ready to put out new shoots. You’ll want to select healthy, non-flowering stems for the best results. Think of it like this: you’re catching the plant at its peak vitality, so it’s more eager to share its life force!
Supplies You’ll Need
Gathering your tools upfront makes the whole process smoother. Here’s what I like to have on hand:
- Sharp pruning shears or scissors: Make sure they’re clean to prevent disease.
- A good quality potting mix: I prefer a light, well-draining mix. A blend of peat moss, perlite, and a bit of compost works wonders. You can also find specific seed-starting mixes that are excellent.
- Small pots or seed trays: Clean ones, please!
- Perlite or vermiculite: For improving drainage and aeration.
- Rooting hormone (optional but helpful): A little dip can encourage faster root development.
- A clear plastic bag or dome: To create a humid environment.
- Watering can with a fine rose: Gentle watering is key.
Propagation Methods
Viola banksii is a breeze to propagate from stem cuttings. This is my go-to method for duplicating these lovely plants.
- Take Your Cuttings: Look for healthy, non-woody stems that are about 3-4 inches long. Using your clean pruning shears, make a clean cut just below a leaf node. A leaf node is where a leaf emerges from the stem; this is where new roots will most likely form.
- Prepare the Cuttings: Gently remove the lower leaves from the cutting, leaving just a couple of leaves at the top. This reduces water loss and allows the plant to focus its energy on rooting. If you’re using rooting hormone, dip the cut end of the stem into the powder, tapping off any excess.
- Plant Your Cuttings: Fill your small pots or seed trays with your moist potting mix. Make a small hole in the center of the soil with your finger or a pencil. Carefully insert the cut end of the stem into the hole, ensuring the leaf nodes are buried. Gently firm the soil around the cutting to keep it upright.
- Create a Humid Environment: Water the soil gently. Then, cover the entire pot or tray with a clear plastic bag or a propagation dome. This traps moisture and creates the humid microclimate that cuttings crave. You can prop up the bag with a few sticks to keep it from touching the leaves.
Another straightforward method is water propagation.
- Prepare the Stem: Similar to stem cuttings, take a healthy stem cutting about 3-4 inches long and remove the lower leaves.
- Place in Water: Find a small vase or jar and fill it with clean water. Place the cutting in the water, ensuring that the leaf nodes that were closest to the bottom are submerged.
- Change Water Regularly: This is crucial! Change the water every few days to keep it fresh and prevent the rot from setting in. Keep the jar in a bright spot, but out of direct sunlight. You’ll be amazed to see those little white roots emerging from the nodes! Once the roots are about an inch long, you can transplant them into soil.
The “Secret Sauce” (Pro Tips)
Here are a couple of things I’ve learned from years of coaxing plants to grow:
- If you’re rooting multiple cuttings in one pot, make sure the leaves don’t touch each other or the sides of the bag. They can start to mold or rot if they’re in constant contact and airflow is limited.
- Many tropicals and semi-tropicals, like Viola banksii, adore a bit of warmth from below. If you have a heat mat designed for seedlings, place your pots on it. It really encourages those roots to get going faster. Don’t worry if you don’t have one, though; success is still very achievable without it!
Aftercare & Troubleshooting
Once your cuttings have developed a good root system (you’ll see roots peeking out of the drainage holes or feel resistance when you gently tug), it’s time to start treating them as small plants. Water them regularly, making sure the soil stays consistently moist but not waterlogged. Gradually transition them out of the humidity dome by opening the bag a little each day. Keep them in bright, indirect light.
The most common setback you’ll encounter is rot. If you notice your stem turning mushy and black, or if it simply wilts and refuses to perk up, it’s likely rot. This is often caused by too much moisture and not enough airflow. Don’t be discouraged! If a few cuttings fail, just try again. Sometimes, it’s just a matter of adjusting your watering schedule or ensuring better drainage.
A Little Encouragement
And there you have it! With a little patience and care, you’ll be well on your way to enjoying more of these delightful Viola banksii plants. Don’t be afraid to experiment and learn from each attempt. Gardening is a journey, and the joy is as much in the process as it is in the bloom. Happy propagating!
Resource:
https://identify.plantnet.org/k-world-flora/species/Viola%20banksii%20K.R.Thiele%20&%20Prober/data