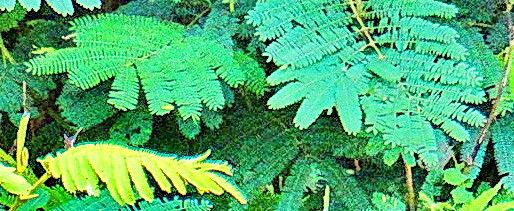
Hey there, fellow plant lovers! Today, we’re diving into the wonderful world of Paraserianthes lophantha, or as many of us affectionately call it, the Albizia. I’ve been growing and propagating these beauties for two decades now, and I can tell you, there’s a special kind of joy in taking a little snipping and watching it transform into a magnificent new tree. The Albizia is a stunner with its feathery foliage and delicate, powder-puff-like flowers. It’s tropical vibes in a pot or in the ground, depending on where you live. And the best part? Propagating it is surprisingly accessible, even for those of you just starting out on your green-thumb journey.
The Best Time to Start
For the highest success rate with Paraserianthes lophantha, I always recommend starting in the late spring or early summer. This is when the plant is actively growing and full of vigor. You’ll be looking for healthy, semi-hardwood stems – those that are no longer floppy and green but haven’t become completely woody. Think of it as the “just right” stage, not too soft, not too hard.
Supplies You’ll Need
Gathering your supplies beforehand makes the whole process so much smoother. Here’s what I usually have on hand:
- Sharp pruning shears or a clean, sharp knife: For clean cuts, which are crucial.
- Rooting hormone: This isn’t always strictly necessary for Albizias, but it can give your cuttings a significant boost. I prefer a powder or gel.
- Well-draining potting mix: A blend of perlite, vermiculite, and peat moss works wonders. Or, you can buy a good quality seed starting mix.
- Small pots or seed trays: Clean ones, of course! Something around 4-6 inches is usually a good size.
- Plastic bags or a propagator: To create a humid environment for your cuttings.
- Watering can with a fine rose or a spray bottle: For gentle watering.
- Labels: So you don’t forget what you planted where!
Propagation Methods
While you can technically try other methods, my go-to for Paraserianthes lophantha is stem cuttings. It’s straightforward and yields excellent results.
Stem Cuttings:
- Start by selecting healthy, vigorous branches on your mature Albizia. Look for those semi-hardwood stems I mentioned.
- Using your sharp pruning shears or knife, take cuttings about 4-6 inches long. Make your cut just below a leaf node (where a leaf attaches to the stem).
- Remove the lower leaves from your cuttings, leaving just a couple at the top. This helps prevent them from rotting in the soil and encourages root development.
- If you’re using rooting hormone, dip the cut end of each stem into the powder or gel. Gently tap off any excess.
- Now, it’s time to plant! Fill your clean pots or trays with your well-draining potting mix.
- Make a hole in the center of the soil with your finger or a pencil.
- Insert the cut end of your cutting into the hole, ensuring it goes deep enough to stand upright.
- Gently firm the soil around the base of the cutting.
- Water thoroughly but gently, making sure the soil is moist but not waterlogged.
The “Secret Sauce” (Pro Tips)
Here are a couple of tricks I’ve learned over the years that can really make a difference:
- The Greenhouse Effect is Key: After you’ve planted your cuttings, cover them with a clear plastic bag or place them in a propagator. This creates a humid microclimate, which is vital for preventing the cuttings from drying out before they can develop roots. Make sure the leaves aren’t touching the plastic if possible – a few toothpicks can help prop it up.
- Bottom Heat Works Wonders: If you have access to a heat mat, placing your pots on it can significantly speed up root formation. Warm soil encourages the plant to send out roots faster. It’s like giving them a cozy duvet!
- Don’t Skip the Dormancy Check (for some!): While Albizia isn’t overly fussy, if you’re taking cuttings late in the season, be aware that cooler temperatures might slow things down. If your cuttings seem to be stalling, don’t be discouraged. Sometimes a bit of patience is all they need.
Aftercare & Troubleshooting
Once your cuttings have rooted – and you can usually tell by seeing new leaf growth or by gently tugging on the stem and feeling resistance – it’s time for a little more attention.
Aftercare:
- Gradually acclimatize them. Start by opening the plastic bag or propagator for increasing amounts of time each day. This helps them get used to the drier air.
- Keep the soil consistently moist but avoid soggy conditions. It’s better to water less often but deeply.
- Once they are well-established and growing heartily, you can repot them into slightly larger containers with fresh, well-draining potting mix.
Troubleshooting:
The most common issue you might encounter is rot. This usually happens if the soil stays too wet, or if the humidity cover is too tight and condensation builds up excessively without good airflow. If you see your cuttings turning brown and mushy at the base, it’s likely rot. Sadly, these are usually lost causes. Good drainage and proper watering are your best defense against this. Another sign of failure can be simply a lack of growth or brown, dried-out leaves. This often means the cutting dried out too much, or it just didn’t have enough energy to root.
A Little Patience Goes a Long Way
Propagating plants is a journey, and sometimes things don’t work out perfectly the first time. Don’t get discouraged if a few cuttings don’t take. Celebrate the successes, learn from the ones that don’t, and keep enjoying the process. Watching that tiny cutting transform into a new miniature version of your beloved Albizia is such a rewarding experience. Happy propagating, and may your gardens flourish!
Resource: