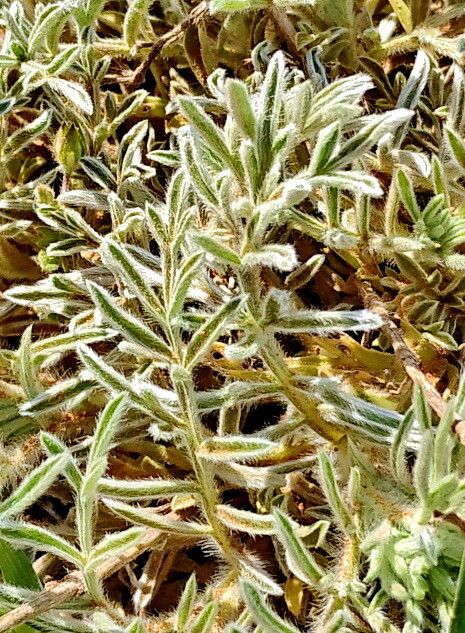
Hey there, fellow plant lovers! Grab a mug of your favorite brew, and let’s chat about a truly delightful garden dweller: Lomelosia argentea. You know, the one with those lovely silver-dusted leaves and delicate, airy blooms that dance in the breeze? They’re like little sparks of understated elegance in any garden bed. Propagating them is such a rewarding endeavor. You get to watch these tiny wonders transform into established beauties, expanding your garden without breaking the bank. Is it a cinch for a total beginner? Honestly, it’s a moderately easy plant to propagate, especially with a few insider tips. You’ll need a touch of patience, but the results are well worth it!
The Best Time to Start
For Lomelosia argentea, I’ve found that early spring, just as new growth is really getting underway, is your golden ticket. You can also have success with late summer cuttings, but they’ll need a bit more attention to establish before winter. The key is to take cuttings from healthy, actively growing stems that haven’t flowered yet. Think of it as capturing that vibrant energy of the plant at its most vigorous.
Supplies You’ll Need
Here’s what I usually have on hand when I’m ready to get propagating:
- Sharp, clean pruning shears or a knife: You want a clean cut to prevent disease.
- Rooting hormone: This is especially helpful for Lomelosia. I prefer a powdered or gel form.
- Well-draining potting mix: A mix of perlite, peat moss, and a little bit of compost works wonders. You can even buy pre-made succulent or seedling mixes.
- Small pots or seed trays: Clean containers are a must.
- Plastic bags or a propagation dome: To create a humid environment.
- Watering can with a fine rose or a spray bottle: For gentle watering.
- Labels: So you don’t forget what you planted!
Propagation Methods
Let’s get our hands dirty with the most reliable ways to multiply your Lomelosia argentea:
1. Stem Cuttings (My Go-To!)
This is usually my favorite approach for Lomelosia.
- Take your cuttings: Using your clean shears, snip off stems that are about 3-4 inches long. Make the cut just below a leaf node (where a leaf attaches to the stem). Gently remove the lower leaves, leaving just a couple at the top.
- Dip in rooting hormone: Lightly dip the cut end of the stem into your rooting hormone. Tap off any excess.
- Plant them: Fill your pots with your well-draining mix. Make a small hole in the center with your finger or a pencil and gently insert the cutting. Firm the soil around it.
- Water gently: Water thoroughly but carefully, making sure not to dislodge your cuttings.
- Create humidity: Cover the pot with a clear plastic bag or a propagation dome. This is crucial! Make sure the leaves aren’t touching the plastic.
2. Division (Best in Spring)
If your established Lomelosia is looking a bit crowded and you want multiples right away, division is a good option.
- Prepare your plant: Water your plant thoroughly a day or two before you plan to divide it. This helps reduce transplant shock.
- Gently remove from pot: Carefully tip the plant out of its container.
- Separate the clumps: You’ll see that the plant naturally forms clumps. Gently tease the root ball apart with your hands or use a clean trowel to help. Aim for divisions that have both roots and at least one or two healthy shoots.
- Pot them up: Replant each division into its own pot, using fresh, well-draining potting mix. Water them in well.
The “Secret Sauce” (Pro Tips)
Here are a few things I’ve learned over the years that can really boost your success:
- Don’t rush the roots: Be patient! For stem cuttings, it can take weeks for roots to develop. Resist the urge to tug on them constantly. A gentle tug will tell you if they’re starting to anchor themselves.
- Bottom heat is your friend: If you’re propagating from cuttings and want to speed things up, placing your pots on a heat mat designed for seedlings can make a world of difference. It encourages root development from below.
- Humidity is key, but air circulation is too: While we want that humid dome for cuttings, once you see some good root development, ventilate occasionally. This helps prevent fungal issues. Just lifting the bag for a few minutes each day is enough to start.
Aftercare & Troubleshooting
Once you see those little roots appearing (you might even see tiny new leaves!), it’s time to adjust their care.
- Gradual acclimatization: Slowly begin to remove the plastic bag or dome over a few days to let the new plants get used to normal humidity.
- Watering: Keep the soil consistently moist but not waterlogged. They’ll tell you when they’re thirsty by looking a little droopy.
- Light: Place them in a bright spot, but avoid direct, harsh sunlight for the first few weeks. A bright windowsill is usually perfect.
- Troubleshooting: The most common issue is rot. If your cuttings look mushy or develop black spots, it’s usually a sign of too much moisture and not enough air circulation. If you catch it early, you might be able to save a healthier part of the cutting by repotting it in dry soil. For divisions, if a section wilts severely and doesn’t perk up, it might not have established its roots well.
Don’t get discouraged if every single cutting doesn’t make it. Gardening is a journey, and plant propagation is a wonderful way to learn and grow alongside your plants. Be patient, observe what your little Lomelosia babies need, and celebrate every success. Happy propagating!
Resource: