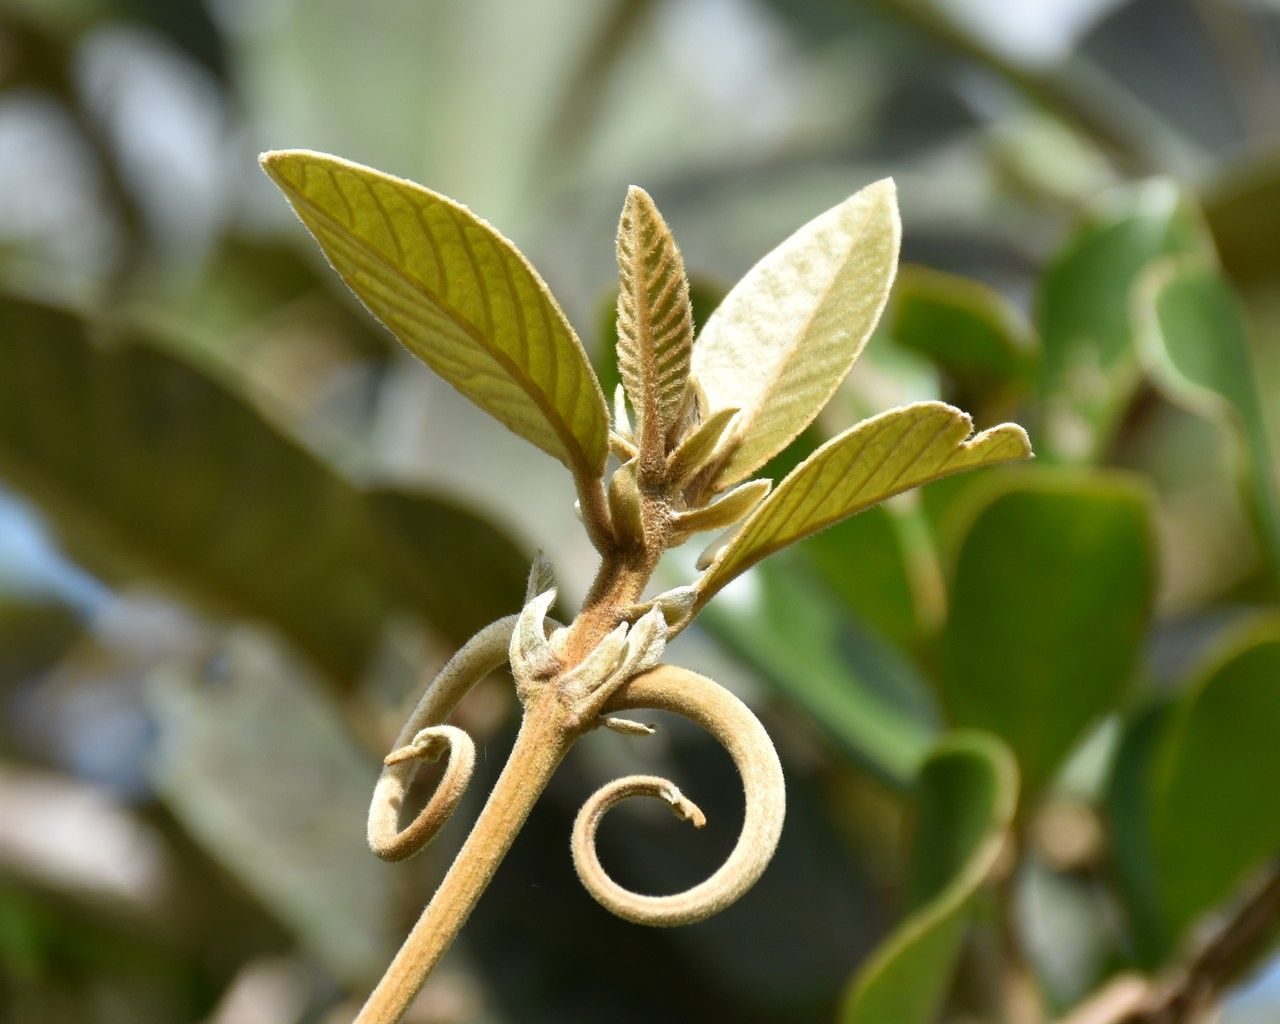
Oh, hello there! Pull up a chair and let’s chat about Hugonia tomentosa. If you’ve ever marveled at its velvety leaves, perhaps its lovely blooms if you’re lucky enough to have a specimen that flowers, then you’re in for a treat. Hugonia tomentosa, often called the “Velvet Leaf” for good reason, is a real charmer. Growing new plants from it is incredibly satisfying, and I’m here to guide you through it. Don’t let the thought of propagation intimidate you; we’ll take it one step at a time.
The Best Time to Start
For Hugonia tomentosa, I’ve found my best success when I propagate in late spring to early summer. This is when the plant is actively growing and has plenty of energy to put into developing new roots. You want to be working with semi-hardwood cuttings – that’s wood that’s new and flexible but has started to firm up a bit. Avoid pieces that are still very soft and green, or those that are already old and woody.
Supplies You’ll Need
Here’s what I always have on hand when I’m getting ready to propagate:
- Sharp pruning shears or a clean, sharp knife: For making clean cuts.
- Rooting hormone: A powder or liquid to give your cuttings a little boost.
- Potting mix: I like a well-draining mix. A good blend is equal parts peat moss or coco coir and perlite. You can also buy specific propagation mixes.
- Small pots or propagation trays: Clean, with drainage holes.
- Clear plastic bag or propagation dome: To maintain humidity.
- Watering can or spray bottle: For gentle watering.
- Labels and a marker: So you don’t forget what you’ve planted!
Propagation Methods
Let’s get our hands dirty! Stem cuttings are generally the most reliable way to go for Hugonia tomentosa.
Stem Cuttings
- Take your cuttings: Using your clean shears, select a healthy stem and make a clean cut just below a leaf node (where a leaf attaches to the stem). You’re looking for pieces that are about 4-6 inches long.
- Prepare the cuttings: Gently remove the lower leaves, leaving just a few at the very top. This is important to prevent leaves from rotting once they’re in the soil.
- Apply rooting hormone: Dip the cut end of each stem into your rooting hormone, tapping off any excess.
- Plant the cuttings: Fill your small pots or trays with your prepared potting mix. Make a small hole with your finger or a pencil and insert the cuttings, pushing them about an inch or two into the soil. Firm the soil gently around them.
- Water gently: Water the soil thoroughly but avoid overwatering. You want it to be moist, not soggy. A good trick is to water from the bottom if your pots have drainage saucers.
- Create humidity: Cover the pots with a clear plastic bag or a propagation dome. Make sure the leaves don’t touch the plastic if possible; just poke a few holes in the bag for air circulation.
Water Propagation (with a caveat!)
While I generally lean towards soil for Hugonia, you can try water propagation for certain plants. However, with Hugonia tomentosa, I find the cuttings are more prone to rot in water if not monitored closely. If you do try it, use a clean glass or jar, fill it with water, and place your prepared cuttings in it. Change the water every few days to keep it fresh. Keep it out of direct sunlight. The key here is very careful observation and quick action if you see any sign of sliminess or decay.
The “Secret Sauce” (Pro Tips)
Here are a couple of things I’ve learned over the years that really make a difference:
- Don’t let the leaves touch the water in the pot (if bottom watering). This sounds simple, but water sitting on leaves for extended periods can encourage fungal issues. After planting, I usually give them a good initial watering and then rely on the humidity from the cover.
- Bottom heat is your friend. If you have an old heating mat you use for seedlings, pop your propagation pots on it. Gently warming the soil from underneath encourages root development much faster. It’s like giving your cuttings a cozy little greenhouse!
- Be patient with the pruning shears. Before you plant them, you can even make a tiny slit up the bottom of the stem that goes into the soil. This bit of damage can sometimes encourage root growth from that area.
Aftercare & Troubleshooting
Once your cuttings have been planted and covered, the waiting game begins. Keep the soil consistently moist but not waterlogged. You should see signs of rooting within 4-8 weeks, sometimes longer. You can gently tug on a cutting to feel for resistance. If it feels firmly rooted, it’s time to acclimate it.
Slowly remove the plastic cover over a few days, opening it up a little more each day to let the humidity decrease. This prevents shock.
The most common problem you might encounter is rot. If you see mushy stems or leaves turning yellow and dropping suddenly, it’s usually a sign of too much moisture and not enough air circulation. If you catch it early, you might be able to save a cutting by trimming away the rotted parts and repotting in fresh, drier soil. It’s also a good sign to check your watering habits.
A Encouraging Closing
Propagating Hugonia tomentosa is a rewarding journey. It might take a little patience, and you might lose a cutting or two along the way – that’s just part of gardening! But there’s nothing quite like seeing those tiny roots emerge and watching a brand new plant unfurl its leaves, knowing you helped bring it to life. So, grab your shears, get your hands in the soil, and enjoy the process. Happy propagating!
Resource:
https://identify.plantnet.org/k-world-flora/species/Hugonia%20tomentosa%20Cav./data