Oh, the joy of sharing! As a gardener who’s spent two decades with my hands in the soil, I’ve learned that one of the most satisfying things you can do is create more life from the plants you already love. Today, we’re diving into the wonderful world of propagating Grevillea parviflora.
Grevillea parviflora: A Little Hug for Your Garden
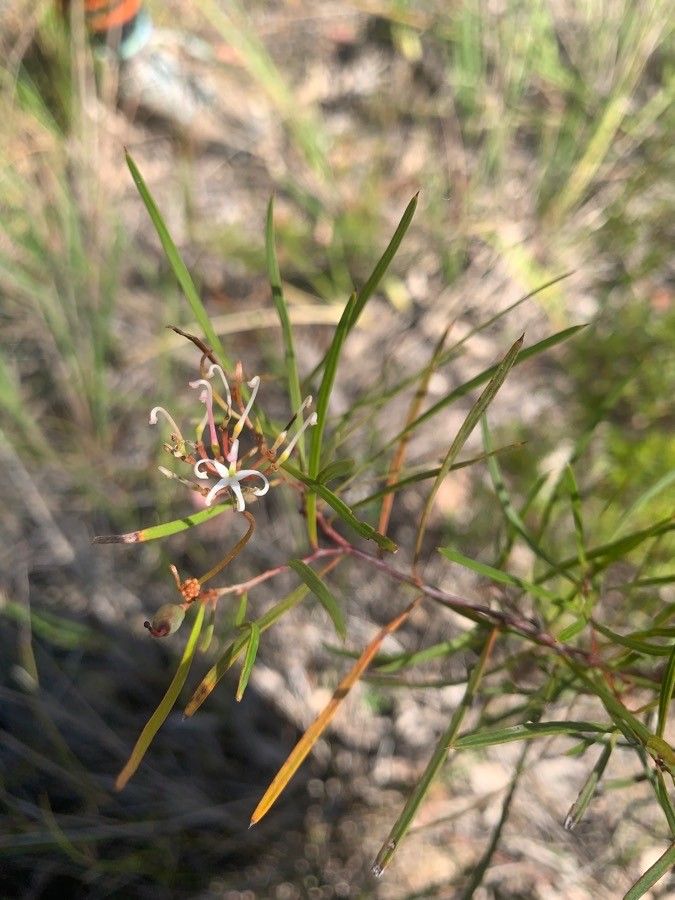
Isn’t Grevillea parviflora just charming? Its delicate, weeping branches and clusters of petite flowers bring such a gentle beauty to any landscape. It’s the kind of plant that makes you pause and smile. And the best part? Sharing that beauty with friends, or simply expanding your own collection, is absolutely achievable. For beginners, I’d say Grevillea parviflora is moderately forgiving. It’s not as tricky as some of its fussier relatives, but it does require a little attention to detail. The reward of watching a tiny cutting transform into a thriving plant is truly immense.
When the Garden is Ready to Share
The absolute sweet spot for propagating Grevillea parviflora is during its active growth period. For most of us, this means late spring through to mid-summer. You want to be collecting cuttings from stems that are semi-hardwood – they bend but don’t snap easily. Avoid taking cuttings from brand new, flimsy growth or from old, woody stems. Think of it as harvesting when the plant is full of energy and eager to grow.
Your Propagation Toolkit
Gathering your supplies beforehand makes the whole process so much smoother. Here’s what you’ll want on hand:
- Sharp Pruning Shears or a Craft Knife: Clean cuts are crucial for successful rooting.
- Rooting Hormone: This is a gentle boost for your cuttings. Gel or powder forms work well.
- Well-Draining Potting Mix: A good starting point is a blend of coarse sand, perlite, and a bit of peat moss or coco coir. Some people like to add a small amount of compost.
- Small Pots or Seedling Trays: Clean pots are a must to prevent disease.
- Plastic Bags or a Propagator: This helps maintain humidity around your cuttings.
- Small Labels and a Marker: To keep track of what you’ve planted and when!
- Watering Can with a Fine Rose: Gentle watering is key.
Bringing New Grevilleas to Life: Stem Cuttings
Stem cuttings are my go-to method for Grevillea parviflora, and I find it incredibly reliable.
- Select Your Cuttings: Head out to your healthy Grevillea parviflora plant. Look for stems that are about 4 to 6 inches long. These should be new growth that has started to firm up. You’re aiming for that semi-hardwood stage.
- Make the Cut: Using your clean secateurs or knife, make a clean cut just below a leaf node. A leaf node is where a leaf attaches to the stem. This is where the magic of rooting hormones and root development often happens.
- Prepare the Cutting: Gently remove the lower leaves from the cutting, leaving just a few at the top. If the top leaves are very large, you can even snip them in half to reduce water loss.
- Dip and Plant: Dip the cut end of your cutting into your rooting hormone. Tap off any excess. Then, carefully insert the cutting into your pre-moistened potting mix. Make sure the nodes are buried, as this is where roots will emerge.
- Create a Humid Environment: Place your pot or tray into a clear plastic bag, or cover it with a propagator lid. This creates a mini greenhouse effect, keeping the humidity high and preventing the cuttings from drying out.
- Find a Suitable Spot: Place your propagation setup in a bright, indirect light location. Avoid direct sun, which can scorch the delicate cuttings.
The “Secret Sauce” from My Garden
Now, let me share a couple of little tricks that have helped me over the years. These aren’t in every book, but they make a difference!
- Think About Air Circulation: While humidity is essential, stagnant air can lead to fungal issues. Every few days, I’ll slightly open the plastic bag or propagator for about 10-15 minutes to allow for some air exchange. It’s a delicate balance.
- Bottom Heat is Your Friend: If you have a heat mat (often used for seed starting), gentle bottom heat can really speed up root development. It mimics the warmth of soil in warmer months. Just a little warmth from below can encourage those roots to form much faster.
Nurturing Your New Sprouts & What to Watch For
Patience is a gardener’s greatest virtue, and it’s especially true here!
- Checking for Roots: After 4 to 8 weeks, you can gently tug on a cutting. If there’s resistance, you’ve likely got roots! You can also carefully inspect the drainage holes for tiny white root tips.
- Gradual Acclimatization: Once roots have formed, gradually introduce them to drier air by slowly opening the plastic bag or propagator over a week or two. This helps them adjust.
- Watering: Water consistently, but avoid waterlogging. The soil should be moist but not soggy. Let the surface dry out slightly between waterings.
- Troubleshooting Rot: The most common sign of failure is rot. If your cutting turns black and mushy, it’s a sign of too much moisture and not enough air. Sadly, you’ll need to discard it and start again, perhaps with slightly drier soil or better air circulation next time. Discolored or wilting leaves before roots appear can also indicate stress.
Go Forth and Grow!
There you have it! Propagating Grevillea parviflora is a journey of observation and gentle care. Don’t be discouraged if your first attempt isn’t perfect. Every cutting you take, every pot you fill, is a step in your gardening adventure. Enjoy the process, and soon you’ll be surrounded by even more of these delightful plants. Happy propagating!
Resource:
https://identify.plantnet.org/k-world-flora/species/Grevillea%20parviflora%20R.Br./data