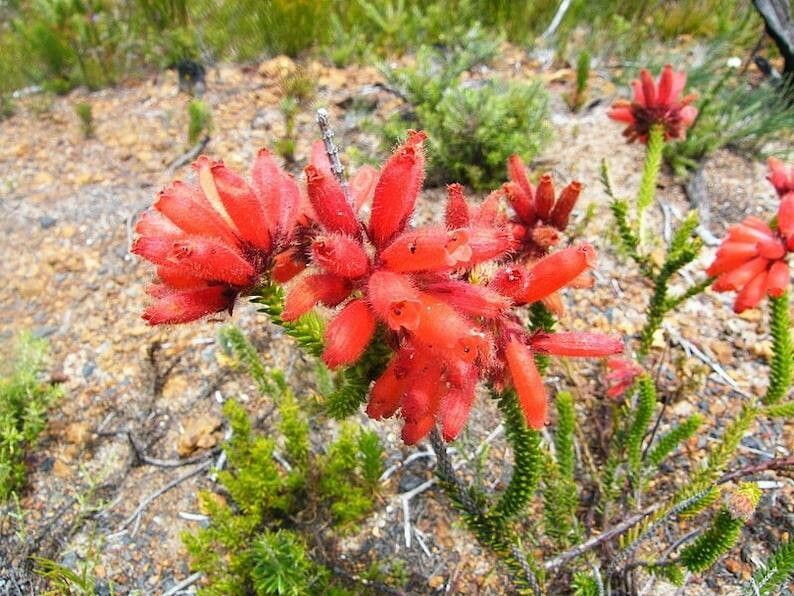
Oh, hello there! So glad you’ve stumbled upon my little corner of the internet. Today, we’re going to talk about a truly special plant: Erica cerinthoides, often called the Mountain Heath or Cape Heath. If you’re captivated by its delicate, bell-shaped flowers and evergreen charm, you’re in for a treat. Getting more of these beauties to grow is a wonderfully rewarding endeavor. Now, I won’t lie to you; Erica cerinthoides can be a tad more particular than, say, a geranium. But don’t let that put you off! With a little know-how and a dash of patience, you can absolutely succeed.
The Best Time to Start
My favorite time to get busy with Erica cerinthoides is in late spring to early summer. This is when the plant is actively growing, and the young, semi-hardwood stems have just enough firmness to root well. Think of it as pinching the best, most vibrant shoots. Avoid taking cuttings when the plant is stressed, like during extreme heat or drought, or when it’s covered in new, floppy growth.
Supplies You’ll Need
Gathering your tools before you start makes a world of difference. Here’s what I always have on hand:
- Sharp, clean pruning shears or a sharp knife: For making clean cuts that heal better.
- Rooting hormone powder or gel: This really gives those cuttings a boost.
- Propagating pots or trays: Small ones are perfect for cuttings. Make sure they have drainage holes!
- A good, sterile potting mix: I prefer a mix that drains exceptionally well. A blend of perlite and peat moss, or a commercial heather/ericaceous compost works beautifully. Avoid heavy garden soil.
- A plastic bag or propagator lid: To create a humid environment.
- Watering can with a fine rose: For gentle watering.
- Labels and a permanent marker: To keep track of what you’ve planted and when.
Propagation Methods
While division is an option for some heathers, stem cuttings are my go-to method for Erica cerinthoides. It’s reliable and allows me to create multiple new plants from one healthy specimen.
Stem Cuttings:
- Select and Cut: Head out to your healthy Erica cerinthoides. Look for current season’s growth that’s firm but not woody – often referred to as semi-hardwood. Take cuttings that are about 4-6 inches long. Make your cut just below a leaf node (where a leaf attaches to the stem).
- Prepare the Cuttings: Gently remove the lower leaves from the cutting, leaving about 2-3 sets of leaves at the top. This prevents them from rotting in the soil. If the leaves are very large, you can even trim them in half horizontally to reduce water loss.
- Dip in Rooting Hormone: Dip the cut end of each cutting into your rooting hormone powder or gel. Tap off any excess. This step is crucial for encouraging root development.
- Potting Up: Fill your clean pots or trays with your well-draining potting mix. Make a small hole in the center of the mix with a pencil or your finger.
- Insert the Cuttings: Carefully insert the prepared cuttings into the holes, ensuring the rooting hormone coating makes good contact with the soil. Gently firm the soil around the base of each cutting.
- Water Gently: Water the pots thoroughly with your fine-rose watering can. The goal is to settle the soil around the cuttings without dislodging them.
- Create Humidity: Now for the cozy bit! Cover the pots with a clear plastic bag (making sure the leaves don’t touch the plastic) or place them inside a propagator with a lid. This creates a humid microclimate that helps prevent the cuttings from drying out before they form roots.
- Placement: Place the pots in a bright spot, but out of direct sunlight. A warm windowsill is often ideal.
The “Secret Sauce” (Pro Tips)
I’ve learned a few tricks over the years that I think really make a difference:
- Bottom Heat is Your Friend: For Erica cerinthoides, a bit of warmth from below can significantly speed up root formation. A heated propagator mat set to a gentle temperature (around 70-75°F) is wonderful. If you don’t have one, placing the pots on top of a warm appliance (like a fridge) can sometimes work, but be careful about over-heating.
- Don’t Let Them Dry Out, But Don’t Drown Them: This is a delicate balance! The soil should remain consistently moist, but never waterlogged. Check the moisture levels by gently pressing the soil. If it feels dry to the touch, give it a light watering.
- Patience is a Virtue (and a Necessity): Erica cerinthoides can take its sweet time to root. I often don’t see signs of success for 6-8 weeks, sometimes even longer. Resist the urge to keep pulling them up to check for roots!
Aftercare & Troubleshooting
Once you start to see new leaf growth at the tips of your cuttings, that’s a great sign that roots have formed! You can gently try to tug on a cutting; if there’s resistance, roots are developing.
Once rooted, gradually acclimatize them to drier air by lifting the lid of the propagator for increasing periods each day over a week or so. Then, you can carefully pot them up into slightly larger pots with their well-draining mix.
The most common issues you’ll encounter are rot (usually caused by overwatering and poor drainage) and drying out (leading to crispy, dead cuttings). If a cutting looks black and mushy at the base, it’s likely rotted. If the leaves are brown and brittle all over, it’s dried out. Don’t be discouraged if you lose a few; it’s all part of the learning process! Just remember to adjust your watering and humidity next time.
A Encouraging Closing
See? It’s not that daunting! Propagating Erica cerinthoides is a process that rewards your keen observation and gentle hand. Embrace the experiment, be patient with your little green charges, and the joy of seeing those tiny roots develop and new plants emerge is truly immense. Happy propagating!
Resource:
https://identify.plantnet.org/k-world-flora/species/Erica%20cerinthoides%20L./data