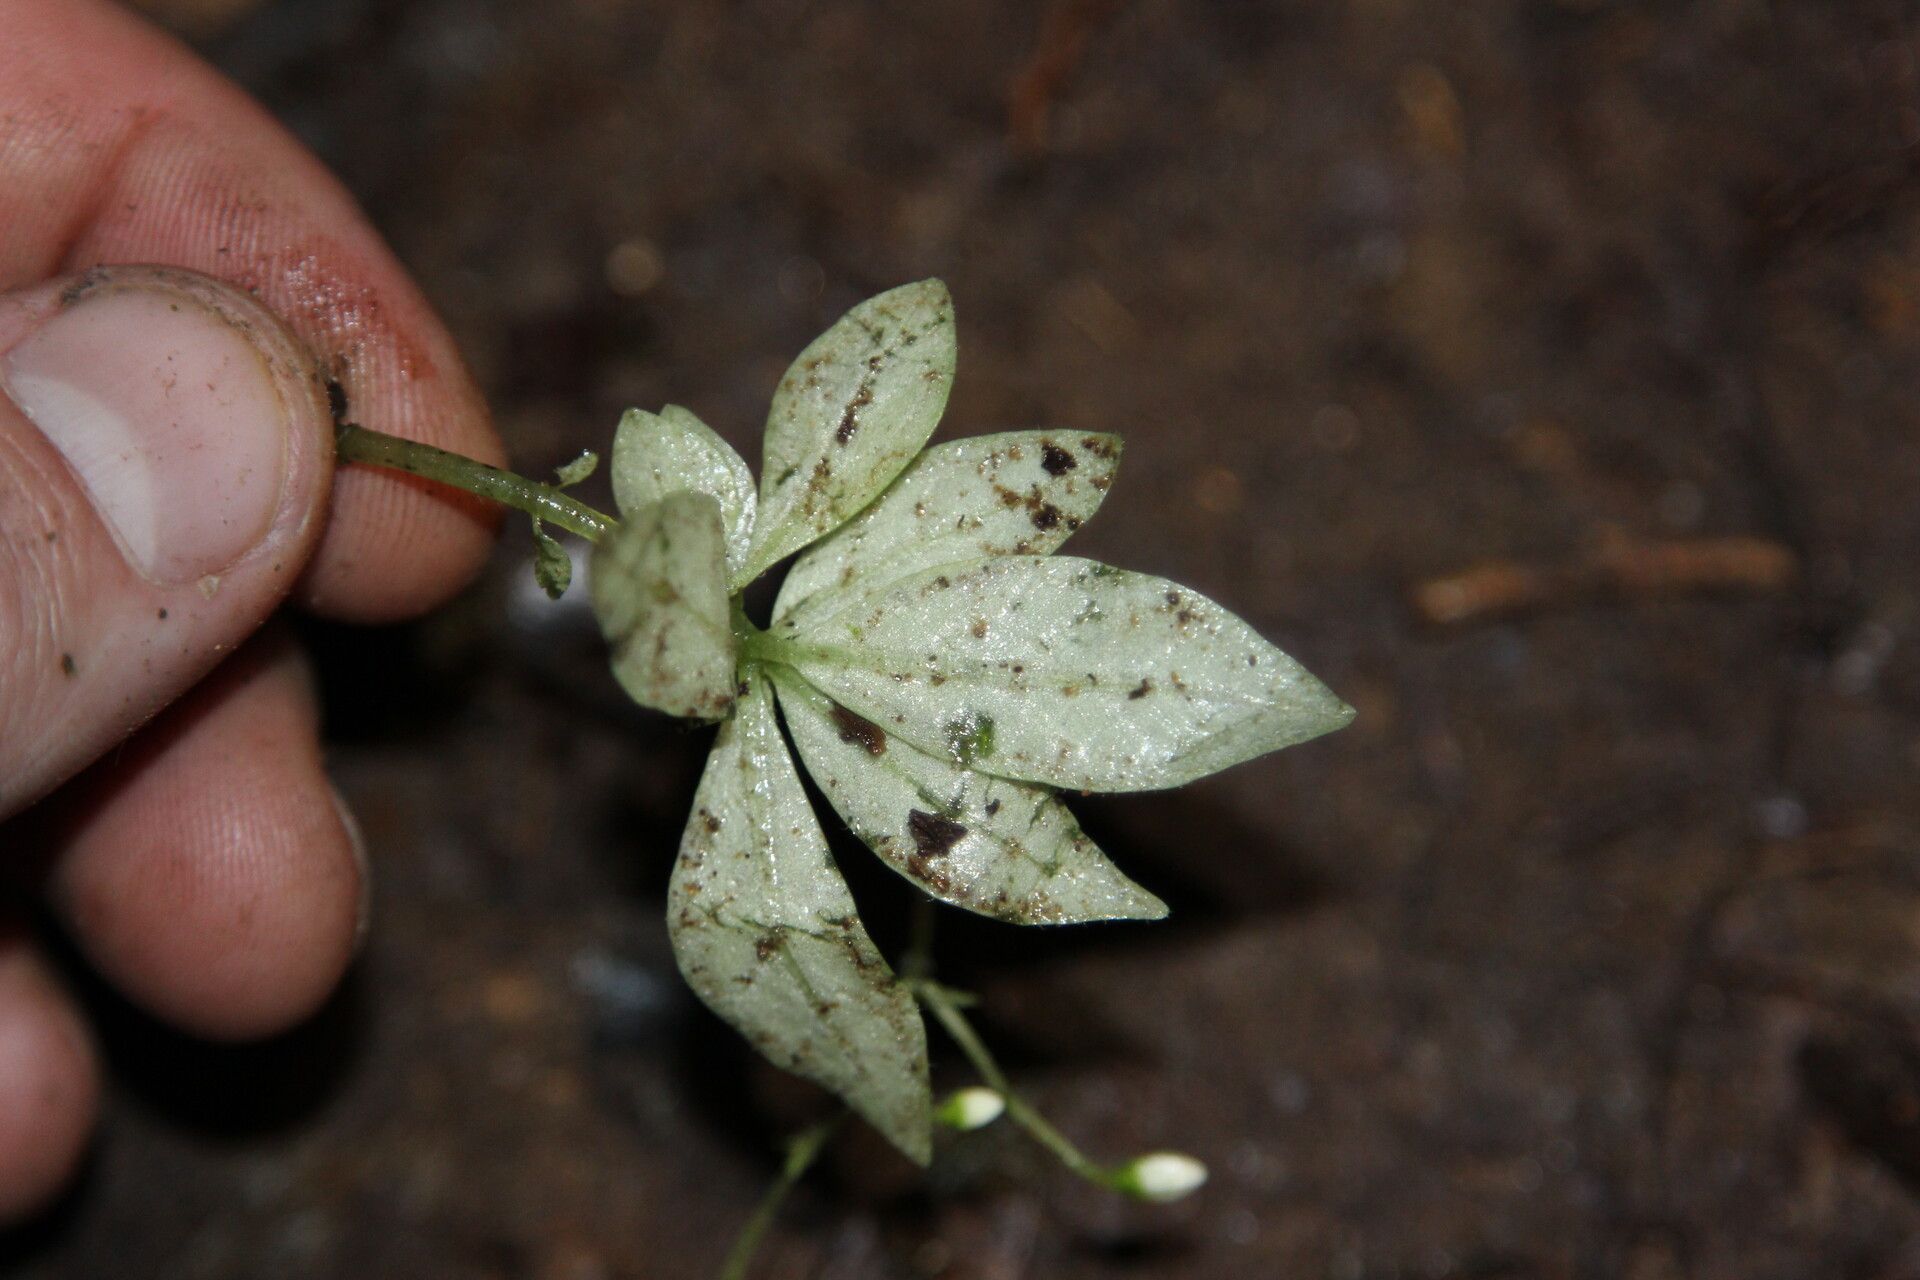
Oh, hello there! I’m so glad you’re here. Today, we’re diving into the wonderful world of Argostemma pumilum. If you’re not familiar with it, imagine tiny, velvety leaves unfurling like miniature works of art. It’s a real charmer, isn’t it? And the best part? You can easily bring more of this beauty into your garden – or your home – by propagating it. While it’s not exactly a walk in the park for absolute beginners, with a little guidance, you’ll be enjoying new plants in no time. It’s a very rewarding endeavor, seeing a tiny piece of your beloved plant transform into a whole new life.
The Best Time to Start
When it comes to coaxing new life from your Argostemma pumilum, spring and early summer are your golden ticket. This is when the plant is actively growing, soaking up that good sunlight and energy. Starting during this period means your cuttings will have plenty of vigor to put into developing roots. Think of it as giving them the best possible start in life!
Supplies You’ll Need
Here’s what you’ll want to have on hand before you begin:
- Sharp, clean pruning shears or a razor blade: For making neat cuts without crushing the stems.
- Potting mix: A well-draining blend is crucial. I like to use a mix of peat moss, perlite, and a bit of worm castings.
- Small pots or trays: Choose something appropriate for the size of your cuttings.
- Rooting hormone (optional but helpful): This can give your cuttings a little boost.
- Watering can or spray bottle: For gently moistening the soil.
- Clear plastic bag or humidity dome: To create a humid environment for your cuttings.
Propagation Methods
Let’s get our hands dirty! I’ve found that stem cuttings are by far the most successful method for Argostemma pumilum.
-
Take Your Cuttings: Look for healthy, non-flowering stems. Using your clean shears, make a cut just below a leaf node (where a leaf attaches to the stem). You want cuttings that are about 2-4 inches long. Remove the lower leaves, leaving just a few at the top.
-
Prepare the Cutting: If you’re using rooting hormone, dip the cut end into it. Gently shake off any excess.
-
Plant the Cutting: Fill your small pots with your well-draining potting mix. Make a small hole in the center with your finger or a pencil, and gently insert the cutting. Firm the soil around the base to ensure good contact.
-
Create a Humid Environment: Water the soil gently. Then, cover the pot with a clear plastic bag, making sure the leaves don’t touch the plastic if possible. You can prop up the bag with a skewer or two. This creates a mini greenhouse.
-
Find a Bright Spot: Place your planted cuttings in a spot that gets bright, indirect light. Avoid direct sunlight, as this can scorch the delicate leaves.
The “Secret Sauce” (Pro Tips)
Now, for a couple of little tricks from my gardening journal:
- Bottom Heat is Your Friend: If you have a seedling mat or can place your pots on a warm surface (like near a gently heated appliance, but not touching), this can dramatically speed up root development. Warm soil encourages those roots to stretch and grow.
- Don’t Overwater! The most common mistake I see is overwatering. The soil should be kept consistently moist, but never soggy. Imagine a wrung-out sponge – that’s the ideal moisture level. Soggy soil is a fast track to rot.
Aftercare & Troubleshooting
Once you see new growth peeking out, that’s a good sign your cutting is rooting! However, don’t rush to remove the plastic bag just yet. Gradually acclimate your new plant to the lower humidity over a week or two by opening the bag a little each day. Continue to keep the soil moist but not wet.
The biggest troubleshooting issue you’ll encounter is rot. If your cutting looks black and mushy, it’s likely rotted. This is usually a sign of too much moisture or poor drainage. Don’t despair! Just start again with fresh cuttings and ensure your soil is super well-draining. You might also notice wilting; this can be from too much light or not enough moisture in the air. Keep an eye on your plants and adjust rather than panicking.
A Encouraging Closing
Propagating Argostemma pumilum is a journey, and like all good journeys, it requires a bit of patience. Don’t be discouraged if your first few attempts don’t take. Each time, you’ll learn something new. Enjoy the process of nurturing these tiny beings, and soon you’ll have a delightful collection to share – or keep all to yourself! Happy gardening!
Resource:
https://identify.plantnet.org/k-world-flora/species/Argostemma%20pumilum%20Benn./data