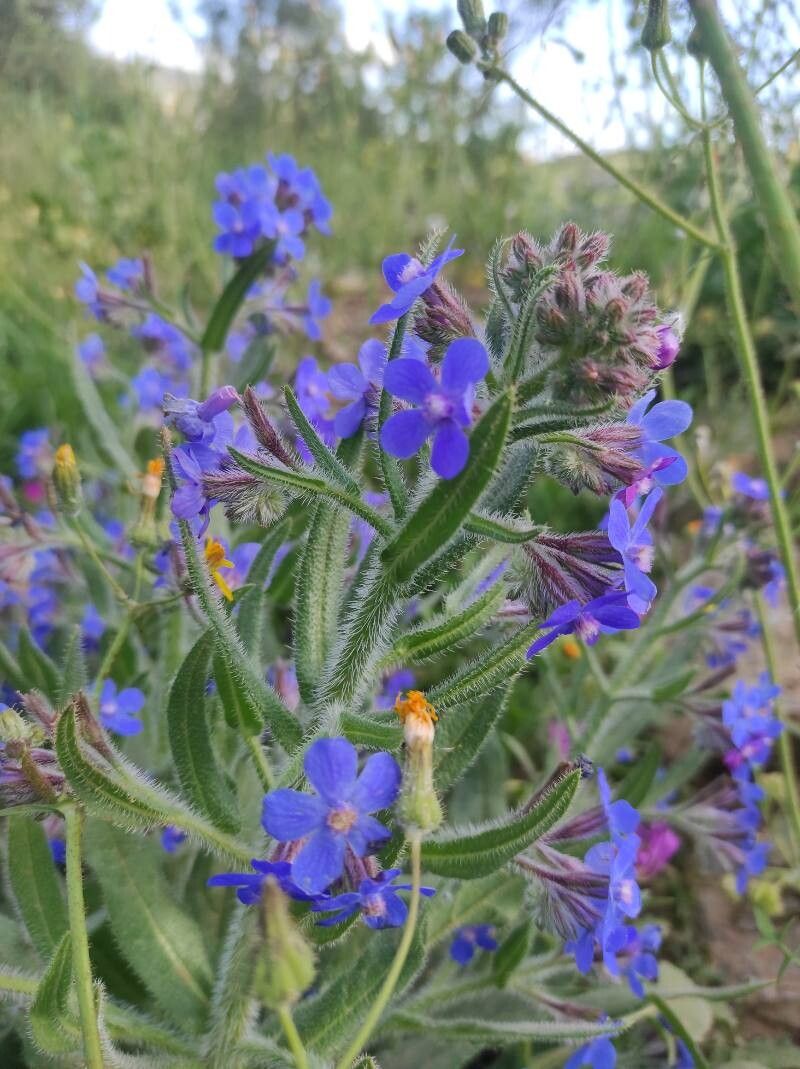
Hello fellow garden lovers! My name is Alex, and for the past two decades, I’ve had my hands in the soil, coaxing life from seeds and cuttings. Today, I want to talk about a plant that’s stolen a piece of my heart: Anchusa strigosa, sometimes called Desert Bugloss.
Those vibrant, sapphire-blue flowers? They’re absolutely stunning, aren’t they? Anchusa strigosa brings such a jewel-toned splash to the garden, and the best part is, you can easily multiply its beauty. Propagating this little charmer is a wonderfully rewarding experience, and I find it to be quite straightforward, even for those just starting out in the world of plant propagation. It’s a fantastic way to fill your garden beds or share these gorgeous blooms with friends.
The Best Time to Start
For Anchusa strigosa, late spring to early summer is your golden window. This is when the plant is actively growing and has plenty of fresh, vigorous material to work with. Think of it as the plant being full of energy and ready to branch out. You’ll see new shoots forming, and those are perfect candidates for taking cuttings.
Supplies You’ll Need
Gathering your tools beforehand makes the entire process smoother. Here’s what I like to have on hand:
- Sharp, clean pruning shears or a sharp knife: For making clean cuts. Sterilize them with rubbing alcohol between uses!
- Rooting hormone (optional but recommended): Especially for stem cuttings, this gives them a helpful boost.
- Small pots or seed trays: Clean ones are crucial to prevent disease.
- Well-draining potting mix: A mix of perlite, peat moss, and a little bit of sand works wonderfully. You can also find commercial propagation mixes.
- A spray bottle: For keeping cuttings moist without waterlogging them.
- A clear plastic bag or propagation dome: To create a humid environment.
- Labels: Don’t forget to label your cuttings! Trust me, you’ll forget which is which.
Propagation Methods
Anchusa strigosa can be propagated through a couple of reliable methods. I find stem cuttings to be the most effective and straightforward.
Stem Cuttings
This is my go-to method for multiplying Anchusa strigosa.
- Select your cuttings: Look for healthy, non-flowering stems that are about 3-4 inches long. Pinch or cut them just below a leaf node (where a leaf attaches to the stem). This is where the plant is primed for root development.
- Prepare the cuttings: Gently remove the lower leaves, leaving just a couple of pairs at the top. This prevents them from rotting in the soil.
- Apply rooting hormone (if using): Dip the cut end of each stem into rooting hormone, tapping off any excess.
- Plant the cuttings: Make small holes in your prepared potting mix with a pencil or your finger. Insert the cuttings, ensuring the leaf nodes are covered by the soil. Gently firm the soil around them.
- Water and cover: Water the soil gently until it’s evenly moist. Then, cover the pots with a clear plastic bag or a propagation dome to maintain high humidity. This is critical!
- Placement: Place the pots in a bright spot but out of direct sunlight. Too much sun will scorch them.
The “Secret Sauce” (Pro Tips)
Here are a few little tricks I’ve picked up over the years that make a big difference:
- The “Heel” Trick: Sometimes, when taking cuttings, you can leave a small sliver of the older stem attached to the new shoot you’re taking. This bit of older tissue can sometimes speed up rooting. It’s not always possible, but if you see an opportunity, go for it!
- Bottom Heat is Your Friend: If you have the ability, using a seedling heat mat under your propagation pots can significantly speed up root formation. It mimics the warmth of spring soil and really encourages those roots to get going. Don’t make it too hot, though – just a gentle warmth is perfect.
- Don’t Overwater, But Don’t Dlly Either: This is a delicate balance. You want the soil to stay consistently moist, like a wrung-out sponge, but never waterlogged. Regularly check the moisture level by gently poking a finger into the soil.
Aftercare & Troubleshooting
Once your cuttings have happily rooted – you can usually tell by a gentle tug resistance or by seeing new growth – it’s time to transition them to a slightly more independent life.
- Acclimatization: Gradually remove the plastic bag or dome over a few days to allow the new plants to adjust to normal humidity levels.
- Regular Watering: Water as needed, allowing the top inch of soil to dry out slightly between waterings.
- Fertilizing: Once you see good growth, you can start feeding them with a diluted liquid fertilizer every few weeks.
Troubleshooting: The most common issue you might encounter is rot. This usually stems from overwatering or poor air circulation. If you see a cutting is wilting, turning brown and mushy, it’s likely succumbed to rot. Unfortunately, there’s not much you can do once it starts, so proper drainage and avoiding soggy soil are key prevention steps. Occasionally, a cutting might just fail to root, and that’s okay too! Plant propagation is often a game of patience and a bit of trial and error.
A Encouraging Closing
So, there you have it! Propagating Anchusa strigosa is a delightfully accessible way to bring more of that gorgeous blue into your garden. Be patient with your new little plants, give them the right conditions, and enjoy the process of nurturing them from a simple cutting into a blooming beauty. Happy gardening!
Resource:
https://identify.plantnet.org/k-world-flora/species/Anchusa%20strigosa%20Banks%20&%20Sol./data