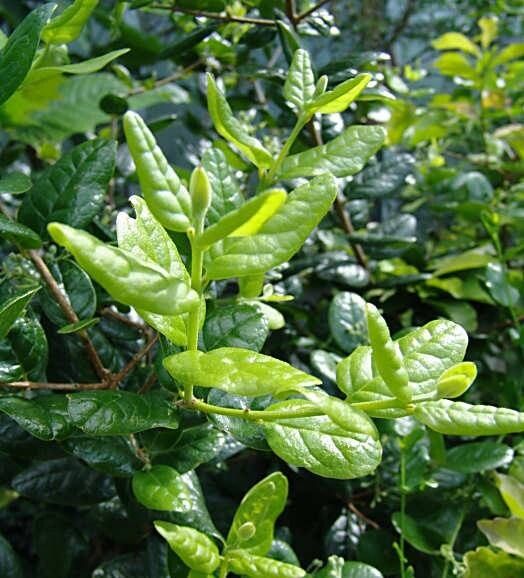
Oh, Peumus boldus, isn’t it a treat? Everyone loves that signature minty-camphor scent that wafts from its leaves, especially on a warm day. Plus, it makes such a handsome addition to the garden, with its glossy, evergreen foliage. And the best part? Growing more of them from your existing plant is deeply satisfying. If you’re a beginner looking to dip your toes into propagation, I’d say Peumus boldus is moderately challenging. It’s not quite as foolproof as a pothos, but with a little patience and care, you’ll be rewarded with success.
The Best Time to Start
For stem cuttings, the sweet spot is usually late spring to early summer. This is when the plant is actively growing, and the stems have a bit of maturity to them – not brand new, flimsy growth, but not woody either. Think of it as that perfect “semi-hardwood” stage. If you’re thinking about division, fall is your friend. It gives the divisions a chance to establish their roots before winter sets in.
Supplies You’ll Need
Here’s what I like to have on hand:
- Sharp pruning shears or a clean, sharp knife: Essential for making clean cuts.
- Rooting hormone (powder or gel): This is a big help, especially for Peumus boldus.
- Well-draining potting mix: A blend of peat moss or coco coir, perlite, and a bit of compost works beautifully. You want it light and airy.
- Small pots or seed trays: Clean ones, of course!
- Plastic bags or humidity domes: To keep the humidity high around your cuttings.
- Watering can or spray bottle: For gentle watering.
- Labels and a marker: You’ll thank me later when you have multiple projects going!
Propagation Methods
The most reliable way to multiply your boldo is through stem cuttings. Here’s how I do it:
- Take your cuttings: On a nice, mild day, select healthy, non-flowering stems from your mature plant. You want cuttings that are about 4-6 inches long. Make a clean cut just below a leaf node (where a leaf attaches to the stem).
- Prepare the cuttings: Gently remove the lower leaves from the bottom half of each cutting. This prevents them from rotting in the soil and gives you space to insert them.
- Apply rooting hormone: Dip the cut end of each stem generously into your rooting hormone. Tap off any excess.
- Pot them up: Fill your clean pots with the well-draining potting mix. Make a hole in the center with your finger or a pencil.
- Insert the cuttings: Carefully push the hormone-coated end of the cutting into the hole, ensuring at least one or two leaf nodes are buried below the soil surface. Gently firm the soil around the stem.
- Water gently: Water the soil thoroughly but avoid waterlogging.
- Create humidity: Cover the pots with a clear plastic bag or a humidity dome. Make sure the leaves aren’t touching the plastic if possible. You can prop the bag up with a few skewers if needed.
- Provide warmth and light: Place the pots in a bright spot, but out of direct, harsh sunlight. A heat mat can make a significant difference, especially if your home is cool.
If you have a particularly large, established clump, division is another avenue. In the fall, carefully dig up the entire plant and gently tease apart the root ball into smaller sections. Make sure each section has plenty of roots and at least one healthy shoot. Replant them immediately into well-draining soil and water them in.
The “Secret Sauce” (Pro Tips)
- Freshness is key: Get your cuttings into the rooting hormone and soil as quickly as possible after taking them. Don’t let them sit around wilting.
- Bottom heat works wonders: A gentle heat mat placed under your pots encourages faster root development. It mimics the warmth of spring soil and really gives your cuttings a boost.
- Don’t be afraid to experiment with timing: While late spring/early summer is ideal, I’ve had success with slightly later cuttings if the weather stays warm. Just be extra diligent with keeping them hydrated.
Aftercare & Troubleshooting
Once you see signs of new growth – tiny leaves unfurling or a gentle tug on the stem meeting resistance – that’s your cue that roots have formed! Remove the plastic cover gradually over a few days to acclimate the new plant to normal humidity. Continue to water them when the top inch of soil feels dry.
The most common problem you’ll encounter is rot. This usually happens because the soil is too wet, or there isn’t enough air circulation. If you see your cutting turn black and mushy at the soil line, it’s usually a goner. Pull it out immediately to prevent the rot from spreading. Sometimes, even perfectly healthy cuttings just don’t root. Don’t take it personally! It’s part of the learning curve.
A Encouraging Closing
Growing new plants from your favorites is one of the most rewarding aspects of gardening. It’s a slow dance, this propagation process. Be patient, watch closely, and enjoy the journey. Each success, no matter how small, is a victory worth celebrating. Happy propagating!
Resource:
https://identify.plantnet.org/k-world-flora/species/Peumus%20boldus%20Molina/data