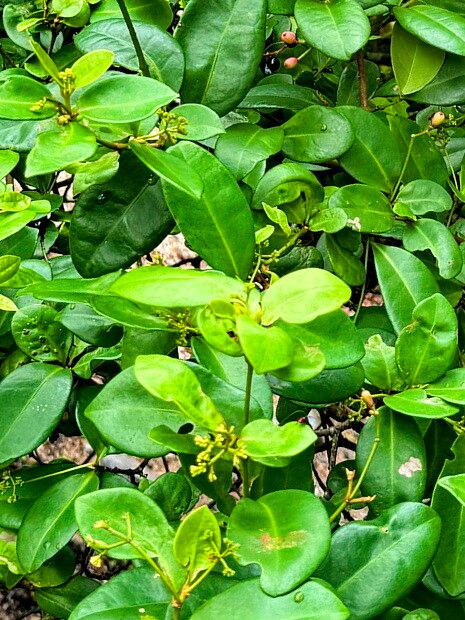
Hello there, fellow plant lovers! I’m so excited to chat with you today about a truly delightful plant: Guapira opposita. You might know it by its more common name, Coral Berry or sometimes even Brazilian Holly, though don’t let that last one fool you, it’s not a holly at all! I’ve been growing these beauties for two decades now, and every time I see their delicate sprays of tiny white flowers followed by those absolutely charming coral-red berries, my heart does a little flip. It’s a wonderful shrub for adding some subtle, yet striking, color and texture to the garden, and guess what? Propagating them is incredibly rewarding. For those of you just starting out, I’d say Guapira opposita is a moderately easy plant to propagate, making it a great choice for building your confidence.
The Best Time to Start
Timing is everything in the garden, isn’t it? For Guapira opposita, the absolute sweet spot for propagation is late spring to early summer. This is when the plant is actively growing and has plenty of energy to put into developing new roots. You’re looking for new, tender growth – often called “softwood cuttings.” Avoid taking cuttings from old, woody stems; they’re much more stubborn and take longer to root.
Supplies You’ll Need
Let’s get our toolkit ready! Here’s what I always have on hand:
- Sharp, clean pruning shears or a craft knife: A clean cut is crucial to prevent disease.
- Rooting hormone: Powder or gel works wonderfully. It’s not strictly necessary for Guapira, but it certainly gives your cuttings a helpful boost.
- Well-draining potting mix: I like to use a blend of peat moss, perlite, and a bit of coarse sand. You can also find excellent pre-made succulent or cactus mixes that work well.
- Small pots or trays: Clean ones, of course! I usually go for 4-inch pots.
- Clear plastic bags or a propagation dome: This helps create a humid environment, which is a lifesaver for cuttings.
- Water mister: For keeping things nice and moist.
- Labels: So you don’t forget what you’ve planted!
Propagation Methods: Let’s Get Cutting!
The primary way I successfully propagate Guapira opposita is through stem cuttings. It’s straightforward and gives great results.
- Take Your Cuttings: With your sharp shears, select healthy, non-flowering shoots that are about 4-6 inches long. Make a clean cut just below a leaf node (where a leaf attaches to the stem). These nodes are where the magic happens, as they contain specialized cells that can develop into roots.
- Prepare the Cuttings: Gently remove the lower leaves from your cuttings, leaving just the top 2-3 leaves. This prevents leaves from rotting when they’re buried or in water. If your leaves are quite large, you can even nip them in half to reduce water loss through transpiration.
- Apply Rooting Hormone: Dip the cut end of each cutting into your rooting hormone, tapping off any excess.
- Plant Your Cuttings: Fill your pots with your prepared potting mix. Make a small hole in the center with your finger or a pencil. Gently insert the cut end of the dipped cutting into the hole, ensuring the leaf nodes that were below the soil line are a little bit covered. Firm the soil around the stem to ensure good contact.
- Water Gently: Water your newly planted cuttings thoroughly but gently. You want the soil to be moist but not waterlogged.
The “Secret Sauce” (Pro Tips!)
Now for a couple of tricks I’ve picked up over the years:
- Bottom Heat is Your Friend: While not absolutely essential, placing your pots on a heated propagation mat can make a significant difference. It encourages root development from the bottom up, speeding up the process considerably. You can find affordable ones online.
- Location, Location, Location: Once you have your cuttings planted and potted, place them in a bright spot that gets indirect sunlight. Avoid direct sun, which can scorch those tender baby leaves. A windowsill that gets morning sun but is shaded in the afternoon is perfect.
- Don’t Over-Mist: It’s tempting to keep those cuttings looking lush, but too much moisture can be your enemy. A light misting once a day, or whenever the surface of the soil starts to look a little dry, is usually plenty. The plastic bag or dome will hold in humidity, so you don’t need to go crazy with the mister.
Aftercare & Troubleshooting
You’ll know your cuttings are taking root when you see new leaf growth appearing or feel a gentle resistance when you lightly tug on the stem. This usually takes anywhere from 4-8 weeks. Once they have a decent root system, you can gradually remove the plastic bag or dome, letting them acclimate to normal humidity levels over a few days. Continue to water them as needed, keeping the soil consistently moist but not soggy.
The most common issue you might encounter is rot. This typically happens if the cuttings are kept too wet or if the air circulation is poor. If you see your cutting turning mushy and brown, it’s likely succumbed to rot. Don’t despair! Just pull it out, discard it, and try again, perhaps with a bit more attention to drainage and air flow.
Happy Rooting!
Propagating plants is such a wonderful way to connect with nature and expand your garden without spending a fortune. Guapira opposita is a joy to work with, and seeing those little cuttings transform into established plants is incredibly satisfying. Be patient with yourself and the process. Sometimes they root quickly, other times they take their sweet time. Just enjoy the journey of nurturing new life! Happy gardening!
Resource:
https://identify.plantnet.org/k-world-flora/species/Guapira%20opposita%20(Vell.)%20Reitz/data