Hello, fellow plant lovers! It’s so lovely to have you join me today. We’re going to delve into the wonderful world of propagating Encephalartos ferox, also known as the East Coast cycad, and let me tell you, it’s a journey well worth embarking on.
Why Grow Encephalartos ferox?
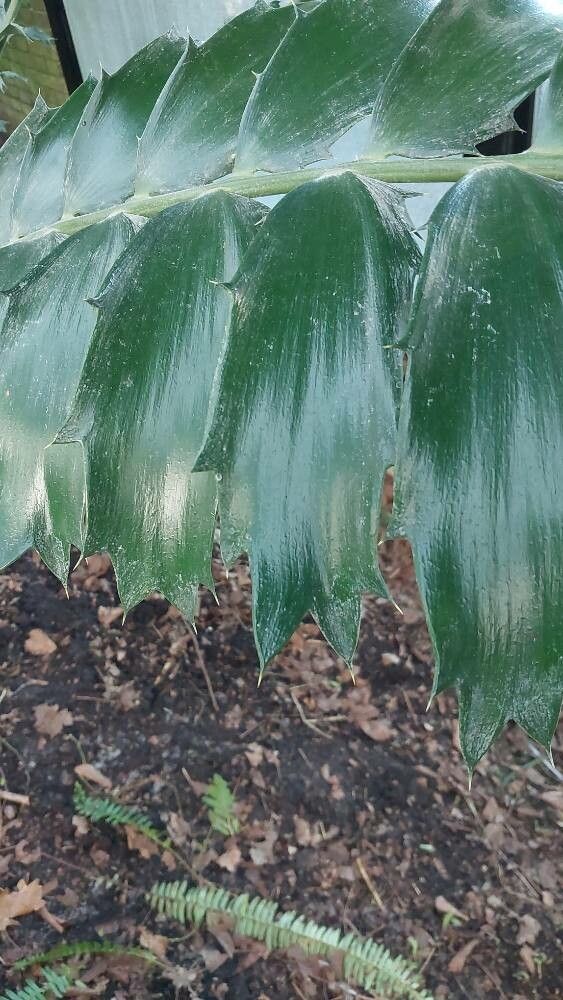
There’s something truly ancient and magnificent about Encephalartos ferox. Its striking, serrated fronds have a prehistoric charm that can transform any garden into a display of natural wonder. Seeing a new plant sprout from a piece of an established beauty is incredibly satisfying. It’s a way to preserve a gorgeous specimen and share its magic with others. Now, for beginners, I’d say propagating cycads like this is a bit of a project, requiring some attention to detail and patience, but it’s far from impossible!
When’s the Best Time to Get Started?
The absolute best time to embark on this propagation adventure is during the active growing season, which for Encephalartos ferox is typically late spring through summer. You want the plant to be full of vigor and ready to put energy into new growth. This is when it’s most likely to successfully establish roots.
What You’ll Need in Your Toolkit
Gathering your supplies beforehand makes the whole process smoother. Here’s what I always have on hand:
- Sterilized sharp pruning shears or a clean, sharp knife: Crucial for making clean cuts to prevent disease.
- Rooting hormone (powder or gel): This is your best friend for encouraging root development. Choose one formulated for woody plants.
- Well-draining potting mix: A blend of coarse sand, perlite, and a good quality potting soil is ideal. You want to avoid anything that holds too much moisture.
- Small pots or propagation trays: Clean and ideally sterile, these will house your new plant babies.
- A clean spray bottle: For misting.
- Gloves: To protect your hands.
- Optional: Bottom heat mat: This can really speed things up in cooler climates.
Bringing Your Encephalartos ferox to Life: The Methods
For Encephalartos ferox, the most reliable method of propagation is through offsets, often called “pups.” These are baby plants that naturally grow from the base of the mother plant.
Propagating Offsets
- Identify the offsets: Look for small, independent plants emerging from the soil around the base of your mature Encephalartos ferox. They will have their own distinct stems and developing fronds.
- Carefully unearth the offset: Gently dig away the soil around the base of the offset until you can clearly see where it’s attached to the mother plant.
- Make the cut: Using your sterilized pruning shears or knife, make a clean cut to separate the offset from the parent. It’s best to leave a small portion of the mother plant’s stem attached to the offset if possible, though sometimes they detach cleanly.
- Allow it to callous: This is a vital step! After separating, let the cut end of the offset dry out and form a dry scar for a few days to a week. Place it in a dry, airy location out of direct sunlight. This prevents rot when you plant it.
- Apply rooting hormone: Once calloused, dip the cut end into your rooting hormone, tapping off any excess.
- Plant your new cycad: Fill your small pot with your well-draining potting mix. Make a small hole in the center and gently place the calloused end of the offset into it. Firm the soil gently around the base.
- Initial watering: Water lightly just to settle the soil.
Important Note: Encephalartos ferox doesn’t typically propagate well from stem cuttings or leaves in the way some other plants do. Offsets are your best bet.
The “Secret Sauce” – My Insider Tips
Over the years, I’ve learned a few tricks that can really boost your success rates.
- Think drainage, then think again: I cannot stress enough how critical excellent drainage is. Even a tiny bit of standing water around the base can spell disaster. Make sure your pots have drainage holes, and don’t be afraid to add extra perlite or gravel to your soil mix if you’re in a particularly damp environment.
- The magic of bottom heat: If you’re propagating during a cooler spell or live somewhere with less intense summer heat, a bottom heat mat can make a world of difference. It encourages root formation by keeping the soil at an optimal temperature, mimicking the warmth of summer soil. Place your potted offset on top of the mat.
- Patience is truly a virtue: Cycads are slow growers by nature. Don’t expect to see dramatic growth overnight. When you first plant your offset, your focus should be on root development, which you won’t see directly. Give it at least 6-8 weeks before you even start to worry about new fronds appearing.
Aftercare and What to Watch For
Once your offset is planted, treat it gently.
- Watering: Water sparingly at first. Allow the soil to dry out almost completely between waterings. You’ll learn to judge this by the weight of the pot or by feeling the soil a few inches down.
- Light: Place your new cycad in a spot with bright, indirect light. Avoid intense, direct sun, which can scorch its young fronds. As it grows stronger, you can gradually introduce it to more sun.
- Troubleshooting – The Dreaded Rot: The biggest enemy of a newly planted offset is rot. If you notice the base of the stem becoming mushy, black, or smelling foul, rot has likely set in. This is usually due to overwatering or insufficient drainage. Sadly, once rot takes hold, it’s very difficult to save the plant. Prevention is key here!
Keep Growing!
Propagating Encephalartos ferox is a wonderful way to connect with these ancient beauties. It might take a little time and care, but the reward of nurturing a new life from an established plant is incredibly fulfilling. Be patient with your new cycad, observe its subtle changes, and most importantly, enjoy the process. Happy gardening!
Resource:
https://identify.plantnet.org/k-world-flora/species/Encephalartos%20ferox%20G.Bertol./data