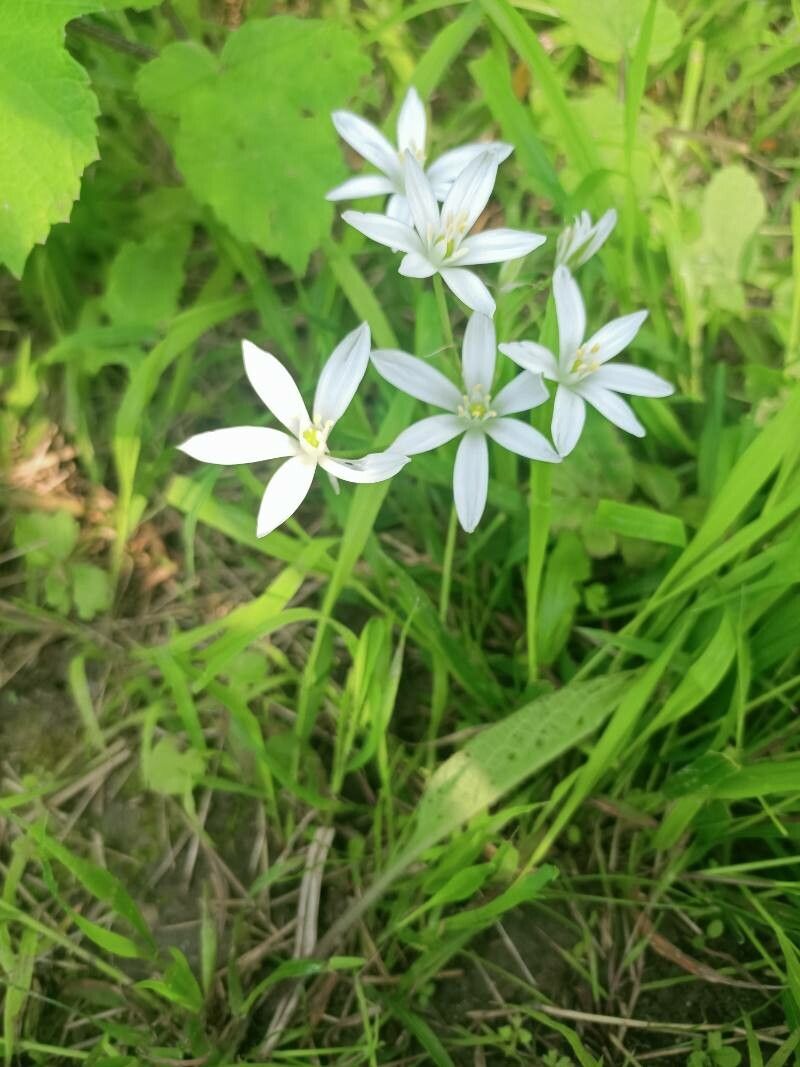
Hello fellow plant lovers! I’m so excited to chat with you today about one of my favorite little bulbs: Ornithogalum gussonei. You might know them as “Star of Bethlehem” or “Dames’ Tears,” and they truly live up to their poetic names. Those delicate, star-shaped white blooms are just breathtaking, and their simple elegance can brighten any corner of your garden or home.
Propagating Ornithogalum gussonei is a fantastic way to expand your collection of these beauties without breaking the bank. And the best part? I find them to be quite forgiving, even for those of you just dipping your toes into the world of propagation. It’s a deeply satisfying process, watching a tiny bulb or a simple bulb offset grow into a full-fledged plant.
The Best Time to Start
When it comes to Ornithogalum gussonei, late summer to early autumn is your golden window. This is when the bulbs have finished their active growth cycle, stored up energy, and are ready to settle in for a rest before putting on their show next spring. Starting them around this time gives them a good head start on developing a strong root system before the cooler weather truly sets in.
Supplies You’ll Need
Here’s a simple list of what you’ll want to have on hand:
- Well-draining potting mix: A mix formulated for succulents or cacti, or a general potting mix amended with perlite or coarse sand, works wonderfully.
- Small pots or trays: Choose containers with drainage holes. Terracotta pots are great for bulbs as they allow for good air circulation.
- Sharp, clean pruning shears or a small trowel: For gently separating bulbs or preparing offsets.
- A watering can with a fine rose: To water gently without disturbing the soil or bulb.
- Optional: A bit of compost: For a gentle nutrient boost once established.
Propagation Methods
For Ornithogalum gussonei, the easiest and most successful method is division of bulbs. This plant produces offset bulbs, and these are your ticket to new plants!
Step-by-Step Division:
- Gently Excavate: When the foliage of your established Ornithogalum gussonei has completely died back (signaling dormancy), it’s time to dig. Carefully dig around the main bulb with your trowel, lifting the entire clump. Be gentle! You don’t want to damage the bulbs.
- Locate the Offsets: You’ll likely see small bulbs, called offsets, attached to the base of the main bulb. They look like tiny bulbs clinging to the mother.
- Careful Separation: Gently tease the offsets away from the main bulb. If they are stubbornly attached, you can use your clean pruning shears to make a clean cut. Aim for offsets that are at least half the size of a pea.
- Prepare for Planting: Inspect the offsets. If there’s any sign of damage or softness, discard them. Otherwise, you’re ready to plant.
- Pot Up: Fill your small pots with your well-draining mix. Plant each offset about 1-2 inches deep, tip pointing upwards if you can discern it. Don’t overcrowd the pots; give each offset a little space.
- Initial Watering: Water gently, just enough to moisten the soil. Let excess water drain away.
The “Secret Sauce” (Pro Tips)
Here are a few little tricks I’ve learned over the years that can make a big difference:
- Don’t Rush the Foliage: Resist the urge to dig up the bulbs as soon as the flowers fade. Wait until the foliage has turned completely yellow and withered. This is crucial for the bulb to re-energize. If you dig too early, you can weaken the bulb and its ability to produce offsets.
- Little and Often with Water: Once planted, these new offsets don’t need much water. Keep the soil barely moist, not soggy. Overwatering at this stage is a surefire way to invite rot. Think of it like giving them a sip, not a flood.
- Patience with the First Year: Don’t expect a huge bloom from your newly propagated bulbs in their first year. They might produce foliage, and that’s a victory! The goal is for them to establish a robust root system. The big blooms will come in subsequent seasons.
Aftercare & Troubleshooting
Once your offsets are planted, find them a bright spot, but avoid intense, direct sun, especially for the first few weeks. Keep the soil lightly moist as they begin to establish. You should see new green shoots emerge within a few weeks to a couple of months, depending on when you planted them.
The most common issue you might encounter is rot. This is almost always due to overwatering or soil that doesn’t drain well. If you notice your offset becoming mushy or turning brown and slimy, it’s likely too late, unfortunately. Prevention is key – ensure that fantastic drainage!
A Encouraging Closing
Watching new life spring from a tiny bulb is one of gardening’s greatest joys. Be patient with your Ornithogalum gussonei offsets. They are wonderful plants, and with a little care and these simple techniques, you’ll soon be enjoying their starry magic year after year. Happy propagating!
Resource:
https://identify.plantnet.org/k-world-flora/species/Ornithogalum%20gussonei%20Ten./data