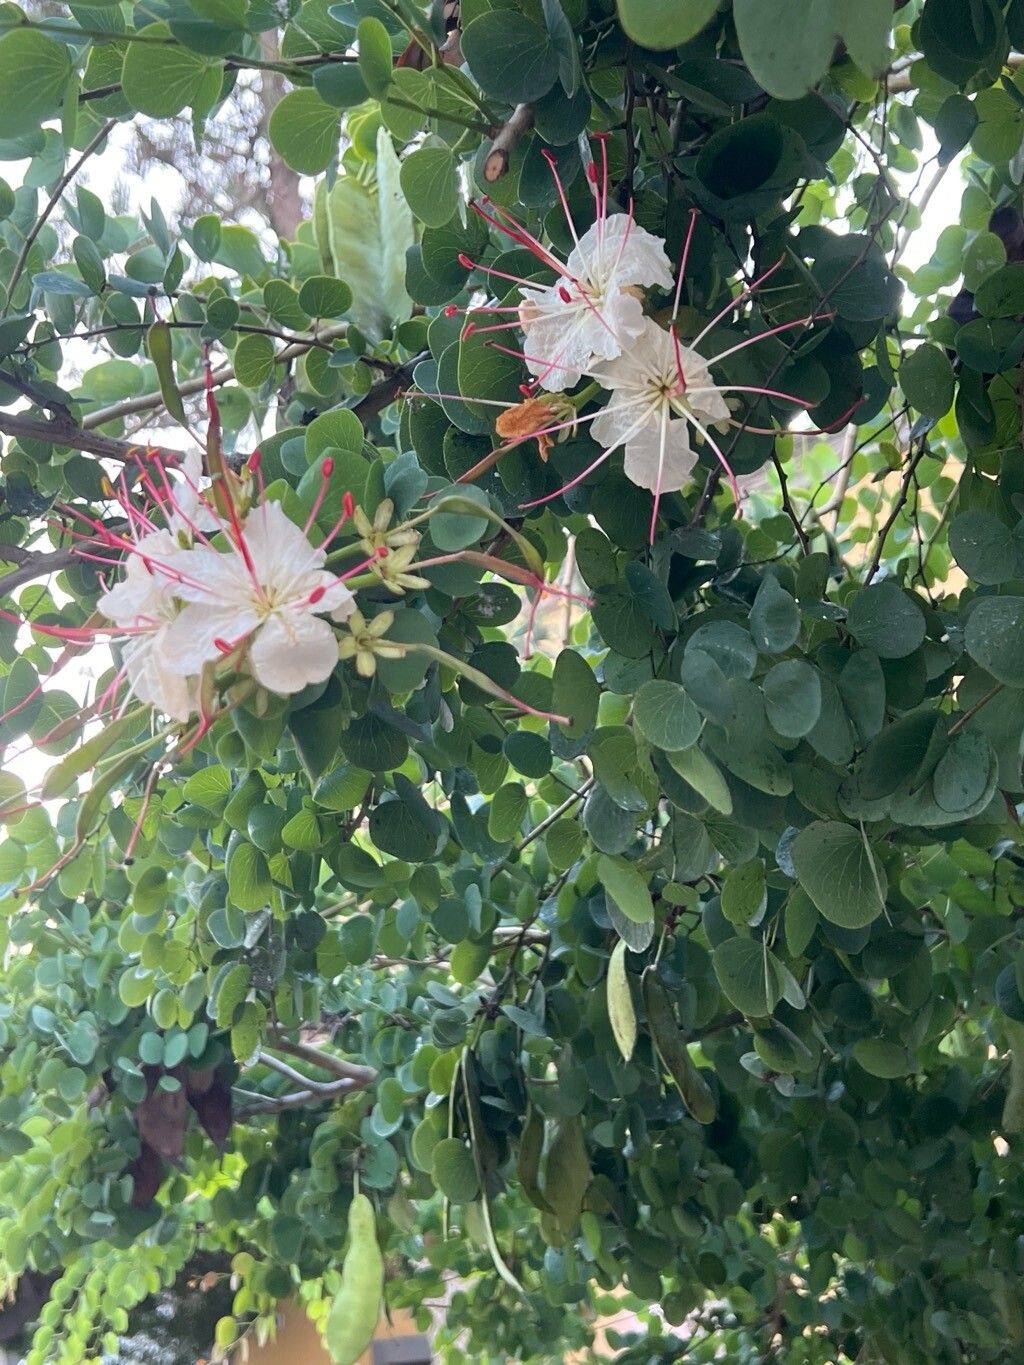
Hello fellow plant lovers! I’m so excited to chat with you today about a truly special plant: Lysiphyllum hookeri, often known as the “Queensland Umbrella Tree” or “Ivory Curl Tree.” If you’ve ever seen one of these beauties, you’ll know why. With its graceful, cascading branches and delicate, white, ruffled flowers that unfurl like little curls, it’s simply stunning, especially when in full bloom. The joy of seeing a tiny cutting develop into a whole new tree is one of gardening’s greatest rewards. Now, being honest, Lysiphyllum hookeri can be a little bit trickier than say, a pothos, but don’t let that deter you! With a bit of care and these tips, you’ll be well on your way to success.
The Best Time to Start
For the most promising results, I always recommend starting your propagation efforts during the late spring to early summer. This is when the plant is in its active growth phase. The hormones are flowing, and the new growth is vigorous, giving your cuttings the best possible chance to establish roots quickly. You can also have some success in early autumn, but spring is really the sweet spot.
Supplies You’ll Need
Here’s what you’ll need to gather before you get started:
- Sharp, clean pruning shears or a sharp knife: For making clean cuts.
- Rooting hormone powder or gel: This isn’t strictly essential, but it significantly boosts your success rate.
- Well-draining potting mix: A blend of perlite, coco coir, and a good quality potting soil works wonders. You want it to be light and airy.
- Small pots or seed trays: With drainage holes, of course!
- Plastic bags or a propagator: To create a humid environment.
- Watering can or spray bottle: For gentle watering.
- Labels: So you don’t forget what you’ve propagated!
Propagation Methods
Let’s dive into how to get these beauties growing!
Stem Cuttings: This is my go-to method for Lysiphyllum hookeri.
- Select Your Cuttings: Look for healthy, semi-ripe stems. These are stems that have finished their initial flush of soft growth but aren’t woody and old. Aim for cuttings about 15-20 cm (6-8 inches) long.
- Make the Cut: Using your clean shears or knife, make a clean cut just below a leaf node. A leaf node is where a leaf attaches to the stem.
- Prepare the Cutting: Remove the lower leaves, leaving just a couple of pairs at the top. This reduces water loss and prevents leaves from rotting in the soil.
- Apply Rooting Hormone: Dip the cut end into your rooting hormone. Tap off any excess.
- Plant Your Cuttings: Make a hole in your prepared potting mix with a pencil or your finger. Gently insert the cutting, firming the soil around it.
- Water Gently: Water the pot thoroughly but gently. You don’t want to disturb the cutting.
- Create Humidity: Place the pot inside a plastic bag or propagator, ensuring the leaves don’t touch the plastic. Secure the bag loosely to allow some air circulation.
Water Propagation (less common for this specific species, but possible):
This method is a bit more hit-or-miss for Lysiphyllum hookeri compared to soil, but if you’re feeling adventurous:
- Prepare the Cutting: Follow steps 1-3 from the stem cutting method.
- Place in Water: Fill a clean jar or glass with fresh water and place your prepared cutting in it.
- Placement: Position the jar in a bright spot, but out of direct sunlight.
- Water Changes: Change the water every 2-3 days to prevent stagnation and fungal growth.
The “Secret Sauce” (Pro Tips)
Here are a few little tricks I’ve learned over the years:
- Don’t Over-Water Them! This is HUGE for Lysiphyllum hookeri. They are surprisingly susceptible to rot if their soil stays too wet. Let the top inch of soil dry out between waterings once your cuttings are planted.
- Warm Bottom Heat is Your Friend: If you have a heated propagator or can place your pots on a windowsill above a radiator (carefully!), that gentle warmth from below can dramatically speed up root formation. It mimics the warmth of summer soil and really encourages those roots to get going.
- Patience is Key with Humidity: That plastic bag or propagator is working overtime to keep things humid, which is vital. However, once you start seeing tiny new leaf buds (a good sign!), you’ll want to gradually start introducing more air. Open the bag a little each day for a week or so to avoid shocking your new plant with a sudden dry environment.
Aftercare & Troubleshooting
Once you see signs of new growth, like tiny leaves or the cutting feeling firm and resisting a gentle tug, it’s time to think about aftercare.
- Gradual Acclimatization: If you used a propagator, begin this process of gradually introducing air as mentioned in the pro tips.
- First Watering: Water your newly rooted cutting thoroughly.
- Potting Up: When the roots have filled the pot (you might see them peeking out of the drainage holes), it’s time to pot your plant into a slightly larger container. Use a good quality, free-draining potting mix.
- Common Issues: The most frequent problem you’ll encounter is rot. If your cutting turns black and mushy, it’s a sign of too much moisture and possibly insufficient air circulation. Unfortunately, with rot, it’s usually game over, so prevention is key! Another sign of failure can be wilting, which might indicate it’s too dry, or the roots just haven’t formed yet.
A Little Encouragement
Propagating plants can sometimes feel like you’re waving a magic wand, but it’s also a process that teaches us so much. Don’t get discouraged if not every cutting takes. Keep trying, pay attention to what your plants are telling you, and celebrate every little success. Enjoy the wonderful journey of bringing new life into your garden! Happy propagating!
Resource:
https://identify.plantnet.org/k-world-flora/species/Lysiphyllum%20hookeri%20(F.Muell.)%20Pedley/data