My Tricks for Multiplying Those Fiery Red Poker Flowers!
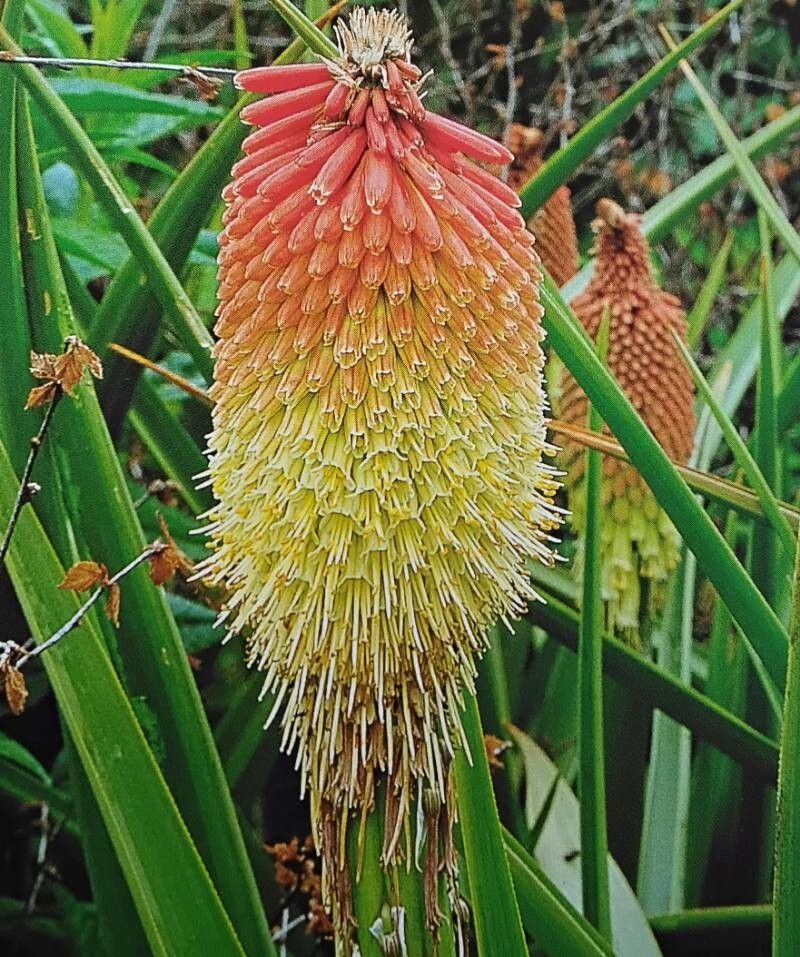
Oh, Kniphofia northiae! Those dramatic, vibrant blooms just scream summer garden joy. I’ve had these beauties gracing my borders for years, and honestly, every time they erupt in that fiery orange-red, I get a little thrill. And you know what’s even more thrilling? Being able to share that joy by propagating them myself. It might sound a bit daunting, but trust me, it’s a wonderfully rewarding process. For those of you just starting out with your green thumb, propagating Kniphofia northiae is absolutely achievable, though it does require a touch of patience. Let’s dive in!
When to Get Your Hands Dirty
The absolute best time to tackle propagating Kniphofia northiae is when the plant is actively growing, usually in late spring or early summer, right after it has finished its main flowering push. This is when the plant has lots of energy stored up and is ready to send out new growth. Trying to do it too late in the season, when things are starting to wind down for winter, can lead to disappointment.
What to Gather for Success
Before we get started, let’s make sure you have everything you need. It’s always better to be prepared!
- Sharp Pruning Shears or a Knife: Cleanliness is key to preventing disease.
- Rooting Hormone (Optional but Recommended): This little powder can give your cuttings a significant boost.
- Well-Draining Potting Mix: I like a mix of equal parts peat moss, perlite, and coarse sand. Or, a good quality seed-starting mix works wonderfully.
- Small Pots or Trays: Clean pots are a must! I prefer terra cotta for good airflow.
- Watering Can with a Fine Rose: Gentle watering is crucial.
- Plastic Bags or a Propagator: To create a humid environment for your cuttings.
- Labels and a Marker: So you don’t forget what you’ve planted and when!
My Go-To Methods for More Pokers
There are a couple of ways to get new Kniphofia northiae plants going, and I find success with both division and taking cuttings.
Method 1: Division is Your Friend
This is by far the most straightforward method, especially for beginners. Kniphofia northiae readily forms clumps, and dividing these is like giving your plant a fresh start.
- Digging Up: In late spring or early summer, carefully dig around the base of your established plant. Gently lift the entire clump out of the ground. You might need a garden fork to help loosen the soil.
- Separating: Once out of the ground, you’ll see distinct sections or rosettes. Gently pull these apart with your hands. If they are really tightly bound, you might need to use your knife or shears to make clean cuts. Ensure each division has a good portion of roots attached.
- Replanting: Pot up your divisions into pots filled with your well-draining mix. Alternatively, you can replant them directly back into the garden, spacing them out appropriately. Water them in well.
Method 2: Taking Stem Cuttings (A Little More Adventurous!)
This method can yield more plants and is quite satisfying, but it requires a bit more attention to detail.
- Selecting Your Cuttings: Look for healthy, non-flowering shoots that are about 4-6 inches long. These usually emerge from the base of the plant.
- Making the Cut: Using your clean shears, make a clean cut just below a leaf node (where a leaf attaches to the stem).
- Preparing the Cutting: Gently remove the lower leaves from the cutting. You want to leave just a few leaves at the top. If the leaves are very large, you can even cut them in half horizontally to reduce water loss.
- Applying Rooting Hormone: If you’re using it, dip the cut end of the stem into the rooting hormone, tapping off any excess.
- Potting Up: Insert the cuttings into pots filled with your prepared potting mix. Make sure the leaf nodes you removed are below the surface of the soil.
- Creating Humidity: Water gently, then cover the pots with a clear plastic bag or place them in a propagator. This creates a mini-greenhouse effect, keeping the humidity high which is crucial for root development.
My “Secret Sauce” for Extra Oomph
Over the years, I’ve picked up a few little tricks that seem to make all the difference.
- The Bottom Heat Boost: For cuttings, placing the pots on a heat mat can really speed up root formation. It mimics the warmth of spring and gives those little roots the encouragement they need to get going. You don’t need it super hot, just a gentle warmth.
- Patience with the Water: If you opt for water propagation for cuttings (though my preference is soil), be very careful not to let the leaves touch the water. Only the stem should be submerged. Leaves sitting in water are prone to rot, and that’s the last thing we want! Change the water every few days.
Nurturing Your New Sprouts & What to Watch For
Once your divisions are planted or your cuttings show signs of rooting (usually after 3-6 weeks for cuttings, and immediately for divisions), it’s time to give them a little extra care.
- Gradual Acclimatization: If you used a plastic bag or propagator for your cuttings, gradually introduce them to normal air by opening the bag a little each day for a week or so. This prevents shock.
- Watering: Keep the soil consistently moist but not soggy. Overwatering is the most common killer of young plants, especially cuttings that haven’t fully rooted. Check the soil moisture regularly.
- Light: Place your new plants in a bright spot, but out of direct, hot sun until they are well-established.
Now, what if things aren’t going as planned? The most common culprits are rot (that mushy, blackening stem base) and drying out. If you see rot, it’s often a sign of too much moisture and not enough airflow. For cuttings that fail to root, it could be lack of humidity, not enough warmth, or simply that the cutting wasn’t strong enough to begin with. Don’t be discouraged! It’s all part of the learning curve.
Go Forth and Multiply!
Propagating Kniphofia northiae is such a rewarding way to fill your garden with more of that glorious color, or to share with fellow gardening friends. Be patient with the process, enjoy the quiet moments of observation, and celebrate every little success. Happy propagating!
Resource:
https://identify.plantnet.org/k-world-flora/species/Kniphofia%20northiae%20Baker/data