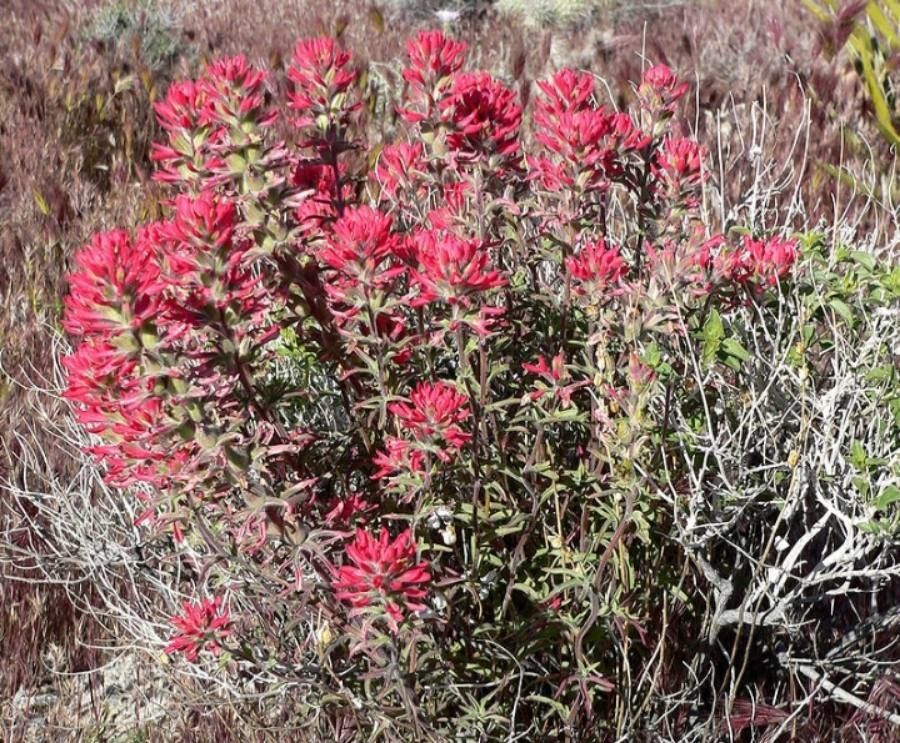
Oh, Castilleja angustifolia! You know, the Indian Paintbrush. If you’ve ever seen these vibrant beauties gracing a meadow, you’ll understand why gardeners like us are drawn to them. Their fiery colors, often a startling scarlet or intense orange, just scream summer. And there’s something incredibly satisfying about coaxing one of these wild wonders into existence right from your own garden.
Now, I won’t sugarcoat it. Castilleja can be a bit of a diva when it comes to propagation. They’re not exactly a beginner-friendly “stick it in water and watch it go” kind of plant. But with a little understanding and some patient effort, you can absolutely bring these stunners into your life. Seeing those first tiny leaves unfurl from a cutting you nurtured? Pure gardening magic.
The Best Time to Start
For Castilleja angustifolia, timing is everything. The sweet spot for attempting propagation is generally late spring or early summer, right when the plant is actively growing but before it gets too hot and stressed. You’re looking for young, healthy side shoots that haven’t started to flower or harden off too much. Think tender, but not floppy.
Supplies You’ll Need
Before we get our hands dirty, let’s gather our tools. You don’t need a fancy setup, but having the right things makes a world of difference:
- Sharp Pruning Shears or a Clean Knife: For making precise cuts.
- Rooting Hormone: A powder or gel can give your cuttings a helpful boost.
- Well-Draining Potting Mix: I like a blend of equal parts potting soil, perlite, and coarse sand. This is crucial for preventing rot.
- Small Pots or Seed Trays: With drainage holes!
- Plastic Bags or a Humidity Dome: To keep things moist.
- Labeling Stakes: So you don’t forget what you planted!
- Watering Can with a Fine Rose: For gentle watering.
Propagation Methods
While seed propagation of Castilleja can be tricky due to their need for specific mycorrhizal fungi, stem cuttings are generally the more reliable route for us home gardeners.
Stem Cuttings:
- Select Your Cuttings: Choose healthy, non-flowering shoots that are about 4-6 inches long. As I mentioned, late spring is prime time.
- Make the Cut: Using your sharp shears or knife, make a clean cut just below a leaf node. This is where roots are most likely to form.
- Prepare the Cutting: Gently remove the lower leaves from the cutting, leaving just a few at the very top. This prevents them from rotting in the soil.
- Dip in Rooting Hormone: Dip the cut end of the stem into your rooting hormone, tapping off any excess.
- Planting Time: Fill your small pots with your well-draining mix. Make a small hole with your finger or a pencil and carefully insert the dipped end of the cutting. Gently firm the soil around it.
- Water Gently: Give the soil a light watering with your fine-rose watering can, ensuring the soil is moist but not soggy.
- Create Humidity: Cover the pot loosely with a clear plastic bag or place it under a humidity dome. This creates a mini greenhouse environment, which is vital for cuttings.
The “Secret Sauce” (Pro Tips)
Now, here are a few little tricks I’ve picked up over the years that can really boost your success rate:
- Don’t Let Leaves Touch Water (or Wet Soil Excessively): This is a cardinal rule for most cuttings, and Castilleja is no exception. Any leaves submerged in water or constantly buried in soggy soil are just invitations for rot and fungal issues. Keep them high and dry!
- Bottom Heat is Your Friend: I often place my pots of cuttings on a “heat mat” designed for propagation. This gentle bottom warmth encourages root development without drying out the top of the cutting. It makes a surprisingly big difference.
- Patience is a Virtue (And So is Observation): Castilleja doesn’t always put on a show of new growth immediately. Keep an eye on your cuttings. If they’re still looking turgid after a few weeks, chances are they’re working on roots below the surface. Tug very gently on a pot. If you feel any resistance, you’re on your way!
Aftercare & Troubleshooting
Once you see signs of rooting – new leaf growth at the tip or gentle resistance when you tug – it’s time to gradually acclimate your new plant.
- Reduce Humidity: Start by opening the plastic bag for a few hours each day, then remove it entirely over a week or so.
- Watering: Continue to keep the soil consistently moist but not waterlogged. Allow the very top of the soil to dry out slightly between waterings.
- Repotting: Once the roots have filled the small pot, you can carefully transplant your new Castilleja into a slightly larger container or its permanent garden spot.
The most common pitfall you’ll encounter is rot. If your cuttings turn black and mushy, or develop fuzzy mold, it’s usually a sign of too much moisture and not enough air circulation. Don’t get discouraged! Just discard the rotted cutting and start fresh, paying close attention to your watering and soil drainage.
A Encouraging Closing
Propagating Castilleja angustifolia takes a bit of patience, but the reward of seeing these fiery beauties thrive from your own efforts is truly special. Don’t be afraid to try, and remember that every gardener has had their share of failures. Just learn from them, adjust your approach, and most importantly, enjoy the green-thumb journey! Happy gardening!
Resource:
https://identify.plantnet.org/k-world-flora/species/Castilleja%20angustifolia%20(Nutt.)%20G.Don/data