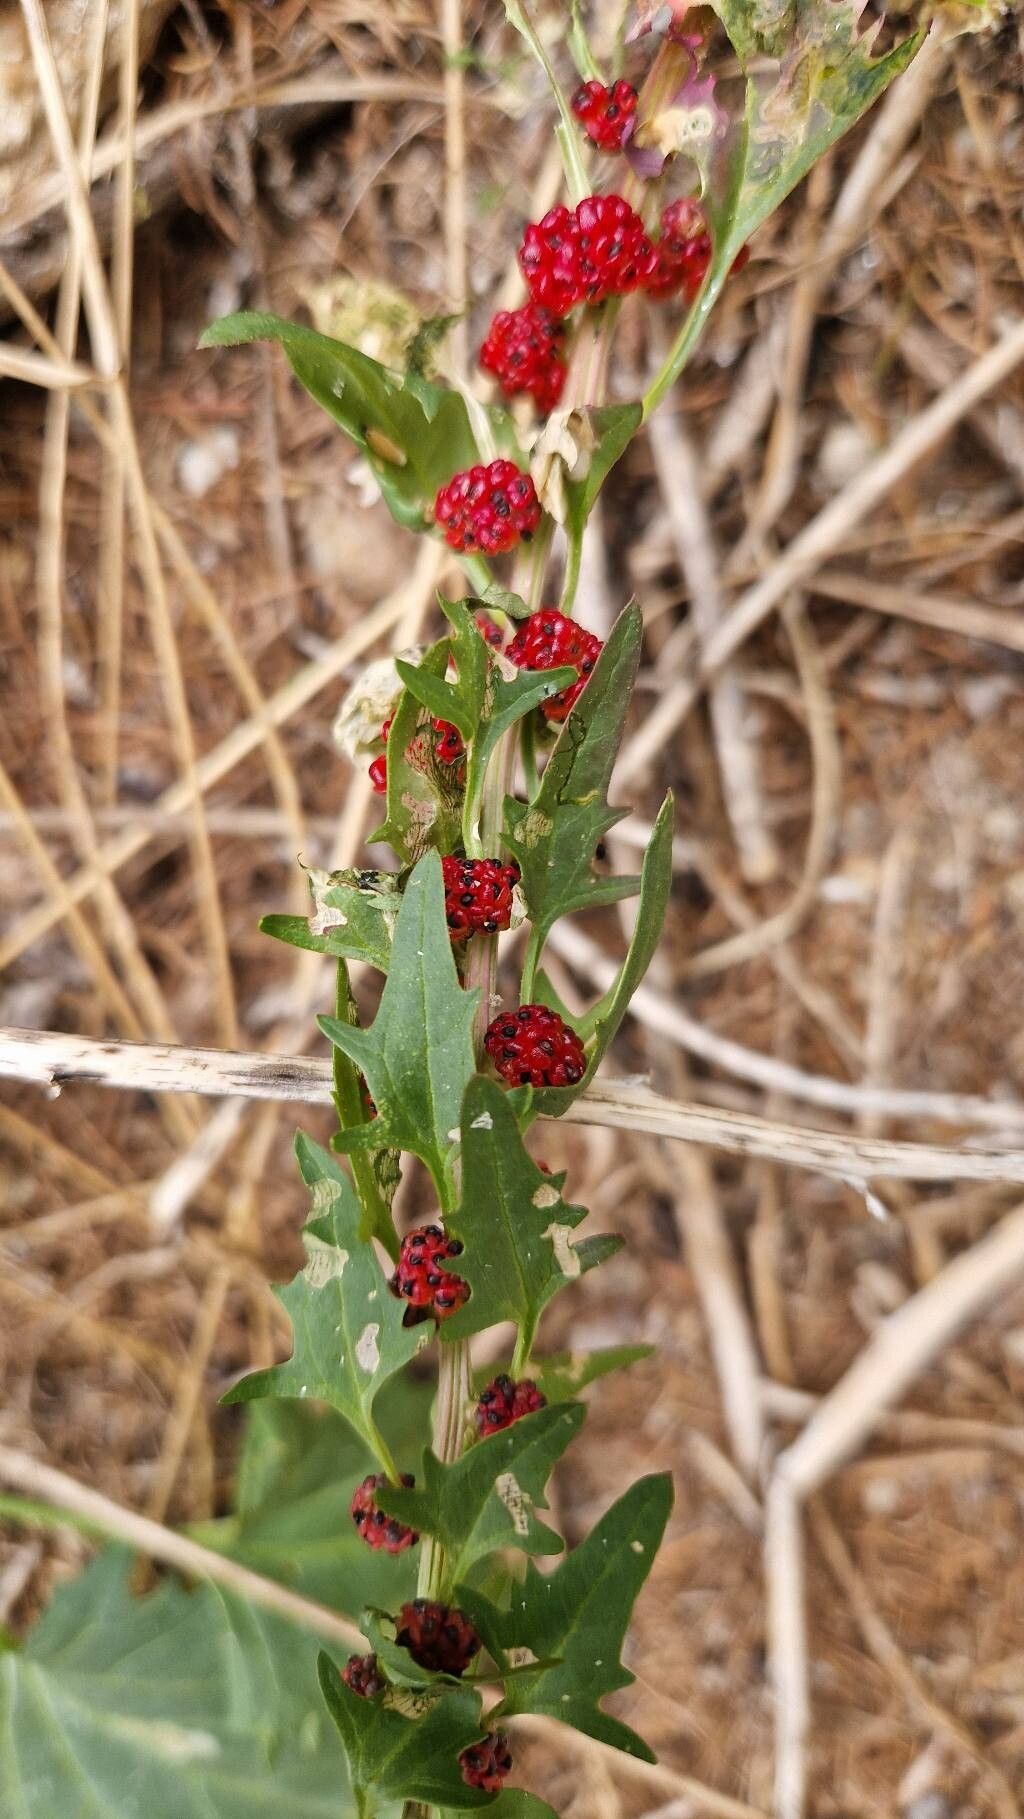
Oh, hello there! It’s so lovely to have you stop by. Today, we’re diving into the wonderful world of propagating Blitum virgatum, often known as trailing spinach or sea purslane. If you’ve ever admired its delicate, trailing habit and edible, almost succulent leaves in your garden, you know what a delight it is. And the best part? Bringing more of this beauty into your life is surprisingly achievable.
This isn’t a plant that will make you tear your hair out, either. In fact, for most home gardeners, propagating Blitum virgatum is quite straightforward. It’s a truly rewarding endeavor, allowing you to expand your edible landscape or share these lovely plants with friends without breaking the bank.
The Best Time to Start
For the most success, I find that late spring to early summer is absolutely ideal for propagating Blitum virgatum. This is when the plant is actively growing and has plenty of energy to spare for forming new roots. You can also take cuttings in late summer, but they might take a little longer to establish before cooler weather arrives.
Supplies You’ll Need
Gathering your tools makes the process so much smoother. Here’s what I usually have on hand:
- Sharp, clean pruning shears or a sharp knife: For making clean cuts.
- Small pots or containers: Seed-starting trays, small nursery pots, or even recycled yogurt cups with drainage holes work perfectly.
- Well-draining potting mix: A good blend for me is a mix of perlite, coco coir, and a little bit of compost. You can also use a commercial seed-starting mix.
- Rooting hormone (optional but recommended): This really gives cuttings an extra boost.
- A watering can with a fine rose: For gentle watering.
- A spray bottle: For keeping leaves hydrated.
Propagation Methods
We’ll focus on the easiest and most reliable methods that have worked wonders for me over the years.
Stem Cuttings: My Go-To
This is my favorite way to propagate Blitum virgatum. It’s quick, and you can get several new plants from just one mother plant.
- Take your cuttings: Select healthy, non-flowering stems from your mature plant. Look for stems that are about 4-6 inches long. Using your clean pruners or knife, make a clean cut just below a leaf node. A leaf node is where a leaf attaches to the stem.
- Prepare the cuttings: Gently remove the lower leaves, leaving just a few at the top. If any leaves are very large, you can even snip them in half to reduce water loss.
- Apply rooting hormone (optional): Dip the cut end of each stem into your rooting hormone powder, tapping off any excess.
- Plant your cuttings: Fill your small pots with your prepared potting mix. Make a small hole in the center of the soil with your finger or a pencil.
- Insert the cuttings: Place the cut end of each stem into the hole, ensuring that at least one leaf node is buried beneath the soil surface.
- Water gently: Lightly water the soil to help settle it around the cuttings.
Water Propagation: A Visual Treat
If you enjoy watching the magic happen, water propagation is a lovely option.
- Prepare stems: Similar to stem cuttings, take 4-6 inch stems with a few leaves removed from the bottom.
- Place in water: Put the bottom ends of the cuttings into a small jar or glass of clean water.
- Location and maintenance: Place the jar in a bright spot, but out of direct sunlight. Change the water every few days to keep it fresh and prevent algae growth.
The “Secret Sauce” (Pro Tips)
Here are a few little tricks of the trade that have served me well:
- Cleanliness is key: Always use sterilized tools and pots! This prevents the spread of any nasty soil-borne diseases that can quickly doom your cuttings. A quick rinse with hot, soapy water or a diluted bleach solution will do the trick.
- Humidity is your friend: Blitum virgatum cuttings love a bit of humidity. You can achieve this by placing the potted cuttings inside a plastic bag or cloche, making sure the leaves aren’t touching the plastic. This creates a mini-greenhouse effect.
- Patience with the water method: When propagating in water, try to avoid letting the leaves touch the water surface. This can cause them to rot before roots even have a chance to form.
Aftercare & Troubleshooting
Once you see roots forming (this can take anywhere from a couple of weeks to a month), it’s time for some gentle care.
- For water cuttings: Once the roots are about an inch long, you can carefully transplant them into pots filled with your well-draining potting mix. Water them in gently.
- For potted cuttings: Continue to keep the soil lightly moist, but not soggy. You can begin misting the leaves more regularly once you see signs of new leaf growth, indicating they’ve rooted.
- Troubleshooting: The most common issue you’ll encounter is rot. If a cutting turns black and mushy, it’s a sign of too much moisture or disease. If your cuttings simply refuse to root, it could be due to the time of year, a lack of sufficient light, or perhaps they were too old or stressed when taken. Don’t get discouraged; just try again with fresh cuttings at the right time.
A Encouraging Closing
See? Not so daunting, is it? Propagating Blitum virgatum is a beautiful way to connect with your plants and learn a little more about their life cycle. Be patient, enjoy the process, and before you know it, you’ll have a whole new patch of this delightful plant to admire and harvest. Happy gardening!
Resource:
https://identify.plantnet.org/k-world-flora/species/Blitum%20virgatum%20L./data