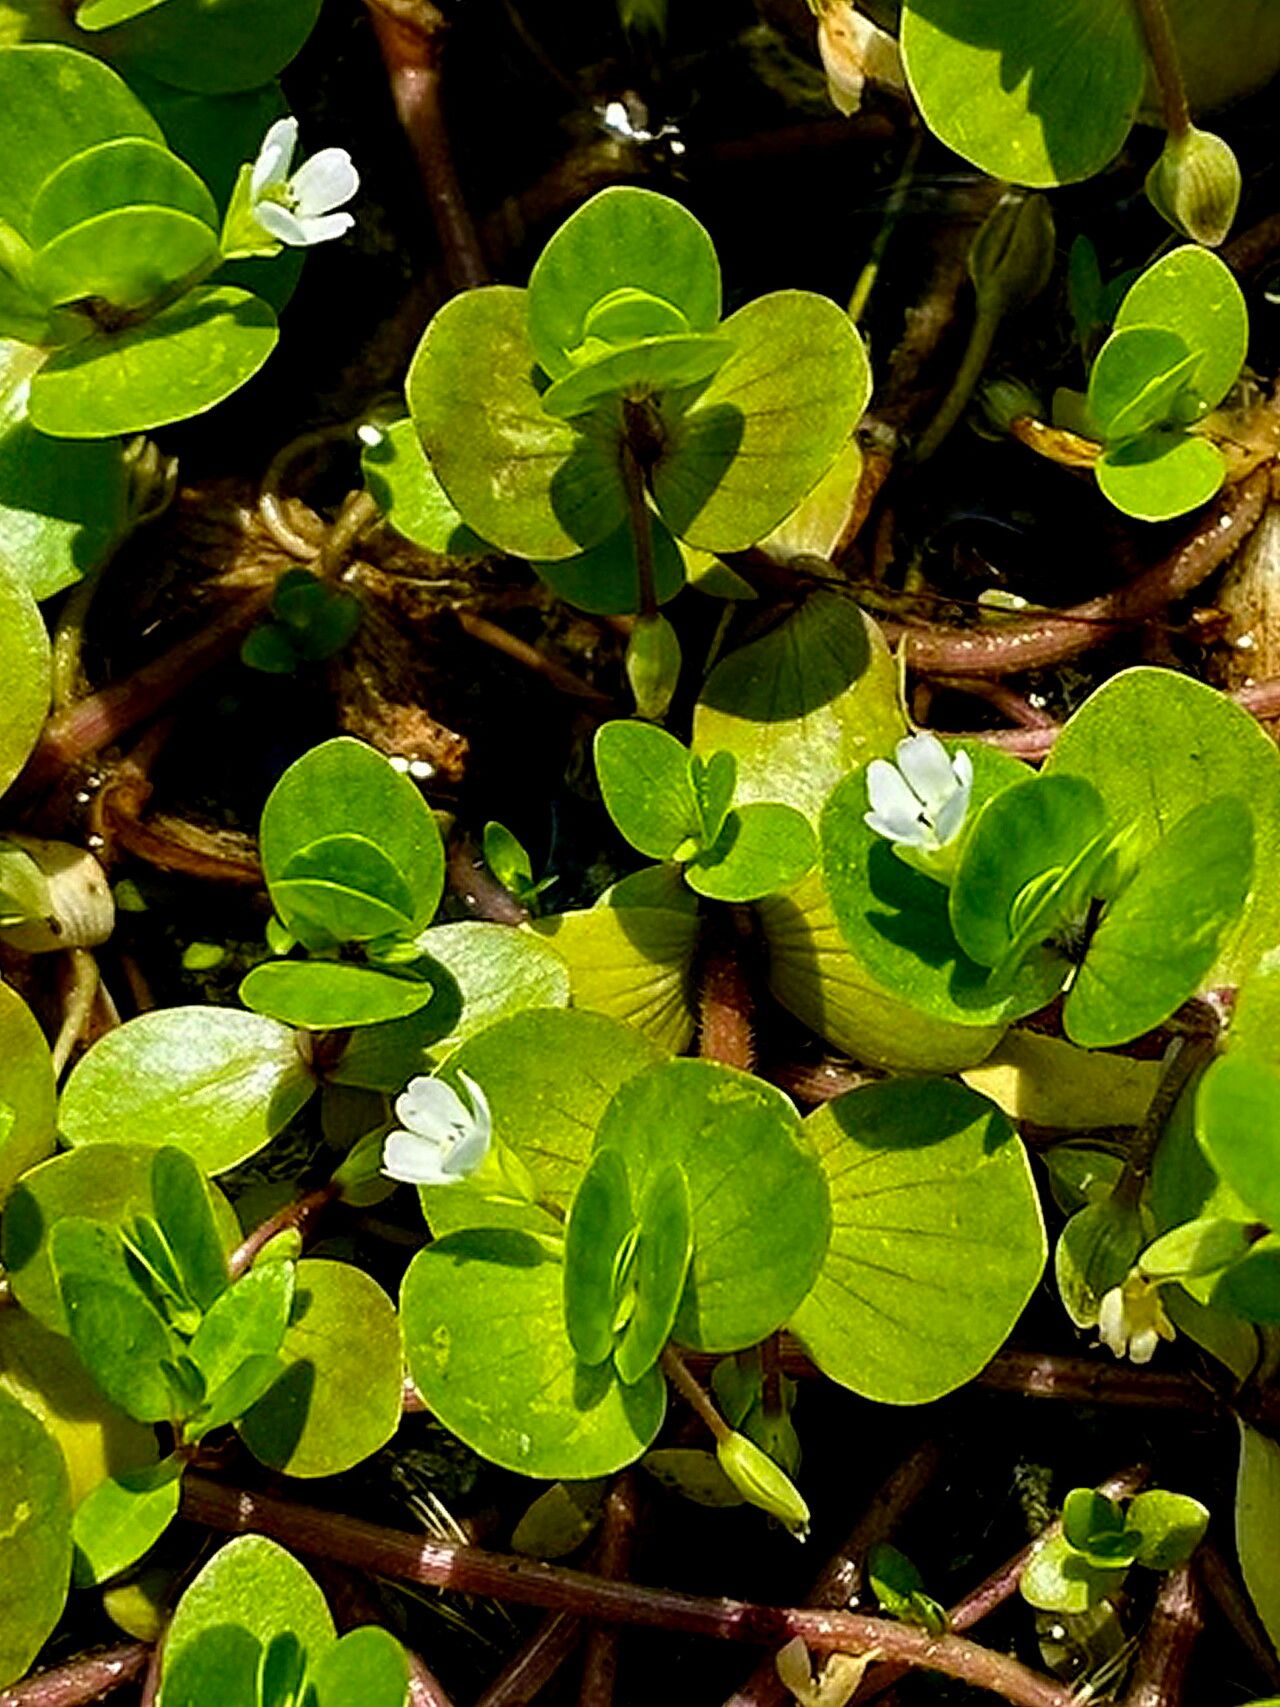
Oh, Bacopa rotundifolia! If you’re looking for a plant that drapes beautifully, spills over containers, and offers those sweet little white or pale blue flowers, you’ve found your match. I’ve been growing it for years, and honestly, it’s one of those plants that just makes you happy. Propagating it is a wonderful way to multiply that joy, and I’m happy to say, it’s a pretty beginner-friendly plant to work with! You’ll be amazed at how easily you can create new plants for your own garden or to share with friends.
The Best Time to Start
For Bacopa rotundifolia, the magic happens when the plant is actively growing. That means late spring through summer is your prime time. You want to take cuttings from healthy, vigorous stems that haven’t flowered yet. Think of it as taking a piece of a strong, growing branch – it’s packed with life and ready to start a new adventure.
Supplies You’ll Need
Here’s what I usually gather before I get my hands dirty:
- Sharp pruning shears or a clean knife: For making neat cuts.
- Rooting hormone (optional but helpful): A little dip can speed things up. I like the powder kind.
- Well-draining potting mix: A mix for seedlings or a blend of peat moss and perlite works great.
- Small pots or seed trays: Whatever you have on hand that can hold a few inches of soil.
- Plastic bags or a propagation dome: To keep humidity high.
- Watering can with a fine rose: So you don’t disturb those tiny cuttings.
- Labels: To remember what you planted and when!
Propagation Methods
I find two methods work consistently well for Bacopa rotundifolia.
Stem Cuttings
This is my go-to method for Bacopa.
- Take Your Cuttings: Find a healthy stem and using your sharp shears, cut a piece about 3-4 inches long. Make the cut just below a leaf node (where a leaf attaches to the stem).
- Prepare the Cuttings: Gently strip off the lower leaves, leaving just a few at the top. If you’re using rooting hormone, dip the cut end into it now.
- Plant Them Up: Fill your pots with the well-draining potting mix. Make a small hole with your finger or a pencil and insert the cutting, firming the soil around it.
- Water Gently: Give them a light watering.
- Create a Humid Environment: Cover the pots with a plastic bag or place them under a clear propagation dome. This is key to keeping them from drying out.
Water Propagation
This is a fun, visual way to see roots develop.
- Select Your Stems: Again, look for healthy, non-flowering stems and cut pieces about 4-6 inches long.
- Remove Bottom Leaves: Just like with soil propagation, strip off the lower leaves.
- Place in Water: Pop the cuttings into a jar or glass of clean water.
- Find a Good Spot: Place the jar in bright, indirect light. Change the water every few days to keep it fresh.
The “Secret Sauce” (Pro Tips)
Here are a few little tricks that I’ve found make a big difference:
- Don’t let the leaves touch the water. If you’re water propagating, make sure only the stem is submerged. Any submerged leaves will just rot and can take your cutting down with them.
- Keep the humidity high, but allow for air circulation. That plastic bag or dome is great, but once a day, lift it for a minute to let some fresh air in. This helps prevent fungal issues.
- Be patient with bottom heat. If you’re using stem cuttings in soil, placing the pots on a heat mat can really encourage rooting. It mimics the warmth of spring soil and gives those roots a cozy place to start.
Aftercare & Troubleshooting
Once you see new leaf growth or notice those cuttings have a good grip on the soil (give them a gentle tug – resistance means roots!), they’re ready for a bit more independence. Gradually introduce them to less humid conditions. If you started them in a tray, pot them up into individual small pots. Water them regularly, but let the soil dry out slightly between waterings.
The most common issue you’ll encounter is rot. If your cuttings turn black and mushy, it’s usually due to too much moisture and not enough air circulation. If you see this happening, remove the affected cutting immediately to prevent it from spreading. Sometimes, a cutting just doesn’t take – don’t get discouraged! It happens to all of us. Just try again.
A Encouraging Closing
Propagating plants is a little act of faith, isn’t it? You’re taking something small and trusting it to grow. With Bacopa rotundifolia, nature often does most of the heavy lifting. Be patient, observe your little charges, and enjoy the process of bringing new life into your garden. Happy propagating!
Resource:
https://identify.plantnet.org/k-world-flora/species/Bacopa%20rotundifolia%20(Michx.)%20Wettst./data