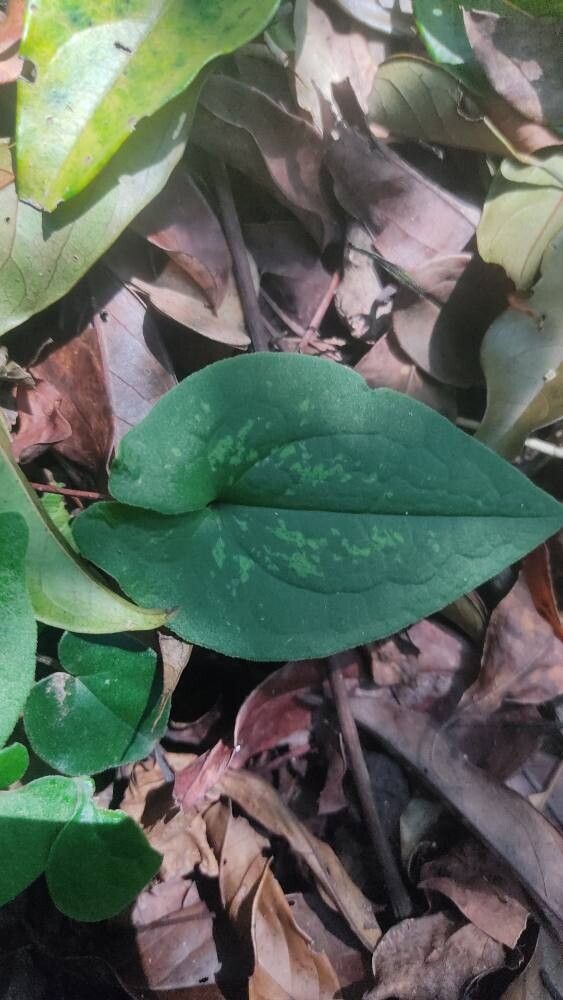
Hoo boy, have I got a treat for you if you’re looking to expand your patch of shade-loving beauties! We’re talking about Asarum arifolium, or as I affectionately call it, the Heartleaf Ginger (though it’s not a true ginger, wink wink). This plant is just a delight. Its glossy, heart-shaped leaves, often with striking silver markings, create this lush carpet that truly brightens up dim corners. And the rewarding part? Bringing more of that woodland magic into your garden, all from a little bit of effort and a whole lot of love. Now, is it a beginner-friendly plant to propagate? I’d say it’s moderately easy. It’s not going to throw a tantrum if you miss a watering, but you do need to pay a little attention.
The Best Time to Start
The sweet spot for propagating Asarum arifolium is definitely late spring to early summer. This is when the plant is actively growing and has the energy to put into new roots. You’re looking for healthy, vigorous stems that are just starting to harden off – not the super soft, floppy new shoots, and not the woody old ones. Think something with a bit of give but that holds its shape.
Supplies You’ll Need
Here’s what you’ll want to have handy:
- Sharp Pruning Shears or a Clean Knife: For making clean cuts.
- Rooting Hormone (Optional, but helpful): A powder or gel to give cuttings a boost.
- Well-Draining Potting Mix: I like a 50/50 blend of peat moss and perlite or coco coir and perlite. This is crucial to prevent soggy roots.
- Small Pots or Trays: Clean ones, of course! Terracotta pots are lovely as they breathe.
- Plastic Bags or a Humidity Dome: To create a mini greenhouse environment.
- Mister Bottle: For gently misting your cuttings.
- Water Source: For division.
Propagation Methods
My go-to methods for Asarum arifolium involve focusing on its growth habits.
Division: The most straightforward way!
This is really the easiest and most foolproof method, especially for beginners.
- Gently Excavate: Carefully dig up your Asarum arifolium plant. Try to disturb the roots as little as possible.
- Locate Natural Breaks: Look for where the plant naturally forms distinct clumps. You should be able to see where one growth point ends and another begins.
- Separate Gently: With clean hands or a trowel, gently pull or tease the clumps apart. You want each division to have a good amount of roots and at least one healthy shoot. If it’s a bit tough, use your sharp pruners to make a clean cut through the root ball.
- Replant Immediately: Get your divisions settled into their new homes in well-draining soil as soon as possible. Water them in well.
Stem Cuttings (A bit more patience required!)
This is where you can really expand your collection!
- Select Healthy Stems: Choose non-flowering stems from your mature plant. Aim for stems that are about 3-4 inches long. You want some healthy leaves at the top and ideally a little bit of a woody base, but not too hard.
- Make the Cut: Using your sharp pruners, make a clean cut just below a leaf node (where a leaf attaches to the stem).
- Prepare the Cutting: Remove the lower leaves and any flowers or buds. You want to expose the node where roots will form. If the remaining leaves are very large, you can even cut them in half, horizontally. This reduces water loss.
- Dip in Rooting Hormone (Optional): If you’re using rooting hormone, dip the cut end into the powder or gel. Tap off any excess.
- Plant the Cuttings: Fill your small pots with your prepared potting mix. Make a little hole with your finger or a pencil. Insert the cut end of the stem into the hole, making sure at least one leaf node is buried in the soil. Gently firm the soil around the stem.
- Water and Cover: Water the soil thoroughly until it drains from the bottom. Cover the pot with a plastic bag or place it inside a clear plastic bag, forming a mini-greenhouse. Ensure the leaves don’t touch the plastic. You can use stakes to prop it up.
The “Secret Sauce” (Pro Tips)
Here are a couple of things I’ve learned over the years that really make a difference!
- Don’t Overcrowd Your Cuttings: Give each cutting a bit of breathing room in its pot. If they’re packed in, they can encourage fungal diseases, and we definitely don’t want that!
- Bottom Heat is Your Friend for Cuttings: If you’re serious about cuttings, popping your pots on a seedling heat mat can significantly speed up root development. It mimics that lovely warm soil of spring. The warmth encourages root formation from below.
Aftercare & Troubleshooting
Once your Asarum arifolium has divided and replanted or your cuttings are tucked in, it’s time for a little TLC.
- For Divided Plants: Keep them consistently moist but not waterlogged. They might look a bit shocked initially, but they’ll perk up. A little shade for the first week or two can help them settle in.
- For Cuttings: The key here is maintaining humidity. Check the soil moisture regularly. If it feels dry, gently mist it. Do not let the soil dry out completely. You’ll want to open the bag for a few minutes each day to provide fresh air and prevent mold.
- Rooting Signs: For cuttings, you’ll know they’re rooting when you see new leaf growth or feel a gentle tug when you very carefully try to lift a cutting. This can take anywhere from 4-8 weeks, or even longer. Be patient!
- Troubleshooting: Rot: The most common sign of trouble is blackening or mushy stems, which is almost always a sign of overwatering and poor drainage. If you see this, try to trim away the affected parts and let the remaining plant dry out a bit more. Good air circulation is also key.
A Little Encouraging Wrap-Up
Propagating plants is such a beautiful way to connect with nature and expand your garden’s beauty. Don’t be discouraged if your first attempt isn’t perfect. Every gardener has learned through trial and error, and that’s part of the fun! Be patient with your Asarum arifolium cuttings, give them the right conditions, and enjoy watching new life emerge. Happy gardening!
Resource:
https://identify.plantnet.org/k-world-flora/species/Asarum%20arifolium%20Michx./data