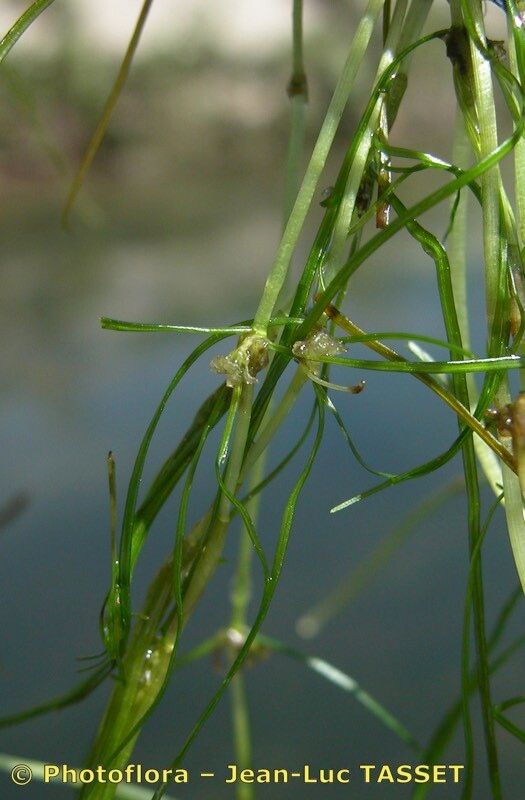
Hello, fellow garden enthusiasts! Today, we’re diving into the wonderful world of Zannichellia palustris, commonly known as Horned Pondweed. If you’re a fan of aquatic plants or looking to add a touch of serene, underwater beauty to your pond or water garden, you’re in for a treat. Horned Pondweed is a delightful native that offers delicate, feathery foliage and tiny, often overlooked flowers. Propagating it yourself is incredibly rewarding, and while it might seem a bit specialized, I find it to be a moderately easy plant to propagate, even for those just dipping their toes into the aquatic gardening scene.
The Best Time to Start
The absolute best time to propagate Zannichellia palustris is during the active growing season, which typically spans from late spring through late summer. This is when the plant is full of vigor and readily produces new growth. You’ll find it putting out plenty of stems and developing seeds, which are all excellent opportunities for propagation. Watching these new beginnings sprout feels like magic!
Supplies You’ll Need
Gathering your tools beforehand makes the whole process smoother. Here’s what I usually have on hand:
- Sharp pruning shears or a clean craft knife: For making clean cuts.
- Clean containers or jars: For water propagation or holding cuttings.
- Aquatic potting mix or a sandy loam soil: If you plan to pot up divisions or rooted cuttings.
- Gloves: Optional, but helpful if you’re not keen on getting muddy.
- A small trowel or spade: For dividing established plants.
- Seeds (if collecting): Tiny, dark, and often found nestled at the leaf axils.
Propagation Methods
Horned Pondweed is quite versatile and can be propagated through a couple of straightforward methods.
1. Stem Cuttings:
This is my go-to method for Horned Pondweed. The plant readily forms new roots along its stems, making it wonderfully forgiving.
- Identify healthy stems: Look for vibrant, green stems that are at least 3-4 inches long. Avoid any that look weak or have signs of decay.
- Take the cutting: Using your sharp shears or knife, make a clean cut just below a leaf node (where a leaf attaches to the stem).
- Prepare the cutting: Gently remove any leaves from the bottom inch or two of the stem. This helps prevent them from rotting in the water.
- Place in water: Submerge the cut end of the stem in a jar or container filled with clean pond water or dechlorinated tap water. Make sure the leaves are above the waterline for now.
- Provide light: Place the container in a bright spot, but out of direct, scorching sunlight. A north-facing windowsill or a spot in dappled shade is perfect.
- Wait for roots: Within a week or two, you should start to see tiny white roots emerging from the submerged part of the stem.
2. Seed Propagation:
Horned Pondweed produces small, club-shaped fruits that contain seeds. This method requires a bit more patience.
- Collect seeds: As the flowering season winds down, look for the small, dark fruits. Carefully collect them from mature plants.
- Sow the seeds: You can sow them directly into shallow containers filled with aquatic soil or sand. Alternatively, you can simply scatter them in a shallow area of your pond where they might find a suitable spot to germinate.
- Maintain moisture: Keep the soil consistently moist, much like you would for any seed. If sowing directly in the pond, ensure the area is shallow enough for light to reach the seeds.
- Germination time: Germination can be erratic and may take several weeks, sometimes even longer, depending on conditions. Don’t be discouraged if you don’t see immediate results.
3. Division:
If you have a well-established clump of Horned Pondweed, you can gently divide it.
- Remove from water: Carefully lift the plant from its container or a shallow pond area.
- Gently separate: Inspect the root ball and stems. You should be able to gently tease apart sections of the plant, ensuring each division has some healthy stems and roots.
- Pot up or replant: You can then pot these divisions into aquatic soil or replant them directly into your pond or water feature.
The “Secret Sauce” (Pro Tips)
Here are a couple of tricks I’ve learned over the years that can really boost your success with Horned Pondweed:
- Keep leaves out of the water: This is crucial for stem cuttings. Any leaves submerged will likely rot, and that rot can spread to the cutting, spoiling your efforts. Always ensure the leaves are dangling above the water’s surface.
- Don’t overcrowd your cuttings: Give each cutting a little space in its container. If they’re bunched up too tightly, it reduces air circulation and increases the risk of disease. Let them breathe and grow!
- Consider a gentle water flow: While Horned Pondweed thrives in still or slow-moving water, a very gentle water current can actually encourage rooting in cuttings. This could be as simple as placing your propagation jar near a filter outlet where there’s minimal disturbance.
Aftercare & Troubleshooting
Once your cuttings have developed a good root system – usually an inch or two long – it’s time to move them to their permanent home. You can plant them in aquatic pots filled with aquatic potting mix or sink them gently into a suitable substrate in your pond. Ensure they have adequate light and are settled in.
The most common issue you might encounter is rot. If you see your cuttings turning mushy or developing black spots, it’s a sign that something isn’t right. This often comes back to those submerged leaves or too much stagnant water. Remove any affected material immediately. If a whole cutting goes south, don’t despair; try again with a fresh one and adjust your approach. Patience is key!
A Encouraging Closing
Propagating Zannichellia palustris is such a rewarding experience. It’s a chance to nurture life, expand your aquatic garden, and connect with nature’s incredible ability to regenerate. Be patient, observe your new plants closely, and most importantly, enjoy the process. Happy gardening!
Resource:
https://identify.plantnet.org/k-world-flora/species/Zannichellia%20palustris%20L./data