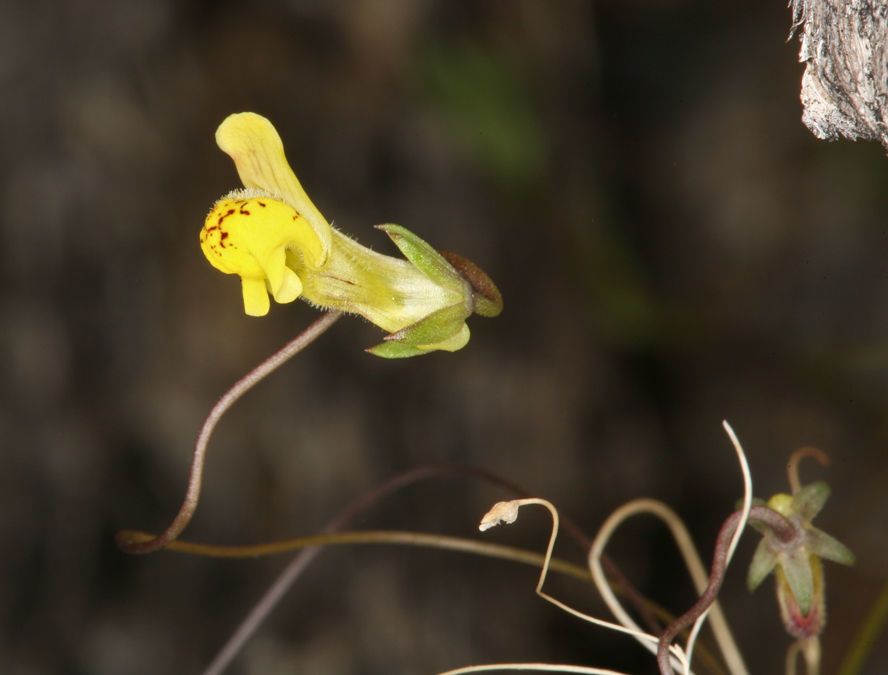
Hello there, fellow plant enthusiasts! Today, I want to chat about a gem that always brings a smile to my face in the garden: Neogaerrhinum filipes. You might know it better by its common name, California Snapdragon, and let me tell you, it lives up to the moniker. Those delicate, arching stems topped with whimsical little snapdragon-like flowers are just plain delightful. They add such a lovely, airy texture to borders and containers, and watching them sway in a gentle breeze is pure garden therapy.
If you’ve ever admired this beauty and thought, “I wish I had more of those!”, you’re in luck. Propagating Neogaerrhinum filipes is a really satisfying endeavor. For beginners? I’d say it’s moderately easy. It’s not quite as foolproof as a spider plant cutting, but with a little attention to detail, you’ll be well on your way to a whole new clan of these charmers.
The Best Time to Start
When it comes to getting the most successful new plants, timing is everything. For Neogaerrhinum filipes, I always aim to take cuttings in late spring or early summer. This is when the plant is actively growing, so the stems have plenty of energy to put into developing roots. You’ll want to harvest those vigorous, non-flowering shoots – they’re generally the most receptive to rooting.
Supplies You’ll Need
Gathering your tools beforehand makes the whole process smoother. Here’s what I usually have on hand:
- Sharp pruning shears or a clean, sharp knife: For making clean cuts on your stems.
- Rooting hormone powder or gel: This is a fantastic booster; it really encourages root development.
- A well-draining potting mix: I like a blend of peat moss, perlite, and some compost. Or, you can buy a good quality seed-starting mix.
- Small pots or cell trays: For your cuttings to grow in. Make sure they have drainage holes!
- A watering can with a fine rose: For gentle watering.
- A plastic bag or propagation dome: To create a humid environment.
- Labels and a marker: To keep track of your precious cuttings.
Propagation Methods
I find that stem cuttings are the most reliable way to propagate Neogaerrhinum filipes. It’s straightforward and yields great results.
- Select Your Stems: Look for healthy, non-flowering stems that are about 4-6 inches long. Gently bend a stem; if it snaps cleanly, it’s a good candidate. If it’s too soft and bendy, it might be too young.
- Make the Cut: Using your clean shears or knife, make a clean cut just below a leaf node. A leaf node is where the leaves attach to the stem. This is where the magic happens for root formation.
- Prepare the Cuttings: Gently strip off the lower leaves from the cutting, leaving just the top couple of leaves. This prevents the lower leaves from rotting when buried in the soil.
- Apply Rooting Hormone: Dip the cut end of the stem into your rooting hormone. Tap off any excess. This step is optional but highly recommended for boosting success.
- Plant Your Cuttings: Fill your small pots with your prepared potting mix. Make a small hole in the center with a pencil or your finger. Carefully insert the cutting, ensuring the nodes where you removed leaves are buried in the soil. Gently firm the soil around the stem.
- Water and Cover: Water the cuttings thoroughly but gently. Now, the crucial step for creating humidity: cover the pots with a plastic bag or a propagation dome. This traps moisture and keeps the leaves from drying out. You can secure the bag around the pot with a rubber band.
The “Secret Sauce” (Pro Tips)
Here are a couple of things I’ve learned over the years that really make a difference:
- Bottom Heat is Your Friend: Placing your pots on a seedling heat mat can significantly speed up root development. The warmth encourages those roots to form more quickly and efficiently.
- Don’t Let Leaves Touch Water: If you choose to root cuttings in water (which can work, but I find cuttings often transplant better directly into soil), make sure no leaves are submerged. Only the stem should be in contact with the water. Any submerged leaves will just rot and can infect the whole cutting.
- Air it Out: Even though you want humidity, it’s a good idea to ”air out” the cuttings daily by removing the plastic bag for a few minutes. This helps prevent mold and fungal issues.
Aftercare & Troubleshooting
Once your cuttings have been in their cozy, humid environment for a few weeks, start gently tugging on them. If you feel resistance, congratulations! You have roots!
- Acclimatize: Once roots have formed, gradually remove the plastic cover over a few days to let the new plants get used to the drier air.
- Watering: Keep the soil consistently moist but not waterlogged. Let the top layer of soil dry out slightly between waterings.
- Light: Place your newly rooted plants in bright, indirect light. Avoid direct sun, which can scorch their delicate new leaves.
- Watch for Rot: The most common sign of failure is rot. If your cuttings turn black and mushy, or if you see fuzzy white mold on the soil surface, it’s usually a sign of too much moisture and not enough air circulation. Discard any rotted cuttings and improve your watering and ventilation practices for the remaining ones. Another sign of failure is if your cuttings just wilt and never seem to perk up – this can happen if they haven’t rooted or if they’re drying out too much.
There you have it! Propagating Neogaerrhinum filipes is a journey worth taking. Be patient with your little cuttings. Nature works on its own time, and the reward of nurturing a brand-new plant from a tiny piece of another is truly special. Happy gardening, my friends!
Resource:
https://identify.plantnet.org/k-world-flora/species/Neogaerrhinum%20filipes%20(A.Gray)%20Rothm./data