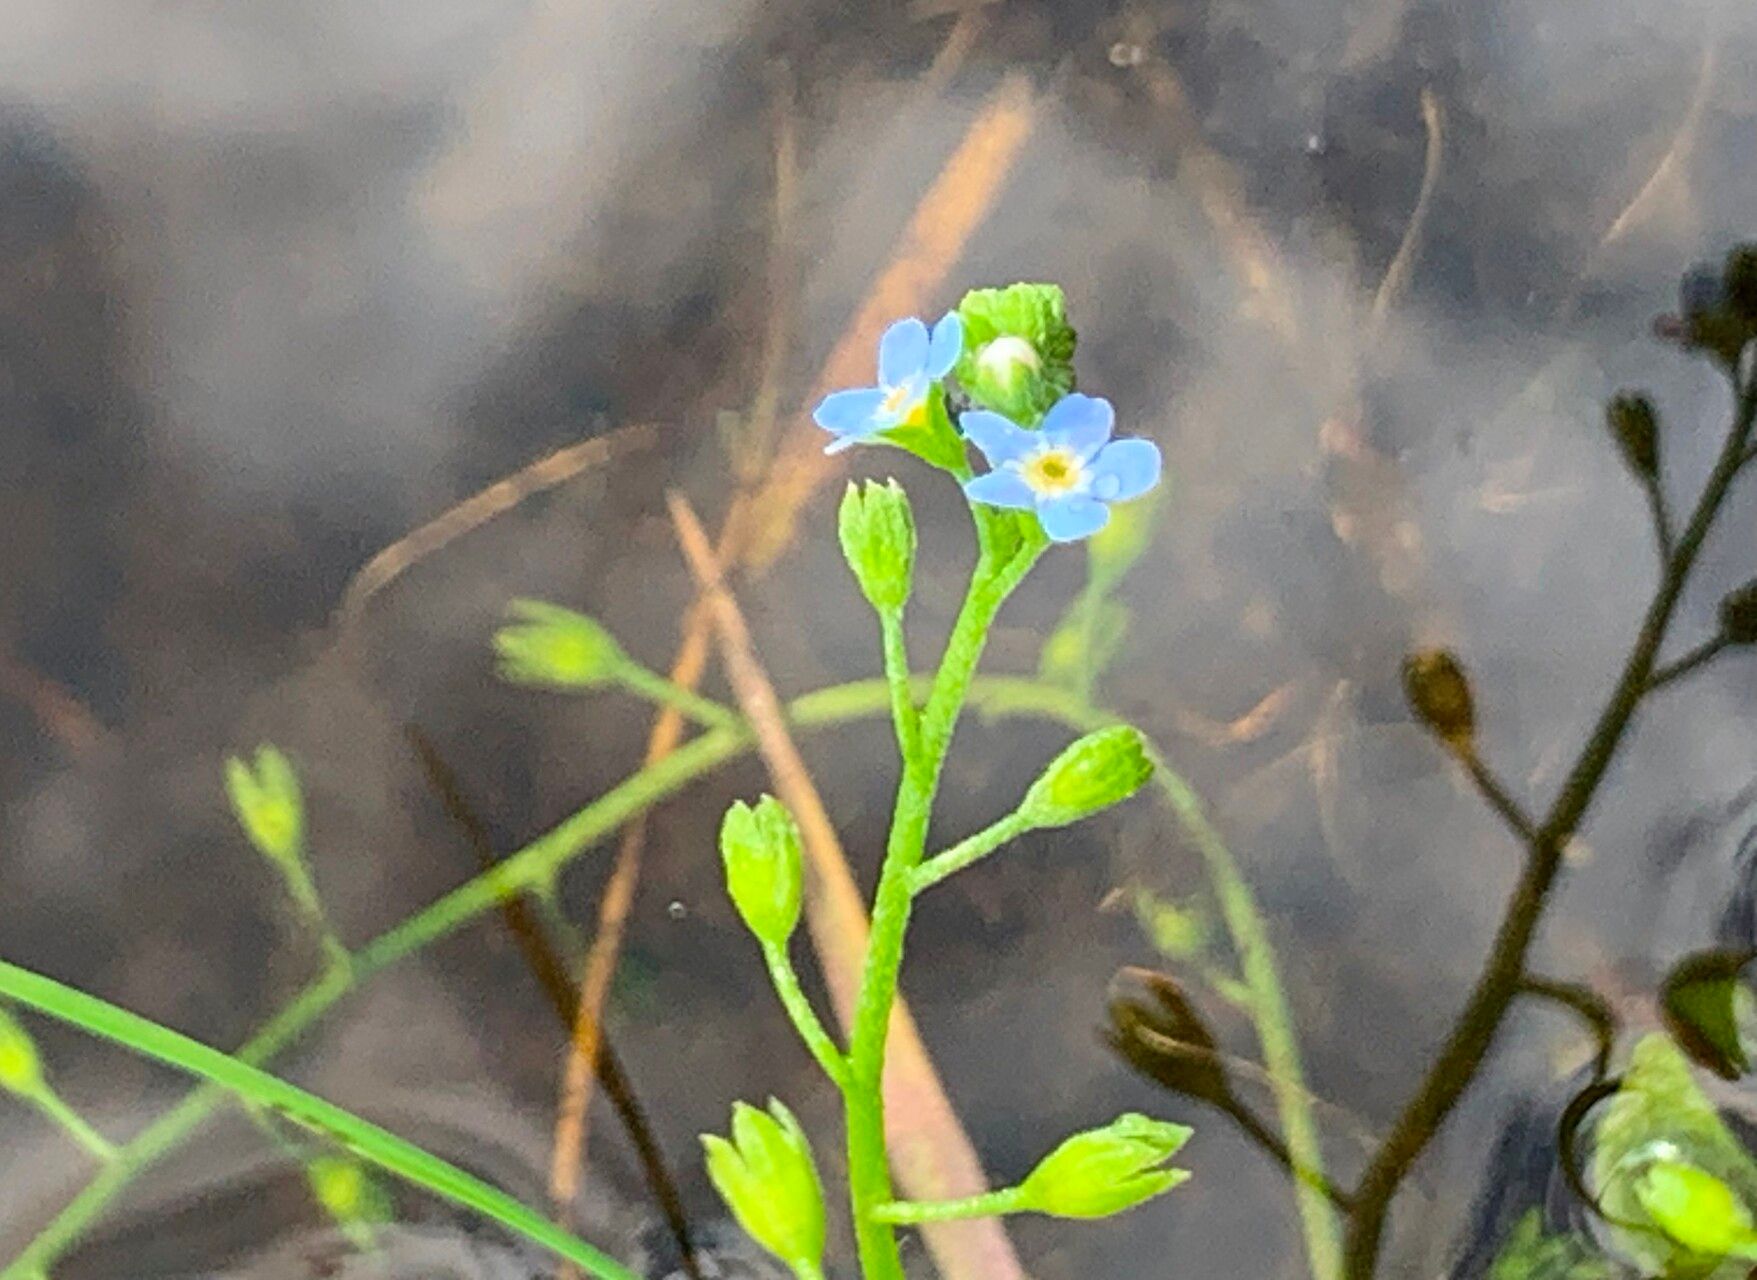
Hello there, fellow gardeners! It warms my heart to chat with you today about a little charmer that brings so much joy to my own garden: Myosotis laxa, also known as the tufted forget-me-not. Oh, these delicate blue flowers! They’re like scattered chips of the sky, carpeting the edges of ponds or peeking out from shady corners. They truly make you pause and appreciate the simple beauty of nature.
And the best part? You can easily bring this beauty into more places in your garden, or even share it with friends! Propagating forget-me-nots is a wonderfully rewarding project, and I’m here to tell you, it’s not a difficult one at all. In fact, I’d say Myosotis laxa is a gem for beginners looking to dip their toes into propagation. You’ll likely have a high success rate with minimal fuss.
The Best Time to Start
Now, when it comes to getting the most bang for your buck with new plant babies, late spring to early summer, right after the plant has finished its glorious bloom, is generally the sweet spot. The plant is still full of vigor, and the weather is usually forgiving. You can also have success with young shoots in early spring before they get too leggy.
Supplies You’ll Need
Gathering your supplies beforehand makes the whole process smoother. Here’s what I usually have on hand:
- Sharp pruning shears or a clean knife: For making clean cuts.
- A good quality seed starting mix or a blend of peat moss and perlite: This airy mix is crucial for preventing rot.
- Small pots or trays with drainage holes: Standard nursery pots work perfectly.
- Watering can with a fine rose spray: To water gently without disturbing things.
- Rooting hormone (optional but helpful): A little dip can boost root development. I prefer the powder form.
- Plastic bags or a propagation dome: To create a humid environment.
Propagation Methods
For Myosotis laxa, the easiest and most effective method is division. It’s like magic – you’re essentially multiplying your plant by intelligently splitting it.
- Prepare Your Tools: Make sure your trowel or spade is clean.
- Gently Excavate: Carefully dig around the base of your established forget-me-not plant, aiming to lift the entire root ball. Try not to be too rough.
- Inspect the Roots: Once it’s out of the ground, gently shake off some of the excess soil. You’ll see clumps of stems arising from a central root system.
- The Gentle Divide: You can often gently pull the plant apart with your hands. Look for natural breaking points where a clump of stems has its own set of roots. If it’s a bit stubborn, use your clean trowel or knife to make a decisive cut through the root ball, ensuring each new section has plenty of healthy roots and a few shoots.
- Potting Up: Immediately replant each division into its prepared pot filled with your airy soil mix. Make sure the crown of the plant (where the roots meet the stems) is at soil level.
- Water Well: Water thoroughly until water drains from the bottom.
The “Secret Sauce” (Pro Tips)
Here are a couple of little tricks that have served me well over the years:
- Don’t be afraid to trim back the foliage: After dividing, I’ll often trim back about a third of the leafy growth. This reduces water loss from the leaves while the roots are re-establishing. It sounds counterintuitive, but it really helps!
- Give them a little cozy home: After potting, I like to place the pots in a partially shaded spot and cover them loosely with a plastic bag or propagation dome. This maintains high humidity, which is crucial for the young divisions to settle in without drying out. Check them daily for condensation and remove the cover for a few hours if it gets too steamy.
Aftercare & Troubleshooting
Once your divided forget-me-nots are potted, keep the soil consistently moist but not soggy. Think of it as a well-wrung-out sponge. You should see new growth appearing within a few weeks. Once they’re looking robust and you’re confident they’ve established themselves (you’ll feel resistance when you gently tug), you can move them to their permanent home or give them to a friend!
The most common issue you might encounter is rot. This usually happens if the soil is too wet or if the humidity under the plastic cover is excessively high for too long. Yellowing leaves or a mushy stem base are often tell-tale signs. If you spot this, act quickly! Remove the affected plant, discard it to prevent spreading, and ensure the remaining ones have better air circulation and slightly less moisture.
A Encouraging Closing
So there you have it! Propagating Myosotis laxa is a simple pleasure, a little piece of gardening magic you can create yourself. Be patient with your new plants; they’re working hard to establish themselves. Take joy in the process, and soon you’ll have even more of those delightful blue blooms scattered throughout your garden. Happy planting!
Resource:
https://identify.plantnet.org/k-world-flora/species/Myosotis%20laxa%20Lehm./data