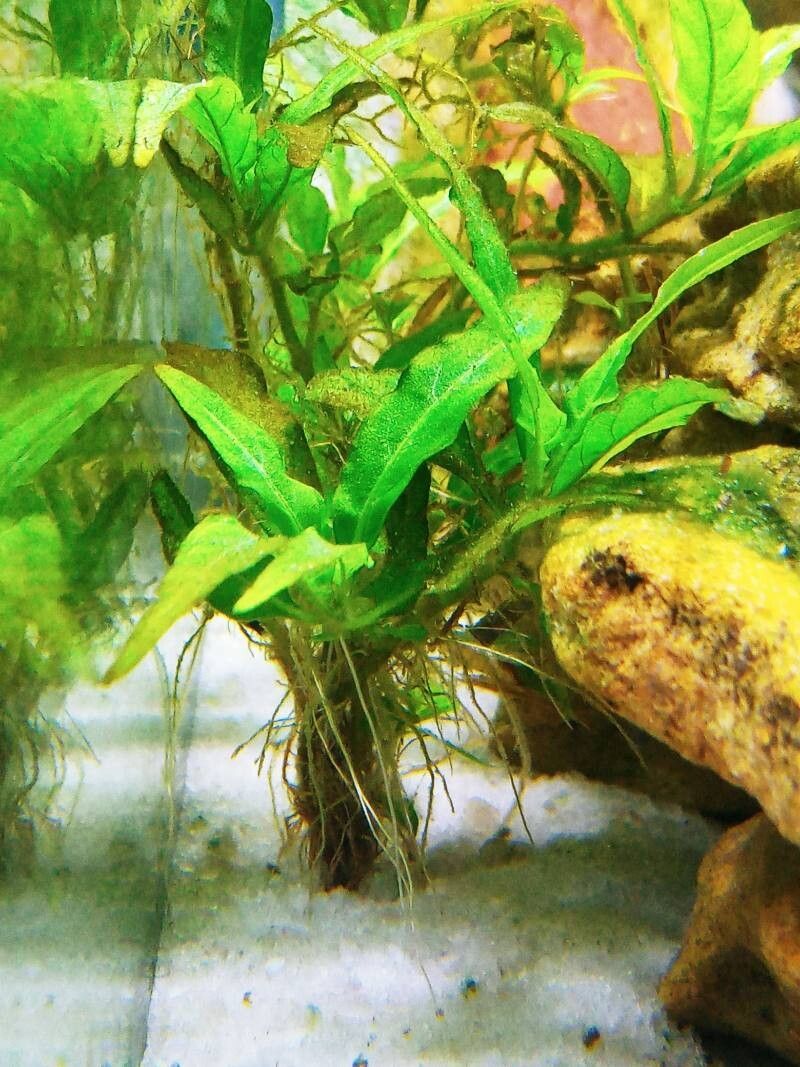
Hello fellow plant lovers! Today, we’re diving into the wonderful world of propagating Hygrophila costata, also known as Australian water-plantain. I’ve been growing and sharing this beauty for years now, and let me tell you, it’s a real winner. Its lush, green foliage brings a touch of the tropics to any space, and the best part? It’s surprisingly easy to multiply! If you’re looking for a plant to get your propagation journey started, this is a fantastic choice. You’ll be sharing cuttings with friends in no time.
The Perfect Time to Get Started
Spring and early summer are your absolute best friends when it comes to propagating Hygrophila costata. This is when the plant is in its most vigorous growth phase, meaning it has plenty of energy to put into developing new roots. You can also have success in late summer, but try to get your cuttings established before the days start to shorten significantly.
What You’ll Need for Success
Gathering your supplies beforehand makes the whole process much smoother. Here’s what I like to have on hand:
- Sharp Pruning Shears or a Craft Knife: Clean cuts are key to preventing disease.
- Rooting Hormone (Optional but Recommended): A little boost can speed things up. I prefer a powder or gel.
- A Well-Draining Potting Mix: For stem cuttings, I use a 50/50 blend of perlite and coco coir. For those who prefer water propagation, this isn’t needed at this stage!
- Clean Water: For water propagation.
- Clear Containers or Jars: For water propagation, so you can see those roots grow!
- Small Pots or Seedling Trays: For transplanting rooted cuttings.
- A Spray Bottle: For keeping things humid.
Easy Ways to Multiply Your Hygrophila
There are a couple of super simple ways to propagate Hygrophila costata. My personal favorite is stem cuttings, but water propagation is also incredibly effective and satisfying to watch.
Stem Cuttings:
- Select Your Cuttings: Look for healthy, non-flowering stems that are at least 4-6 inches long. Make your cut just below a leaf node. This is where the plant will send out roots.
- Prepare the Cutting: Gently remove the lower leaves from the cutting, leaving just 2-3 leaves at the top. If your cutting is long, don’t be afraid to trim it back a bit – it reduces water loss.
- Apply Rooting Hormone (Optional): Dip the cut end into your rooting hormone, tapping off any excess.
- Plant Your Cutting: Fill a small pot or seedling tray with your well-draining potting mix. Make a small hole with your finger or a pencil and gently insert the cutting, ensuring the leaf nodes you removed are buried. Firm the soil around it.
- Water and Cover: Water the soil thoroughly. Then, I like to cover the pot with a clear plastic bag or place it in a propagator to create a humid environment. Mist the inside of the bag lightly if you see condensation.
Water Propagation:
- Take Your Cuttings: Just like with stem cuttings, select healthy stems, at least 4-6 inches long, and cut just below a leaf node. Remove the bottom leaves.
- Place in Water: Pop your cuttings into a clean jar or glass filled with fresh water. Ensure that no leaves are submerged in the water. If they are, trim them off or adjust the water level.
- Find a Good Spot: Place the jar in a bright location out of direct sunlight.
The “Secret Sauce” – My Insider Tips
After years of fiddling with plants, I’ve picked up a few tricks that seem to make all the difference.
- The Power of Humidity: For stem cuttings, don’t skimp on the humidity. That plastic bag or propagator isn’t just for show; it’s crucial for preventing the cuttings from drying out before they can root.
- Don’t Overcrowd: When taking multiple cuttings for water propagation, give them a little space. Too many cuttings crammed together can lead to fungal issues.
- Patience with Water: In water propagation, you might not see roots for a week or two, and that’s perfectly normal. Resist the urge to keep changing the water daily; once every few days is usually sufficient unless it looks murky.
Aftercare and What to Watch For
Once you see those tiny white roots forming (hooray!), it’s time to transition.
- For Water Cuttings: Once your roots are about an inch long, you can gently transplant them into your well-draining potting mix. Keep the soil consistently moist but not soggy for the first couple of weeks. Continue to provide a humid environment, just like you did with the initial cuttings.
- For Soil Cuttings: Once you see new growth emerging from the top of the cutting, it’s a good sign that roots have formed. You can test this by giving the cutting a gentle tug – if there’s resistance, it’s rooted! Continue to keep the soil lightly moist.
Common signs of failure usually involve rot. If your cutting turns black and mushy, it’s a sign of too much moisture and not enough air circulation. This is why that well-draining soil and humidity balance are so important. Brown or crispy leaves usually mean it’s too dry.
So there you have it! Propagating Hygrophila costata is a simple, rewarding joy. Be patient with your little cuttings, enjoy the process of watching them grow, and soon you’ll have a whole new fleet of these beautiful plants to admire and share. Happy growing!
Resource:
https://identify.plantnet.org/k-world-flora/species/Hygrophila%20costata%20Nees/data