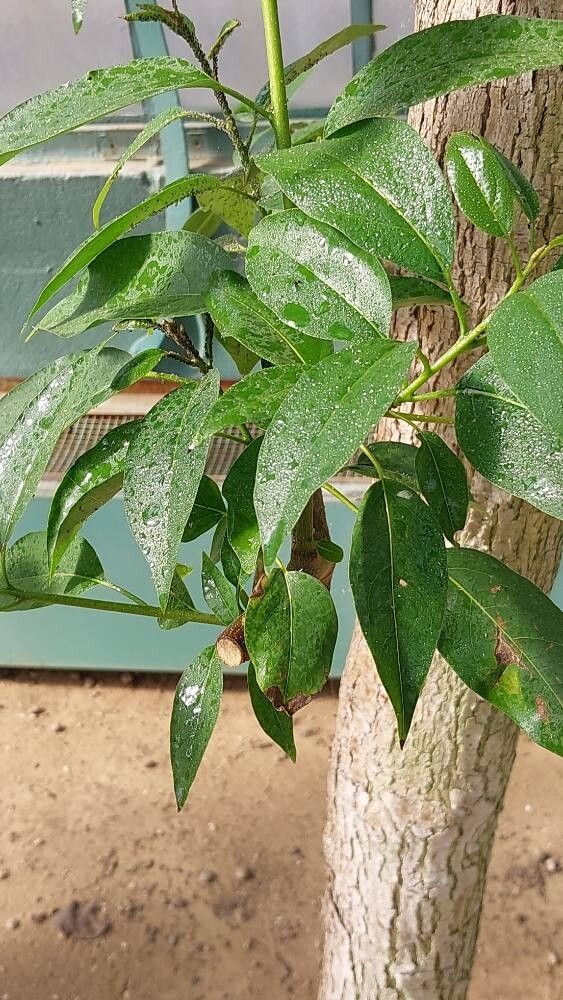
Oh, hello there! Pull up a chair, let’s chat about a real gem of the plant world: Diospyros ferrea. You might know it by its common names, like ironwood or satinwood. It’s got this lovely, dense foliage and a certain elegance that just makes a garden feel more grounded, more established. And the best part? Getting more of these beauties is a truly rewarding endeavor. Now, I’ll be honest, while Diospyros ferrea isn’t the absolute easiest plant for a complete beginner to propagate, it’s certainly achievable with a little patience and care. You’ll feel such a sense of accomplishment when your own little ironwood saplings start to grow!
The Best Time to Start
For Diospyros ferrea, the sweet spot for propagation is definitely late spring to early summer. This is when the plant is actively growing. You want to take cuttings from new, but not overly soft, growth from the current season. Think of it as taking a healthy teenager, not a brand-new sprout or an old, hardened branch. This active growth phase means the plant has plenty of energy to put into forming new roots.
Supplies You’ll Need
Here’s what I’ve found makes the job go smoothly:
- Sharp Pruning Shears or a Knife: Clean cuts are crucial to prevent disease.
- Rooting Hormone: A good quality rooting powder or gel will significantly boost your success rate.
- Well-Draining Potting Mix: I like a 50/50 blend of perlite and peat moss or coco coir. Some add a bit of coarse sand too.
- Small Pots or Seed Trays: Clean pots are a must!
- Plastic Bag or Humidity Dome: To keep those cuttings nice and humid.
- Optional: Heat Mat: This can be a real game-changer for encouraging root development.
Propagation Methods
I’ve had the most success with stem cuttings for Diospyros ferrea. It’s pretty straightforward!
- Take Your Cuttings: On a bright spring or early summer morning after the dew has dried, select healthy, semi-hardwood stems. Look for stems that are firm but still have a bit of flexibility. You want cuttings that are about 4-6 inches long. Make a clean cut just below a leaf node (where a leaf attaches to the stem). This is where the magic of root formation tends to happen.
- Prepare the Cuttings: Gently remove the lower leaves from your cuttings, leaving just a few at the very top. This prevents them from rotting in the soil and directs the plant’s energy towards rooting. If the remaining leaves are very large, you can even cut them in half to reduce water loss.
- Apply Rooting Hormone: Dip the cut end of each cutting into your rooting hormone. Make sure to tap off any excess.
- Plant Your Cuttings: Fill your clean pots with your prepared, moistened potting mix. Make a small hole in the center with your finger or a pencil, and carefully insert the base of each cutting. Gently firm the soil around the base to ensure good contact.
- Create a Humid Environment: Water the soil lightly. Then, either cover the pot with a clear plastic bag (propped up with stakes so it doesn’t touch the leaves) or place it under a humidity dome.
- Provide the Right Conditions: Place the pots in a bright location but out of direct sunlight. If you have a heat mat, now’s the time to use it! Warmth from below really speeds things up.
The “Secret Sauce” (Pro Tips)
Here are a couple of things I’ve learned over the years that can make a big difference:
- Bottom Heat is Your Friend: I cannot stress this enough. Diospyros ferrea absolutely loves a bit of warmth on its roots. A heat mat set to around 70-75°F (21-24°C) will dramatically increase your rooting success and speed. It mimics the warmth of the soil in the summer.
- Don’t Rush the Check: Resist the urge to constantly pull up your cuttings to see if they’ve rooted. You’ll disturb any developing rootlets. Wait at least 4-6 weeks, and even then, give a gentle tug. If you feel resistance, that’s a good sign!
- Sterilize Everything: I know it sounds tedious, but using clean pots, clean tools, and a clean workspace dramatically reduces the chances of fungal diseases, which are the bane of propagation. A quick scrub with soapy water and a rinse with diluted bleach can work wonders.
Aftercare & Troubleshooting
Once you start to see new growth on your cuttings – that’s your signal that roots are forming! At this point, you can gradually acclimate them to less humid conditions. Slowly open the plastic bag or humidity dome over a period of a week or two. You can then repot your rooted cuttings into slightly larger individual pots.
The most common issue you might face is rot. If a cutting turns black and mushy, it’s likely rotted. This is often due to too much moisture and not enough air circulation, or the presence of pathogens. If you see this, remove the affected cutting immediately to prevent it from spreading. Ensure your soil is very well-draining, and don’t overwater.
A Encouraging Closing
Starting new plants is like planting a little bit of hope, isn’t it? Be patient with your Diospyros ferrea cuttings. Sometimes they take their time, and that’s perfectly okay. Each attempt is a learning opportunity, and the joy of watching these little cuttings unfurl their first true leaves is simply unparalleled. So, get your hands in the soil, enjoy the process, and I can guarantee you’ll have a whole new appreciation for these wonderful ironwood trees! Happy propagating!
Resource:
https://identify.plantnet.org/k-world-flora/species/Diospyros%20ferrea%20(Willd.)%20Bakh./data