Oh, hello there! Come on in, let’s chat about plants. You know, I’ve been digging in the dirt for about two decades now, and one of the things that still brings a twinkle to my eye is watching a tiny piece of green turn into a whole new plant. It’s like magic, isn’t it?
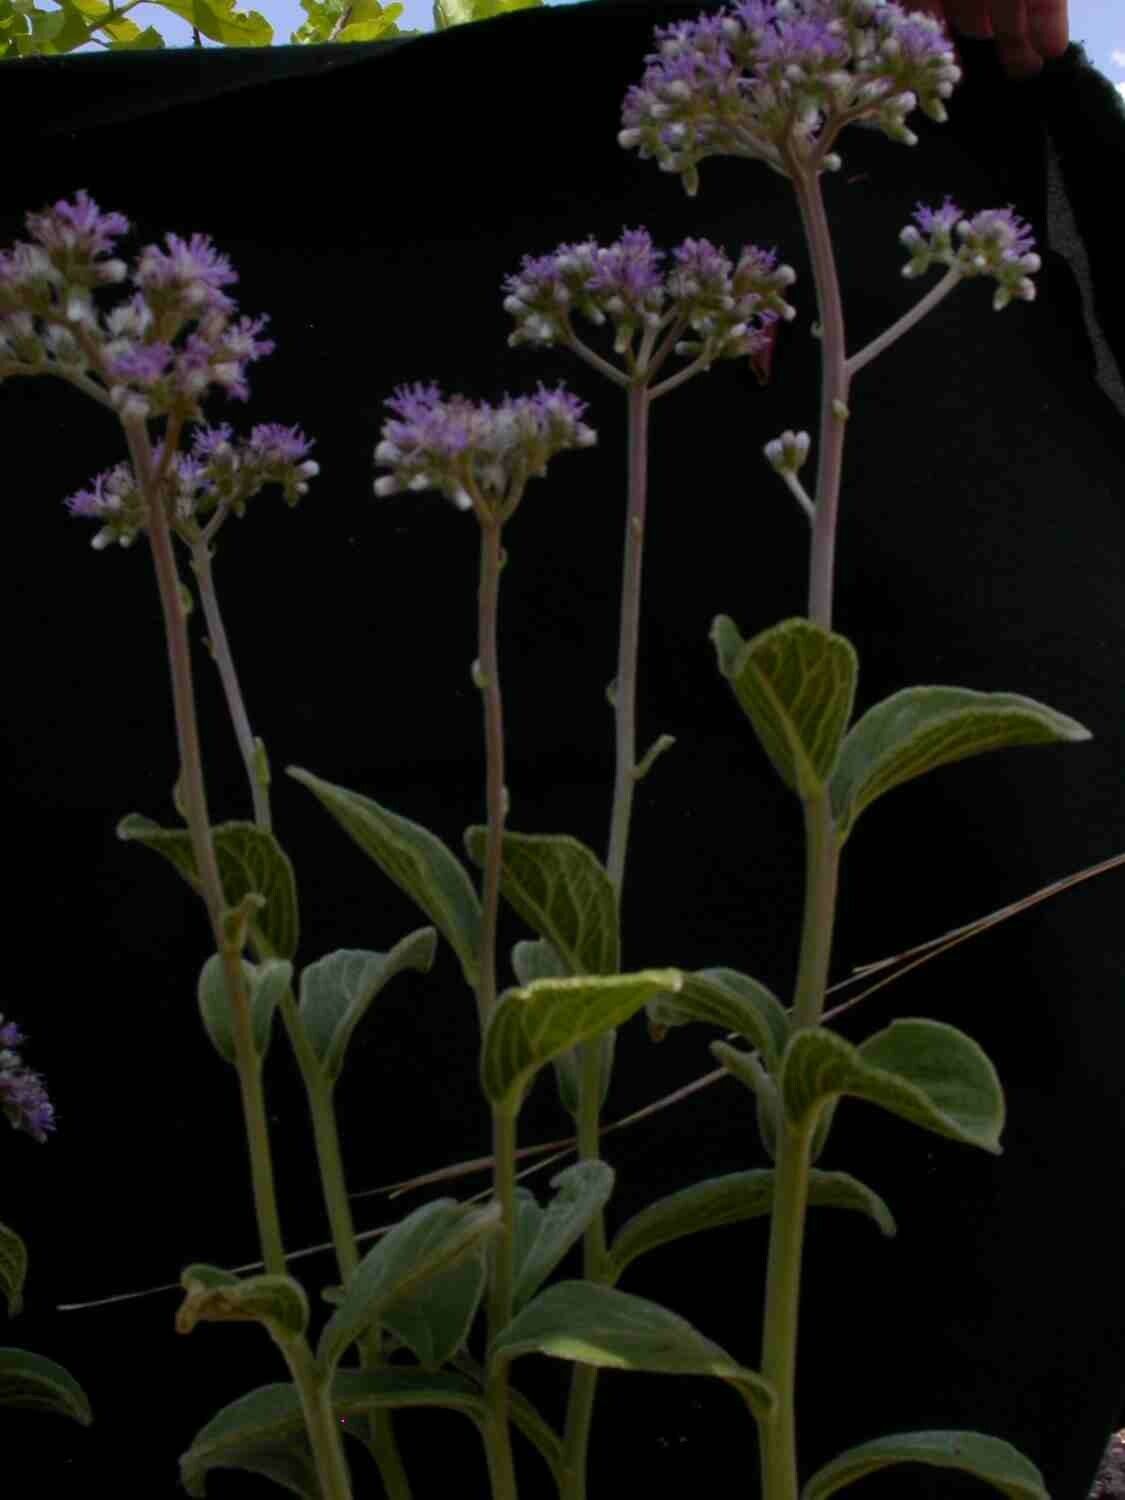
Today, I want to talk about Chrysolaena obovata. If you’re looking for a plant that’s a real joy to grow and propagate, this is one you’ll want to get to know. Its charming foliage, often with lovely silver undersides, adds such wonderful texture to a garden. And the satisfaction of multiplying your own plants? Absolutely priceless! Now, let me be frank: some plants can be a bit finicky, but Chrysolaena obovata is genuinely quite agreeable. I think even a beginner can have a lot of success with it.
The Best Time to Start
For the best results with Chrysolaena obovata, I always recommend starting your propagation efforts in late spring or early summer. This is when the plant is in its active growing phase. The stems are firm but still flexible, and they generally have the most energy to put into developing new roots. Trying to propagate when the plant is stressed, like during a heatwave or a cold snap, can be much more challenging.
Supplies You’ll Need
Gathering your supplies beforehand makes the whole process so much smoother. Here’s what I usually have on hand:
- Sharp Pruning Shears or a Clean Knife: For making clean cuts.
- Rooting Hormone (Optional but Recommended): I find it significantly speeds up the rooting process.
- Small Pots or Seedling Trays: Clean ones are a must to prevent disease.
- Well-Draining Potting Mix: A good blend is crucial. I often use a mix of perlite, peat moss, and a bit of compost. You can also find specific cutttering mixes in garden centers.
- Watering Can with a Fine Rose: For gentle watering.
- Plastic Bag or Clear Dome: To create a humid environment.
- Labels: Trust me, you’ll forget what you planted and when!
Propagation Methods
There are a couple of ways to go about this, and I find stem cuttings to be the most reliable for Chrysolaena obovata.
Stem Cuttings
This is my go-to method, and it’s quite straightforward.
- Take Cuttings: Select healthy, non-flowering stems from your parent plant. Look for stems that are about 4-6 inches long. Using your sharp shears or knife, make a clean cut just below a leaf node. This is where roots are most likely to form. Remove the leaves from the bottom half of the cutting, leaving just a few at the very top.
- Apply Rooting Hormone: If you’re using rooting hormone, dip the cut end of the stem into the powder or gel. Tap off any excess.
- Plant the Cuttings: Fill your small pots or trays with your well-draining potting mix. Make a hole in the center with your finger or a pencil. Insert the base of the cutting into the hole, making sure the leaf nodes are below the soil surface. Gently firm the soil around the cutting.
- Water Gently: Water the soil thoroughly, but avoid making it soggy. A good watering will help the soil settle around the cutting.
- Create Humidity: This is a key step! Cover the pot with a clear plastic bag or a propagation dome. This keeps the humidity high, which is essential for the cuttings to form roots before they dry out. Make sure the leaves aren’t touching the plastic if possible, as this can encourage rot. You might need to prop up the bag with a skewer or two.
- Place in Bright, Indirect Light: Find a warm spot that receives bright, indirect light. Avoid direct sun, which can scorch the tender cuttings.
Water Propagation
While I prefer soil for Chrysolaena obovata, some people have success with water propagation.
- Take Cuttings: Follow the same steps as above for taking cuttings.
- Place in Water: Put the cuttings in a clean jar or vase filled with fresh water.
- Change Water Regularly: Change the water every few days to keep it fresh and prevent bacterial growth.
- Avoid Leaf Submersion: Ensure that no leaves are submerged in the water, as this will lead to rot.
- Wait for Roots: You’ll see small white roots start to emerge from the nodes. Once the roots are about an inch long, you can carefully transplant them into pots with soil.
The “Secret Sauce” (Pro Tips)
After all these years, I’ve picked up a few tricks that can really make a difference.
- Bottom Heat is Your Friend: If you have a heat mat, using it under your propagation trays can significantly speed up root development. It mimics the warmth of spring soil, giving those cuttings a real boost.
- Don’t Be Afraid of Thinning: Once your cuttings have rooted (you’ll see new growth), if you have multiple cuttings very close together in a tray, it’s okay to carefully thin them out. This gives the remaining ones more space and resources.
- The “Tap Test” for Readiness: When you think your cuttings have rooted, you can give them a very gentle tug. If you feel resistance, that’s a good sign roots have formed. Of course, you can also carefully peek into the drainage holes if your pots have them.
Aftercare & Troubleshooting
Once you see roots and new growth, it’s time to switch gears slightly in your care.
- Acclimate Gradually: If you’ve been growing your cuttings in a humid environment (under plastic), gradually acclimate them to lower humidity before removing the cover completely. Open the bag or dome for a few hours each day for a week.
- Watering: Continue to water when the top inch of soil feels dry. Avoid overwatering, as this is the quickest way to invite trouble.
- Fertilizing: Wait until you see active new growth before lightly feeding. A diluted liquid fertilizer applied every few weeks is usually sufficient.
Now, for the not-so-fun part: troubleshooting. The most common issue you might face is rot. This usually happens due to overwatering or poor air circulation. If you see your cuttings turn mushy or black, it’s usually a sign of rot. Unfortunately, there’s no coming back from that, so it’s best to discard them and start again, perhaps with a slightly different watering schedule or better-draining soil. Another sign of failure is a cutting that simply shrivels up and shows no signs of rooting or new growth. This can happen if the cutting dried out too quickly or if it just wasn’t viable.
A Little Patience Goes a Long Way
Propagating plants is a journey, and like any good journey, it requires a bit of patience. Don’t get discouraged if your first few attempts aren’t perfect. Each time you try, you learn a little more, and your confidence will grow. The reward of nurturing a new plant from a tiny cutting is truly special. So, get your hands dirty, enjoy the process, and happy propagating!
Resource:
https://identify.plantnet.org/k-world-flora/species/Chrysolaena%20obovata%20(Less.)%20Dematt./data