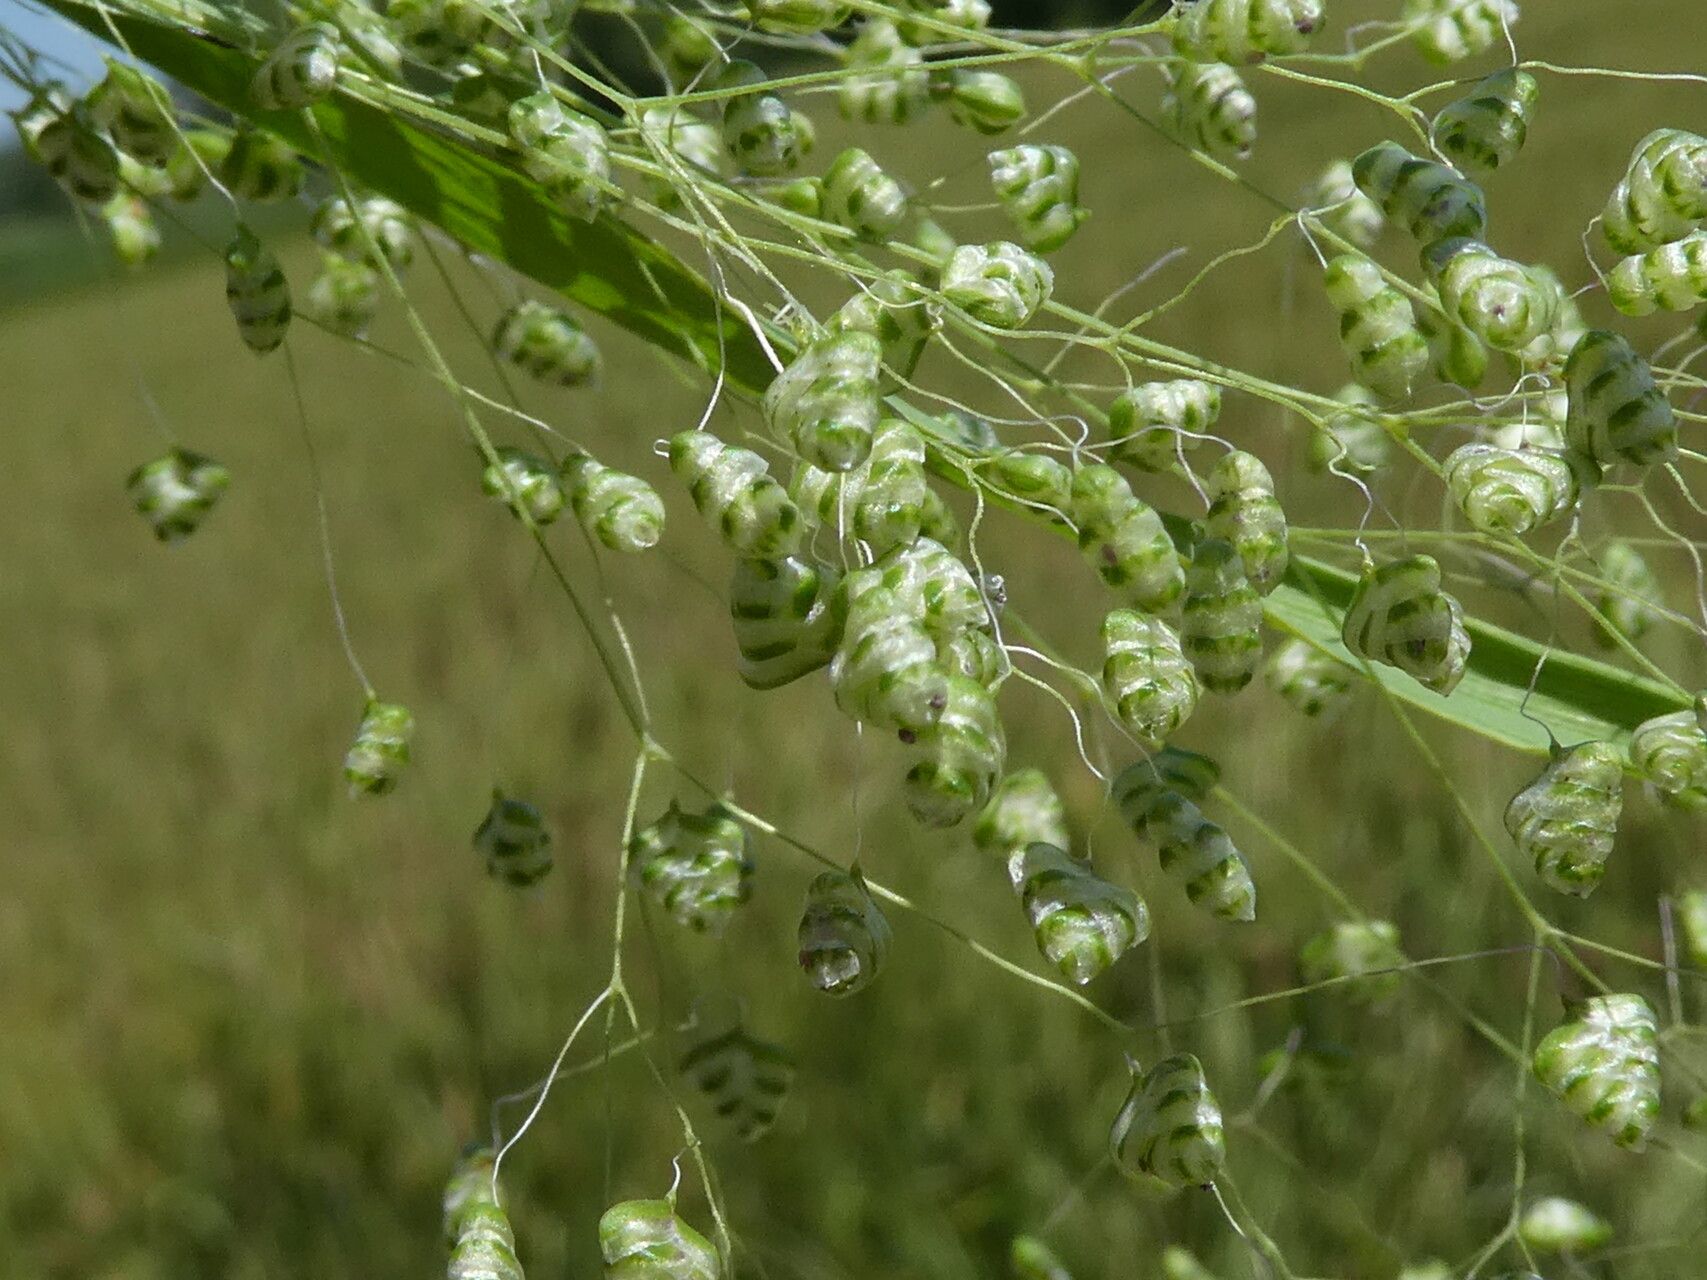
Oh, hello there! Come on in, grab a mug. Let’s talk about one of my absolute favorites: Briza minor, or as I affectionately call it, the Little Quake grass. This charming ornamental grass, with its delicate, nodding flower spikelets that look like tiny hearts trembling in the breeze, is just pure poetry in motion. And the best part? Sharing its beauty by propagating it is incredibly rewarding! If you’re new to the gardening game, you’ll be happy to know that Briza minor is generally pretty forgiving and a fantastic plant to start your propagation adventures with.
The Best Time to Start
For Briza minor, the sweet spot for propagation is spring. Think late March through May, when the days are getting longer and the soil is warming up. You’re looking to collect material from established, healthy plants that have finished their bloom cycle or are just starting to look a bit tired after their winter rest. Trying to propagate too early in the cold or too late in the heat of summer can make things trickier.
Supplies You’ll Need
Gathering your tools before you begin makes the whole process so much smoother. Here’s what I usually have on hand:
- Sharp, clean pruning shears or a knife: For making clean cuts. Sterilize them with rubbing alcohol between uses – it’s a simple step that prevents disease.
- Well-draining potting mix: A good blend of coarse sand, perlite, and peat moss works wonders. You can also find specific seed-starting mixes that are excellent.
- Small pots or seed trays: Clean ones, of course! Small apertures are perfect for young grass seedlings.
- Watering can with a fine rose attachment: To avoid disturbing tiny seedlings.
- Optional: Rooting hormone powder: While not strictly essential for Briza minor, it can give cuttings a little boost.
- Optional: Clear plastic bag or dome: To create a mini-greenhouse effect.
Propagation Methods
Briza minor is most readily propagated either by seed or division. Both are wonderfully effective ways to create more of this lovely grass.
From Seed: A Burst of New Life
This is probably the most straightforward method for Briza minor.
- Harvesting Seeds: Wait until the seed heads are brown and dry on the plant. You can often just gently shake the dried stalks over a container to collect the seeds. They’ll look like tiny grains.
- Sowing: Fill your seed tray or pots with your well-draining mix. Lightly moisten the soil. Sprinkle the seeds over the surface. You don’t need to bury them deeply – a light dusting of soil is enough, or sometimes just pressing them gently into the surface is all they need.
- Watering: Mist the sown seeds gently.
- Creating a Humid Environment: Cover the tray or pots with a clear plastic bag or a propagator lid. This keeps the moisture in.
- Location: Place the tray in a bright spot, but out of direct, harsh sunlight. A windowsill is often ideal.
- Germination: Keep the soil consistently moist but not soggy. You should start to see tiny green shoots emerging within 10-20 days.
By Division: Sharing the Wealth
This method is perfect if you already have a mature Briza minor plant you want to share or multiply.
- Timing: The absolute best time to divide is in early spring as soon as new growth begins to emerge.
- Excavate Gently: Carefully dig up the entire clump. It’s best to do this when the soil is slightly moist, not bone dry or waterlogged.
- Separate the Clumps: Gently pull the clumps apart with your hands. For tougher clumps, you might need to use a clean trowel or knife to slice through the roots. Aim for divisions that have a good amount of roots and several healthy shoots.
- Replant Immediately: Plant your new divisions into pots filled with your well-draining potting mix. The crown of the plant should be at soil level.
- Water In: Water thoroughly to settle the soil around the roots.
The “Secret Sauce” (Pro Tips)
As you get more comfortable, you’ll discover little tricks that make a big difference.
- For divisions, don’t be afraid to prune back the foliage by about a third. This helps the plant focus its energy on establishing new roots instead of supporting a lot of overhead greenery. Your divided clumps might look a bit sad for a few days, but they’ll bounce back!
- When sowing seeds, I often find that lightly tamping down the soil after sowing, rather than pressing individual seeds, gives a more even germination. It just ensures good seed-to-soil contact.
- If you’re using a propagator and notice condensation building up heavily, give it a quick airing out for an hour or so each day to prevent fungal issues.
Aftercare & Troubleshooting
Once your Briza minor seedlings are a few inches tall or your divisions have settled in (you’ll see new growth appearing), you can gradually acclimate them to conditions outside their humid nursery.
- Watering: Keep the soil consistently moist, but let it dry out slightly between waterings. Overwatering is the quickest way to encourage problems.
- Light: Gradually introduce them to brighter light. Once they are robust seedlings, full sun is ideal for Briza minor.
- Feeding: You won’t need to feed them heavily at first. A light application of a balanced liquid fertilizer, diluted to half strength, can be given once they are a few weeks old if they seem to be lacking vigor.
The most common issue you might encounter is damping-off, which is a fungal disease that causes seedlings to rot at the soil line. This is usually a sign of overwatering or poor air circulation. If you see this happening, remove the affected seedlings immediately and ensure you have better airflow and a less waterlogged environment. If divisions look limp and yellow and don’t start showing new growth, they might not have established enough roots, or they could have been damaged during the separation process. Sometimes, sadly, some won’t make it, and that’s part of the learning curve!
Your Greener Thumb Awaits!
Don’t get discouraged if your first attempt isn’t perfect! Every gardener has had their share of learning experiences. Propagation is all about observation, a little patience, and the sheer joy of creating more beauty to enjoy. So go ahead, get your hands in the soil, and have fun growing your own little quakes! You’ve got this.
Resource:
https://identify.plantnet.org/k-world-flora/species/Briza%20minor%20L./data