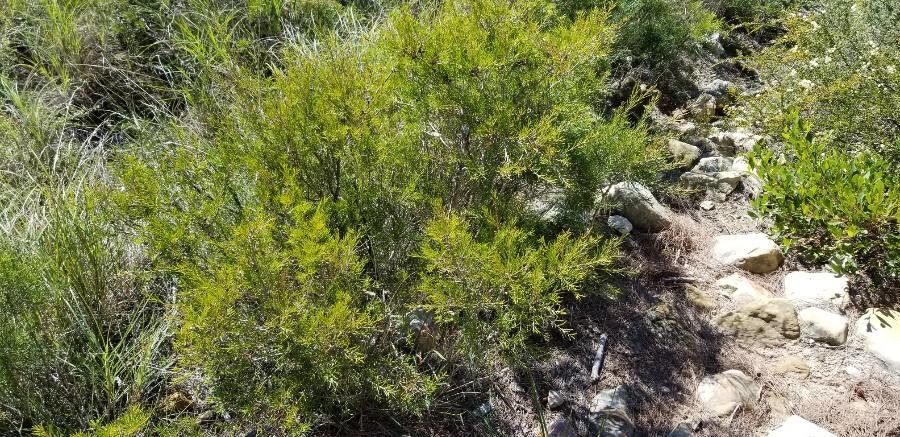
Hello fellow garden enthusiasts! I’m so excited to talk to you today about a plant that’s been capturing my heart for years: Allocasuarina thalassoscopica. You might know it by its more common names, like the coastal she-oak or even just tall casuarina. Its delicate, needle-like foliage and graceful, weeping habit make it a stunning addition to any landscape, especially coastal areas. And trust me, propagating it yourself is incredibly rewarding. Now, for the beginners out there, I’d say Allocasuarina thalassoscopica is moderately easy. It’s not quite pick-up-and-go, but with a little attention and the right approach, you’ll be creating a whole new generation of these beauties in no time.
The Best Time to Start
For Allocasuarina thalassoscopica, I’ve found the sweet spot for propagation is generally late spring to early summer. This is when the plant is actively growing and has plenty of that youthful vigor you want for successful rooting. Look for healthy, new growth that’s slightly firm but not woody. If you try too early, the cuttings might not have enough energy. Too late, and they might struggle to establish before cooler weather sets in.
Supplies You’ll Need
Here’s what you’ll want to gather before you get started:
- Sharp, clean pruning shears or a craft knife: Essential for making clean cuts.
- Rooting hormone (powder or gel): This is a real game-changer, giving your cuttings a helpful boost.
- A well-draining potting mix: I like a blend of perlite, coarse sand, and a good quality potting soil. You want it to drain like a sieve, honestly.
- Small pots or seedling trays: Clean ones are a must.
- Plastic bags or a propagator: To create a humid environment.
- Water: For misting and watering.
- Optional: Bottom heat mat: This can significantly speed up rooting.
Propagation Methods: Stem Cuttings
This is my go-to method for Allocasuarina thalassoscopica. It’s reliable and you can get multiple plants from a single parent.
- Select your cuttings: Look for healthy, semi-hardwood stems. Aim for pieces about 4-6 inches long. Remove any flowering or fruiting structures.
- Prepare your cuttings: Gently strip off the lower leaves, leaving a clean stem of about 1-2 inches. If the leaves are very small, you can leave them on the upper part of the cutting.
- Dip in rooting hormone: Dip the cut end of each cutting into your rooting hormone, tapping off any excess. Make sure the bottom inch or so is well-coated.
- Plant your cuttings: Fill your clean pots or trays with your well-draining potting mix. Make a small hole in the center of each with a pencil or your finger. Gently insert each cutting into the hole, making sure the rooting hormone stays on the stem. Firm the soil gently around the base of the cutting.
- Create humidity: Water the soil thoroughly after planting. Then, cover the pots loosely with a plastic bag or place them in a propagator. This is crucial for keeping the humidity high and preventing the cuttings from drying out. You can prop the bag up with a couple of stakes to keep it from touching the foliage.
The “Secret Sauce” (Pro Tips)
Now, for a few things I’ve learned over the years that make a real difference:
- Don’t overdo the rooting hormone. A light coating is all you need. Too much can actually inhibit rooting.
- Bottom heat is your friend. Even a gentle warming from a heat mat can work wonders. It encourages root development from the base upwards. Imagine giving your little cuttings a nice warm bath!
- Cleanliness is paramount. Always use sterilized tools and pots. Fungal infections are the bane of propagation, so being meticulous here will save you a lot of heartache.
Aftercare & Troubleshooting
Once your cuttings are planted, keep them in a bright spot but out of direct sunlight. The humidity is key, so mist them gently every few days if they seem dry, or if you notice condensation on your humidity dome.
You’ll know your cuttings are rooting when you see new growth appearing from the tips or leaf nodes. This usually takes anywhere from 4-8 weeks, but be patient! Gently tugging on a cutting is another way to check; if there’s resistance, roots are forming.
The most common problem you’ll encounter is rot. If you see your cuttings wilting, turning black, or becoming mushy at the base, it’s usually a sign of too much moisture and poor drainage, or a fungal issue. In this case, often they can’t be saved. It’s a tough lesson, but it’s part of the process. If you catch it early, you can try repotting in fresh, dry mix, but prevention is always better. Ensure your soil drains exceptionally well.
A Encouraging Closing
Propagating new plants can feel like a bit of magic, and with Allocasuarina thalassoscopica, it truly is. Don’t be discouraged if your first attempt isn’t perfect. Gardening is a journey of learning and observation. Enjoy the process, celebrate each tiny success, and before you know it, you’ll have a small forest of these gorgeous she-oaks to share or enjoy in your own garden. Happy propagating!
Resource: