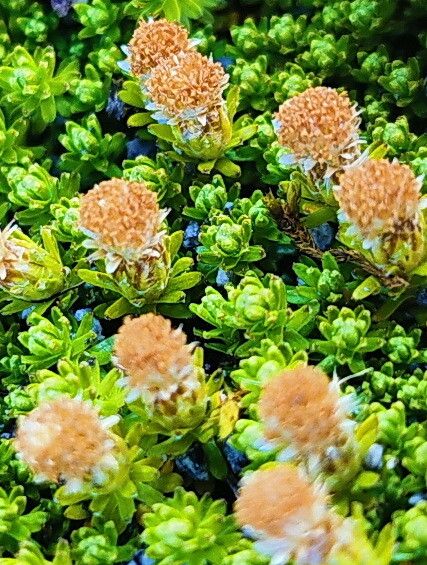
Oh, Raoulia glabra! If you’ve ever seen this little gem, you’ll understand the attraction. It’s that charming, low-growing alpine that forms dense mats of silvery, woolly leaves. It looks like a miniature, fuzzy sheep grazing your garden path, or a perfectly sculpted moss garden without all the fuss. Bringing more of this delightful plant into your life is incredibly rewarding, and guess what? It’s not too tricky to propagate, even for those of you just starting your gardening adventures.
The Best Time to Start
For Raoulia glabra, spring is truly your golden ticket. Think of it as giving your new plant babies the best possible start. When the weather warms up and the plant is actively growing, it has all the energy it needs to put out roots. Aim for late spring or early summer, after the worst of the frost has passed but before the intense heat of mid-summer sets in. This gives them a nice, long growing season to establish themselves.
Supplies You’ll Need
You don’t need a fancy greenhouse for this, just a few essentials:
- Sharp pruning shears or a clean knife: For making clean cuts.
- Small pots or trays: With drainage holes, of course!
- A well-draining potting mix: I like a mix of compost, perlite, and a bit of sharp sand. Raoulia hates soggy roots.
- Rooting hormone (optional but recommended): A little boost never hurts!
- A spray bottle or misting system: For keeping things humid.
- A clear plastic bag or a propagation lid: To create a mini-greenhouse effect.
- Gravel or grit: For excellent drainage in your pots.
Propagation Methods
I find that stem cuttings are the most reliable way to increase your Raoulia glabra collection.
- Select your cuttings: Look for healthy, non-flowering stems. You want pieces that are about 3-4 inches long. Gently twist or snip them off from the parent plant.
- Prepare the cuttings: Carefully remove the lower leaves. You want a bit of bare stem to encourage rooting. If you’re using rooting hormone, dip the cut end into it now.
- Plant them up: Fill your pots with your well-draining mix. Make a small hole with a pencil or your finger and insert the cutting, firming the soil gently around it.
- Water them in: Give them a good, gentle watering to settle the soil around the cuttings.
- Create a humid environment: Pop the pot into a clear plastic bag, sealing it to trap humidity, or cover it with a propagation lid. Place it in a bright spot, but out of direct sunlight. Direct sun will scorch those delicate new cuttings.
If you have a larger clump of Raoulia that’s starting to look a bit woody in the center, division is another excellent option.
- Gently dig up the plant: Carefully lift the entire clump from the soil.
- Separate the sections: Tease apart the root ball into smaller sections, making sure each section has healthy roots and some leafy growth. You might need to use your fingers or a clean trowel to help.
- Replant immediately: Plant each division directly into well-draining soil in pots or your garden. Water them in and keep them slightly moist until they establish.
The “Secret Sauce” (Pro Tips)
Here are a couple of things I’ve learned over the years that can really make a difference:
- Give it some warmth from below: A heated propagator mat can work wonders for encouraging root development, especially if your spring is a bit cool. It’s like a cozy little incubator for your cuttings.
- Don’t let the leaves touch the soil: When you’re propagating, especially in a humid environment, any leaves resting on damp soil are a prime spot for fungal issues to take hold. Pinch off lower leaves so only the stem is in contact with the potting mix.
- Be patient with the misting: For stem cuttings, a light misting a couple of times a day is usually enough. You want that humidity, but you don’t want to see water sitting on the leaves for too long. We’re aiming for moist, not waterlogged.
Aftercare & Troubleshooting
Once you see new growth appearing on your cuttings, that’s a fantastic sign that roots are forming! You can gently tug on a cutting to feel for resistance; that indicates roots have taken hold. At this point, you can start to gradually acclimatize them to drier air by opening the plastic bag a little each day over a week or so. Water them whenever the top inch of soil feels dry.
The most common issue you’ll likely face is rot. This usually happens if the soil is too wet and there’s not enough air circulation. If you see a cutting turning black and mushy, unfortunately, it’s best to discard it to prevent it from spreading. Make sure your potting mix is super free-draining, and avoid overcrowding your pots.
A Encouraging Closing
Propagating Raoulia glabra is a lovely way to fill your garden with more of this fuzzy delight. There will be moments you wonder if it’s working, but stick with it! Nature has its own rhythm, and with a little care and patience, you’ll soon be admiring those tiny new plants. Happy gardening!
Resource:
https://identify.plantnet.org/k-world-flora/species/Raoulia%20glabra%20Hook.f./data