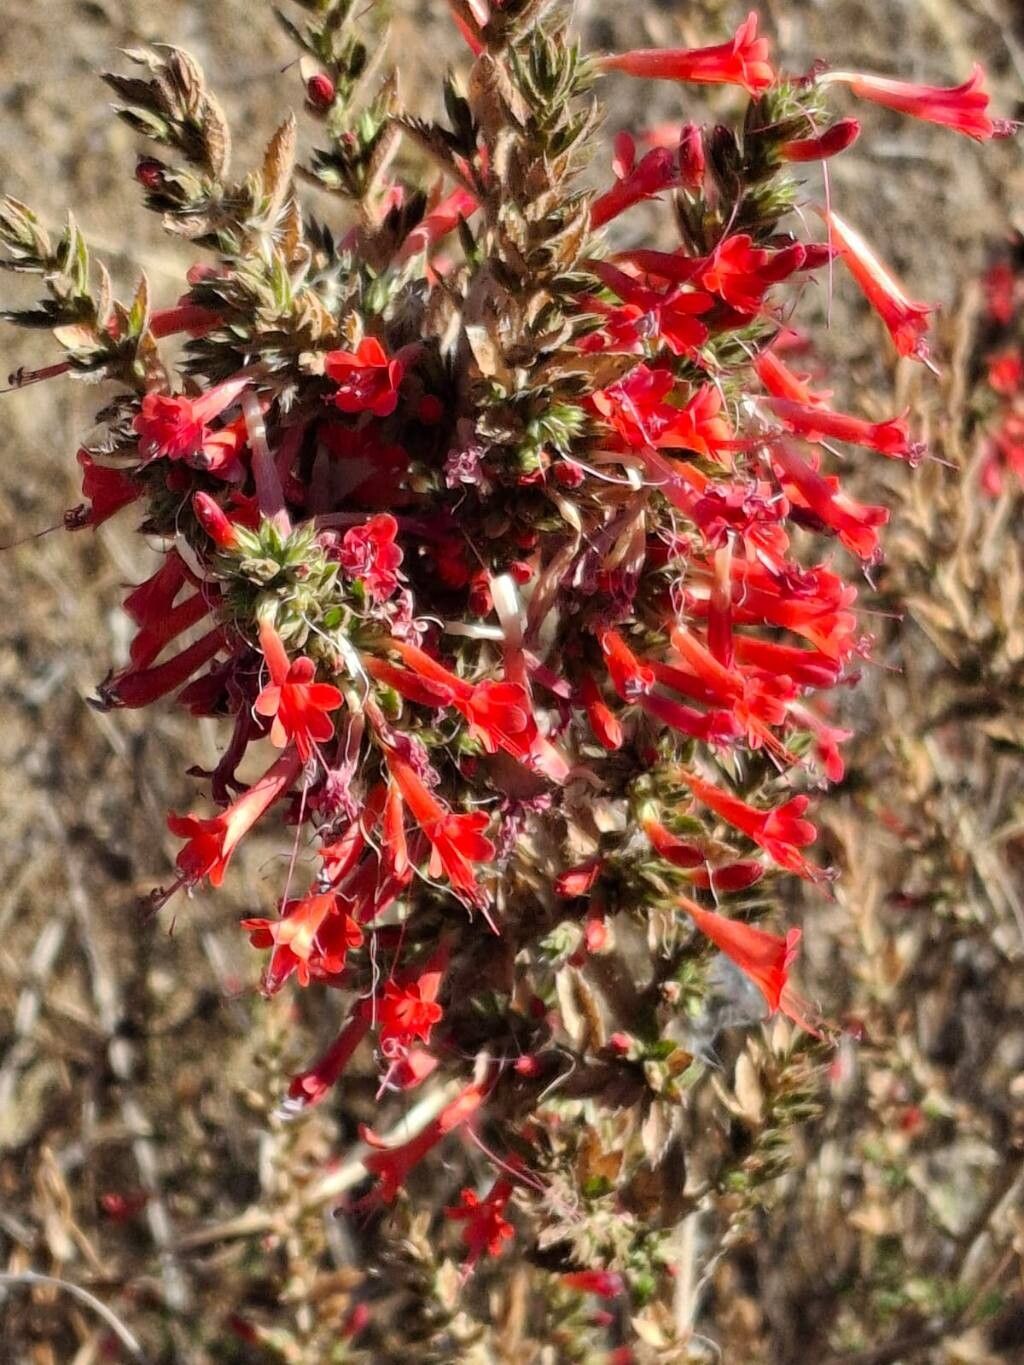
Oh, hello there! Pull up a chair and let’s chat about a truly special bloom: Loeselia mexicana. If you’ve ever seen this beauty, you know what I mean. Its vibrant, almost fiery orange-red tubular flowers are a magnet for hummingbirds, and its native charm adds a touch of wild elegance to any garden. Propagating Loeselia mexicana might sound a little intimidating at first glance, but I promise, with a little gentle guidance, you’ll be well on your way to enjoying more of this stunning plant. It’s a truly rewarding process, watching a tiny cutting transform into a thriving new specimen. For beginners, I’d say it’s moderately challenging – not impossible, but it rewards careful attention.
The Best Time to Start
When it comes to getting a jump on propagating Loeselia mexicana, I’ve found that spring is your absolute best bet. Aim for when the plant is actively growing, but before the really intense summer heat kicks in. This gives your new cuttings plenty of time to establish themselves before the weather gets too tough. Think of it as giving them a gentle start in life.
Supplies You’ll Need
Before we dive in, let’s gather our tools:
- Sharp, clean pruning shears or a razor blade: For making clean cuts.
- Rooting hormone (optional, but helpful): A good powder or liquid can give your cuttings an extra boost.
- A well-draining potting mix: I like to use a mix of equal parts peat moss or coco coir and perlite or coarse sand.
- Small pots or seedling trays: With drainage holes, of course!
- A clear plastic bag or a propagator lid: To create a humid environment.
- Watering can with a fine rose or a spray bottle: For gentle watering.
- Labels and a permanent marker: To keep track of your green babies.
Propagation Methods
Loeselia mexicana is most readily propagated from stem cuttings. This is my go-to method, and it usually yields fantastic results.
Stem Cuttings:
- Select your cutting: Look for a healthy, non-flowering stem that is about 4-6 inches long. It should be somewhat firm but still flexible – we call this “semi-hardwood.” Avoid anything too woody or too soft and floppy.
- Make the cut: Using your sharp, clean shears or razor blade, make a clean cut just below a leaf node (where a leaf attaches to the stem). This is where the plant is most likely to develop roots.
- Prepare the cutting: Gently remove the lower leaves from the cutting, leaving just a few at the top. This prevents them from rotting in the soil.
- Apply rooting hormone (if using): Dip the cut end of the stem into your rooting hormone, tapping off any excess.
- Plant your cuttings: Moisten your potting mix slightly. Make small holes in the mix with a pencil or your finger, and gently insert the cuttings about an inch deep. Firm the soil gently around them.
- Create humidity: Water the soil lightly. Then, cover the pots with a clear plastic bag, securing it loosely with a rubber band, or place the pots inside a propagator with a lid. This creates a mini-greenhouse effect, keeping the humidity high, which is crucial for cuttings. Place them in a bright spot, but avoid direct, harsh sunlight – it can scorch your delicate cuttings.
The “Secret Sauce” (Pro Tips)
Now, for a couple of little tricks I’ve learned over the years that can make all the difference:
- Bottom heat is your friend! If you have a seedling heat mat, placing your pots on it can significantly speed up root development. The warmth encourages those roots to start reaching out.
- Don’t drown them! While they need humidity, soggy soil is the enemy. It’s better to err on the side of slightly too dry than too wet. Check the soil moisture regularly and water only when the top inch feels dry. Overwatering is the quickest way to invite rot.
Aftercare & Troubleshooting
Once you start seeing signs of new growth – tiny leaves unfurling at the top – that’s your cue that roots are forming! You can gently tug on a cutting; if there’s resistance, it’s rooted. Keep the humidity high for a few more weeks, gradually acclimatizing them to lower humidity by opening the bag or propagator a little more each day. Once they are well-established, you can transplant them into their own individual pots.
Now, what if things go wrong? The most common culprit is rot. If your cuttings turn black and mushy, it’s usually due to too much moisture and not enough airflow. If you see signs of wilting or yellowing leaves before rooting, it could be too much direct sun or inconsistent watering. If a cutting fails, don’t despair! Simply discard it and try again. Every cutting is a learning opportunity.
A Encouraging Closing
Remember, gardening is a journey, and propagating plants is a wonderful way to connect with nature’s cycles. Be patient, observe your cuttings, and celebrate every little success. The joy of nurturing a new plant from a tiny piece of another is truly unmatched. Happy propagating!
Resource:
https://identify.plantnet.org/k-world-flora/species/Loeselia%20mexicana%20(Lam.)%20Brand/data