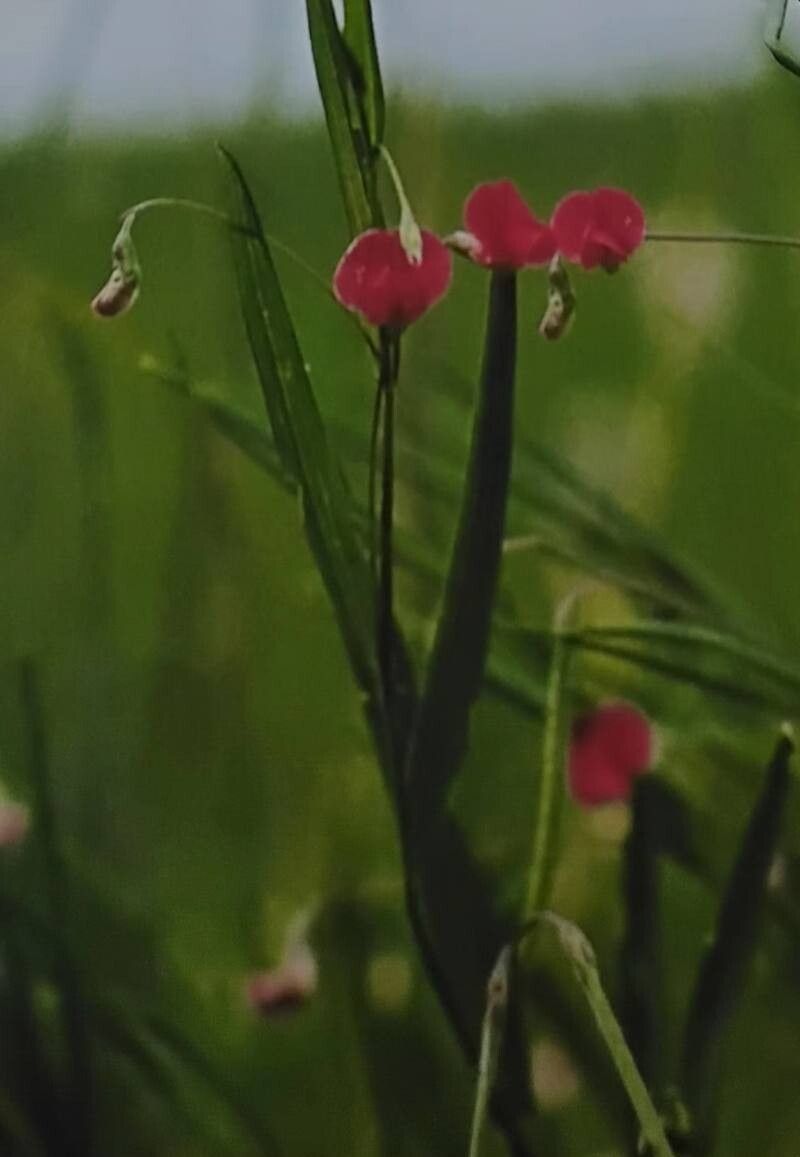
Oh, Lathyrus nissolia! What a charmer. It’s one of those understated beauties that really catches your eye when you see it in bloom. Often called Grass Vetchling because of its grass-like foliage, this little annual has delicate, vibrant flowers that pop against the greenery. And you know, propagating it yourself? It’s incredibly satisfying. You get to watch these tiny, potentially unassuming seeds or cuttings transform into a whole new wave of your favorite plant. Is it a beginner’s dream? Well, it’s definitely doable, especially with a few pointers.
The Best Time to Start
For Lathyrus nissolia, I find that sowing seeds directly outdoors in early spring is your golden ticket. As soon as the soil is workable after the last frost, get those seeds in the ground. If you’re feeling adventurous and want to try stem cuttings, late spring or early summer, when the plant is actively growing and has plenty of young, flexible stems, is the time to go for it.
Supplies You’ll Need
Here’s what I usually have on hand when I’m getting ready to propagate:
- Seeds: Freshly harvested or good quality purchased seeds.
- Seed-starting mix: A light, well-draining blend. You can buy this or make your own with peat moss or coco coir, perlite, and a little compost.
- Small pots or seed trays: With drainage holes, of course!
- Pruning shears or sharp knife: For taking cuttings. Make sure they’re clean!
- Rooting hormone (optional but helpful for cuttings): Powder or gel.
- Spray bottle: For misting.
- Clear plastic bag or propagation dome: To create a humid environment for cuttings.
- Water: Always.
Propagation Methods
Let’s get our hands dirty!
Seed Starting (The Easiest Route)
- Prepare your site: Choose a spot in your garden that gets plenty of sun and has good drainage. Loosen the soil to about 6 inches deep.
- Sow the seeds: Scatter the Lathyrus nissolia seeds thinly directly onto the prepared soil. You can lightly rake them in, covering them with about ¼ inch of soil.
- Water gently: Use a watering can with a fine rose to water the area thoroughly but without washing the seeds away.
- Keep moist: Over the next few weeks, keep the soil consistently moist, but not waterlogged. You’ll start to see tiny seedlings emerge.
Stem Cuttings (A Bit More Involved)
- Select your cuttings: Look for healthy, non-flowering stems that are about 3-4 inches long. You want pieces that are somewhat flexible but not woody.
- Make the cut: Using your clean pruners or knife, make a cut just below a leaf node (where a leaf attaches to the stem).
- Prepare the cuttings: Gently remove the lower leaves from the cutting, leaving just a couple of leaves at the top.
- Apply rooting hormone (optional): Dip the cut end of the stem into your rooting hormone.
- Plant the cuttings: Fill your small pots or seed tray with your seed-starting mix. Make a small hole with a pencil or your finger and insert the cutting. Gently firm the soil around the stem.
- Water and cover: Water the soil lightly and then cover the pot with a clear plastic bag or propagation dome. This is crucial for maintaining humidity.
- Place in bright, indirect light: Find a warm spot, but out of direct, harsh sunlight.
The “Secret Sauce”
Here are a couple of things I’ve learned over the years that really make a difference:
- For cuttings, bottom heat is your friend. If you have a seedling heat mat, placing your potted cuttings on it can significantly speed up root development. It mimics the warmth of the soil surface after a good rain.
- Don’t overcrowd your cuttings. Even though it’s tempting to pack them in, giving each cutting a little space helps prevent the spread of any potential fungal issues and ensures they all get enough air circulation.
Aftercare & Troubleshooting
Once your Lathyrus nissolia seedlings are a few inches tall, or your cuttings have developed a good root system (you might see roots peeking out of the drainage holes or feel a bit of resistance when you gently tug), it’s time for them to move to their permanent home.
- Harden off carefully: If you started seeds or cuttings indoors, gradually acclimate them to outdoor conditions over a week or two. Start by placing them outside in a sheltered spot for a few hours each day, increasing the time and exposure slowly.
- Transplanting: When transplanting, water your new plants well.
- Watch for rot: The most common enemy of newly propagated plants is rot, often caused by overwatering or poor drainage. If your cuttings look limp and mushy at the base, or if your seedlings are collapsing, it’s a sign of too much moisture. Pull back on watering and ensure good air flow. Sometimes, it’s too late, but often, letting the soil dry out slightly and improving ventilation can save them. If you see mold on the soil surface, remove the affected parts and increase air circulation.
A Gentle Reminder
Propagating plants is a journey, and sometimes it’s a patient one. Don’t be discouraged if every single attempt doesn’t work out perfectly. The joy is in the trying, the learning, and the eventual success of seeing your Lathyrus nissolia flourish thanks to your own efforts. Happy gardening!
Resource:
https://identify.plantnet.org/k-world-flora/species/Lathyrus%20nissolia%20L./data