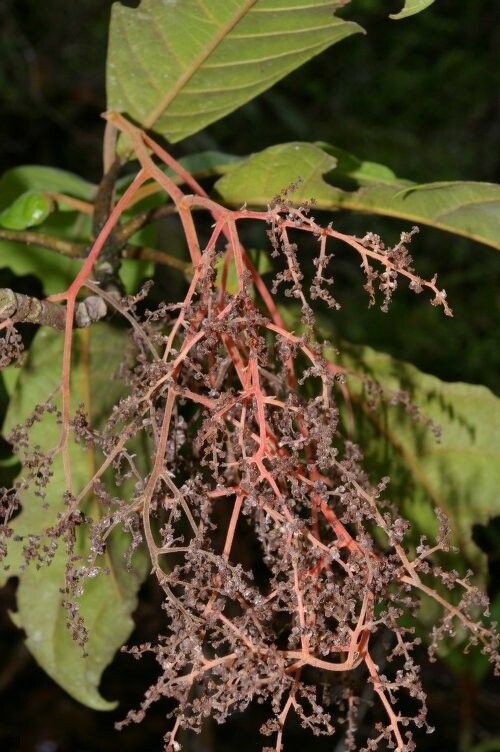
Hey there, fellow plant lovers! Today, we’re diving into the wonderful world of propagating Endlicheria directonervia. This beautiful plant, with its glossy, deep green leaves and often delicately fragrant flowers, is a real gem in any collection. Seeing a tiny cutting transform into a thriving new specimen is one of the most satisfying experiences in gardening, and with Endlicheria directonervia, it’s a journey that’s absolutely worth taking. Now, is it a walk in the park? For a complete beginner, it might present a few learning curves, but with a little guidance, you’ll be well on your way to success.
The Best Time to Start
Timing is everything when it comes to coaxing new life from our plants. For Endlicheria directonervia, the sweet spot is generally late spring to early summer. This is when the plant is actively growing and has plenty of energy to put into developing new roots. You’re looking for stems that are semi-hardwood – they’ve matured somewhat but still have a bit of flexibility. Avoid brand new, bright green growth that’s too soft, and also avoid old, woody stems.
Supplies You’ll Need
Gathering your tools beforehand makes the whole process smoother. Here’s what I recommend having on hand:
- Sharp, clean pruning shears or a sterile knife: For making clean cuts.
- Rooting hormone (optional but helpful): I like to use a powder form.
- A well-draining potting mix: A blend of perlite, peat moss, and a bit of compost is excellent. You can also use a dedicated seed-starting mix.
- Small pots or seed trays: With drainage holes, of course!
- Plastic bags or a propagation dome: To create a humid environment.
- Perlite or coarse sand: For mixing into your potting medium if it’s too dense.
- Spray bottle: For misting.
Propagation Methods
Let’s get our hands dirty! Stem cuttings are my go-to for Endlicheria directonervia.
- Take Your Cuttings: Select a healthy stem that fits the semi-hardwood description. Using your sharp shears, make a clean cut just below a leaf node (where a leaf attaches to the stem). Aim for cuttings about 4-6 inches long. Remove the lower leaves, leaving just two or three at the top.
- Prepare the Cuttings: If you’re using rooting hormone, dip the cut end of the stem into the powder, tapping off any excess.
- Plant Your Cuttings: Fill your small pots or trays with your prepared potting mix. Make a small hole in the center of the mix using a pencil or your finger. Gently insert the cut end of your Endlicheria cutting into the hole, ensuring the leaf nodes that were just below the soil line are covered. Firm the soil gently around the stem.
- Create a Humid Environment: Water the soil thoroughly but gently. Then, and this is key, cover the pot with a clear plastic bag or a propagation dome. This traps moisture, which is crucial for encouraging root development. Make sure the leaves aren’t touching the plastic if possible – an occasional propping up with a small stick can help.
- Find the Right Spot: Place your pots in a bright location, but out of direct sunlight. Too much sun will scorch those tender cuttings. Consistent warmth is also beneficial.
The “Secret Sauce” (Pro Tips)
Over the years, I’ve learned a few little tricks that tend to boost success rates.
- Bottom Heat is Your Friend: If you have a heat mat, place your pots on it. This gentle warmth from below encourages root formation much faster than just ambient room temperature. It’s like giving those nascent roots a cozy place to grow.
- Don’t Overwater: While humidity is vital, soggy soil is the enemy of cuttings. Let the top inch of the soil dry out slightly between waterings. Overwatering can lead to rot before roots even have a chance to form. A good sign is when the potting mix starts to feel light again.
- Sterilize Everything: I can’t stress this enough! Make sure your pruning shears, knives, and even your pots are clean. A quick wipe with rubbing alcohol goes a long way in preventing fungal diseases that can wipe out your efforts.
Aftercare & Troubleshooting
Once you start seeing signs of new growth – tiny leaves unfurling or the cutting resisting a gentle tug – you know roots are forming! Continue to keep the environment humid, but you can gradually start to acclimate your new plant to normal room humidity by opening the plastic bag a little each day. Once the roots are well-established and you’re confident, you can transplant your little Endlicheria into its own pot with regular potting soil.
Watch out for wilting that doesn’t improve after watering, or a mushy, black stem at the soil line. These are usually signs of rot, often caused by too much moisture or poor drainage. If you see this, it’s a tough setback, but don’t despair. Sometimes, you can salvage a healthier part of the stem if caught early.
Keep Growing!
Propagating plants like Endlicheria directonervia is a beautiful dance with nature. There will be times when it works like a charm, and other times when nature has other plans. Be patient with yourself and the process. Enjoy the journey of learning and celebrating each little success. Happy growing!
Resource:
https://identify.plantnet.org/k-world-flora/species/Endlicheria%20directonervia%20C.K.Allen/data