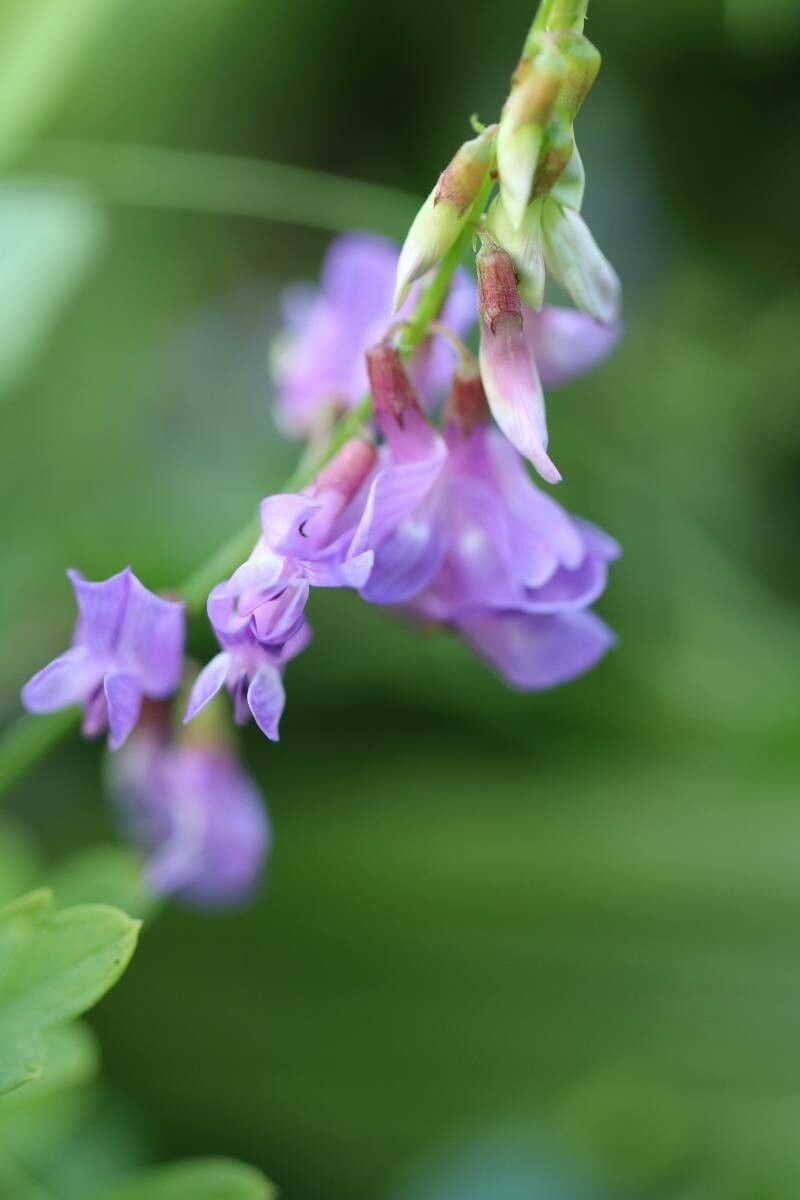
Hello there, fellow garden enthusiasts! Today, we’re diving into the wonderful world of propagating Vicia amoena, or as it’s commonly known, the Mountain Sweet Pea. Now, I know what some of you might be thinking. Vicia amoena… sounds a bit fancy, right? But trust me, this lovely leguminous vine is a real charmer, offering delicate, pea-like flowers in beautiful shades of purple and pink. It brings a touch of wild beauty to any garden, scrambling up trellises or naturalizing in a woodland setting. And the best part? Propagating it is quite rewarding, and honestly, it’s not too tricky for beginners. If you’ve got a little patience, you’ll be well on your way to enjoying more of this gorgeous plant!
The Best Time to Start
For Vicia amoena, the sweet spot for propagation is definitely late spring to early summer. This is when the plant is in its active growth phase. You’ll find new, healthy shoots readily available, and they’ll have ample time to establish themselves before the cooler weather rolls in. Think of it as giving them the longest possible growing season to get big and strong.
Supplies You’ll Need
Gathering your supplies beforehand makes the whole process feel so much smoother. Here’s what I always have on hand:
- Sharp pruning shears or a clean knife: For making clean cuts.
- Rinsed sand or perlite: Helps with drainage.
- Seed-starting mix or a light potting mix: A good quality mix that doesn’t hang onto too much moisture.
- Small pots or propagation trays: With drainage holes, of course!
- Rooting hormone (optional but helpful): Encourages faster root development.
- Clear plastic bags or a propagator: To create a humid environment.
- Watering can or spray bottle: For gentle watering.
Propagation Methods
Vicia amoena is quite adaptable, and I’ve had great success with a couple of methods. Let’s break it down!
Stem Cuttings
This is my go-to for increasing my plant collection quickly.
- Take your cuttings: In late spring or early summer, select healthy, non-flowering stems that are about 4-6 inches long. Make a clean cut just below a leaf node (where a leaf attaches to the stem).
- Prepare the cuttings: Gently remove the lower leaves, leaving just a couple at the very top. This prevents them from rotting when they’re in the soil. If you’re using rooting hormone, dip the cut end into it now.
- Plant the cuttings: Fill your small pots with your chosen soil mix. Make a hole with your finger or a pencil, and insert the cuttings, ensuring the leaf nodes are buried. Gently firm the soil around them.
- Water gently: Water thoroughly but gently, so you don’t dislodge your cuttings.
- Create humidity: Cover the pots with a clear plastic bag, or pop them into a propagator. This creates a mini-greenhouse effect, which is crucial for cuttings to root.
Water Propagation
This is a wonderfully visual way to watch roots grow!
- Select your cuttings: Similar to stem cuttings, look for healthy, young shoots about 4-6 inches long.
- Prepare for water: Remove all but the top two leaves.
- Place in water: Pop the cuttings into a clean jar or vase filled with fresh, room-temperature water. Make sure no leaves are submerged – this is key to preventing rot!
- Find a bright spot: Place the jar in a bright location, but out of direct, harsh sunlight.
- Change the water regularly: Every few days, change the water to keep it fresh and oxygenated. You’ll start to see tiny roots emerge in a few weeks.
- Pot up: Once the roots are about an inch long, you can carefully transplant them into soil, following the steps for stem cuttings.
The “Secret Sauce” (Pro Tips)
Over the years, I’ve picked up a few tricks that seem to boost success rates.
- The importance of air circulation: Even in your humidity dome, open the plastic bag or propagator vents daily for a few minutes. This helps prevent fungal diseases from taking hold. Think of it as giving your little cuttings a breath of fresh air.
- Bottom heat can be a game-changer: While not strictly necessary, placing your pots on a warm propagation mat can really speed up root formation, especially if your home is on the cooler side. It mimics the warmth of spring soil beautifully.
- Don’t be too quick to discard: Sometimes, a cutting might look a bit sad and droopy for a while. Don’t give up too soon! As long as the stem is firm and hasn’t turned mushy, there’s still hope. I’ve had cuttings surprise me with roots after weeks of looking like they were on their last legs.
Aftercare & Troubleshooting
Once you see those lovely new roots peeking out from the drainage holes, it’s time for a little extra TLC.
- Gradual acclimatization: Slowly introduce your new plants to normal humidity. Gradually open your plastic bag or propagator more over a few days. For water-propagated plants, once they are potted, water them thoroughly and cover them loosely with a plastic bag for the first week.
- Watering: Keep the soil consistently moist but not waterlogged. You want to feel the top inch of soil dry out a bit before watering again.
- Light: Place your newly potted plants in a bright spot with indirect sunlight. Avoid intense, direct sun during their initial delicate stage.
Now, let’s talk about what can go wrong. The most common culprit is rot. This usually happens if the soil is too wet and there’s poor drainage or not enough air circulation. If you notice your cutting turning mushy or developing black spots, it’s likely rot. In this case, unfortunately, it’s best to discard it and try again. Yellowing leaves can sometimes mean too much or too little water, so check the soil moisture.
A Encouraging Closing
Propagating plants is a journey, and Vicia amoena is a delightful companion for that journey. Be patient with your cuttings, celebrate every tiny sign of success, and enjoy the process of nurturing new life. Soon enough, you’ll have a whole patch of these lovely vines gracing your garden. Happy propagating!
Resource:
https://identify.plantnet.org/k-world-flora/species/Vicia%20amoena%20Fisch.%20ex%20Ser./data