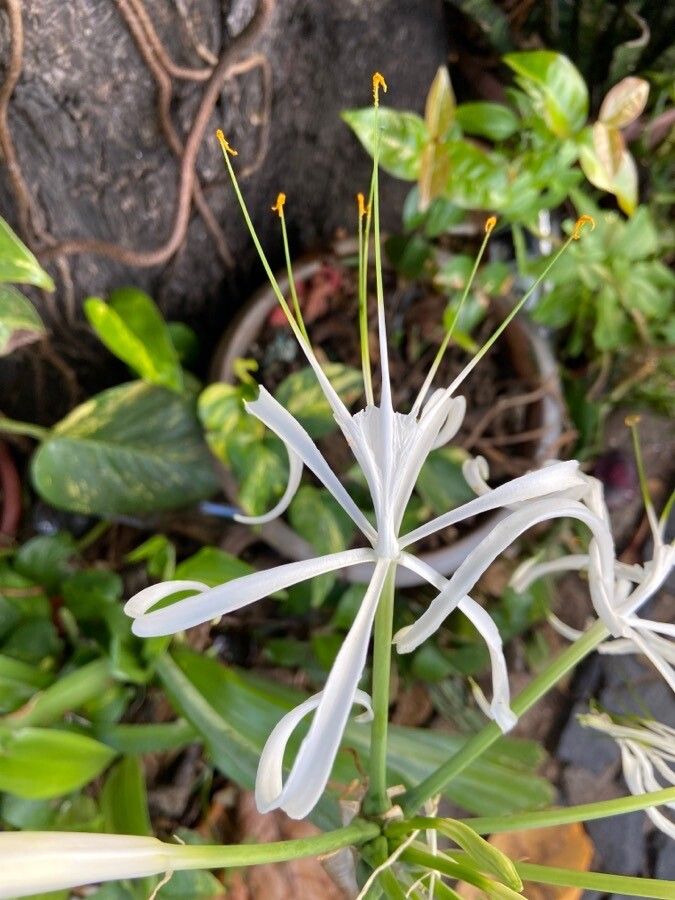
Hello, fellow plant lovers! I’m so excited to chat with you today about a truly enchanting plant: Hymenocallis rotata, often known as the Spider Lily. These beauties, with their elegant, starry white blooms and often striking foliage, bring a touch of the exotic to any garden or sunny windowsill. There’s something incredibly satisfying about coaxing new life from an established plant, and happy to report, Hymenocallis rotata is actually a wonderfully accessible plant to propagate, even for those of you who are just starting out on your green-thumb journey.
The Best Time to Start
The sweet spot for propagating Hymenocallis rotata is typically during its active growing season. Think late spring through summer. This is when the plant is energized, putting out new growth, and has the most reserves to dedicate to forming new roots. Trying to propagate too early in the spring when it’s just waking up, or late in the fall when it’s winding down, can be a bit trickier.
Supplies You’ll Need
Gathering your tools beforehand makes the whole process much smoother. Here’s what I usually have on hand:
- Healthy, established Hymenocallis rotata plant: The source of your new babies!
- Sharp, clean pruning shears or a knife: For making clean cuts. Sterilize them with rubbing alcohol.
- Well-draining potting mix: A good blend for bulbs or a mix of equal parts potting soil, perlite, and sand works brilliantly.
- Small pots or trays: Enough to house your new propagations. Clean ones are key!
- Rooting hormone (optional but recommended): A powder or gel can really give your cuttings a boost.
- A spray bottle: For misting.
- A clear plastic bag or humidity dome: To create a mini greenhouse.
Propagation Methods
Hymenocallis rotata primarily propagates through division of its bulbs. It’s the most reliable and straightforward method for this lovely plant.
Division of Bulbs
This method is best done when you’re repotting your Hymenocallis rotata, or when you notice the plant is starting to create a cluster of bulbs.
- Gently excavate the mother plant: Carefully remove the Hymenocallis rotata from its pot. If it’s in the ground, dig a generous circle around it and lift the entire root ball.
- Clean off excess soil: Gently brush away as much of the soil as you can from the root ball and bulbs. You want to clearly see where the individual bulbs are connected.
- Identify and separate the offsets: You’ll see smaller bulblets or “offsets” growing from the sides of the main bulb. Using your clean knife or pruning shears, carefully cut or gently twist these offsets away from the mother bulb. Aim to get a piece with at least one or two small roots attached if possible. Don’t worry if they don’t have huge roots yet; they’ll grow them!
- Allow to callous (optional but good practice): If you’ve had to make a clean cut, letting the cut surface of the offset dry and form a slight callus for a few hours or even overnight can help prevent rot.
- Pot up your new bulbs: Plant each offset in its own small pot filled with your well-draining potting mix. Plant them at about the same depth they were growing before, or just so the top of the bulb is barely covered.
- Water lightly: Give them a gentle watering. Not a drowning, just enough to settle the soil around the bulb.
- Provide ideal conditions: Place the pots in a warm, bright spot with indirect sunlight. Keep the soil consistently moist but never soggy. A humidity dome or a clear plastic bag can create a nicely humid environment, which is beneficial as they begin to establish.
The “Secret Sauce” (Pro Tips)
Here are a few things I’ve learned over the years that make a big difference:
- Don’t rush the separation: When you’re looking at those offsets, it’s tempting to yank them off. Be patient and use your tools for a clean break. This minimizes damage to both the parent bulb and the new offset, making it less susceptible to disease.
- Bottom heat is your friend: If you find your new propagations are taking a while to show signs of life, popping them on a gentle heating mat designed for plants can significantly speed up root development. The warmth encourages root growth from below.
- Good air circulation is crucial: While humidity is good, stagnant air can be a recipe for fungal issues, especially around the bulbs. Make sure your pots have good drainage holes and don’t overcrowd them. If you’re using a plastic bag, occasionally lift it to allow for some air exchange.
Aftercare & Troubleshooting
Once your little Hymenocallis offsets start showing new leaf growth, you know roots have formed! At this stage, you can treat them much like a young plant. Continue to keep the soil consistently moist and provide bright, indirect light. As they grow, you can gradually introduce them to more direct sunlight.
The most common issue you might encounter is rot. If you notice a bulb looking mushy, black, or smelling foul, it’s likely rotted. This is usually due to overwatering and poor drainage. If it’s a mild case, you might be able to cut away the rotten parts, let it dry thoroughly, and replant in fresh, dry soil. However, sometimes, it’s best to discard the affected bulb to prevent it from spreading. Yellowing leaves can also indicate too much or too little water, or not enough light. Observe your plant, and adjust accordingly!
A Little Patience Goes a Long Way
Propagating plants is a journey, a beautiful act of nurturing. Don’t get discouraged if your first attempt isn’t perfect. The key with Hymenocallis rotata is healthy bulbs and consistent, but not excessive, moisture. Take joy in the process, and soon you’ll have even more of these stunning Spider Lilies to share and admire! Happy gardening!
Resource: