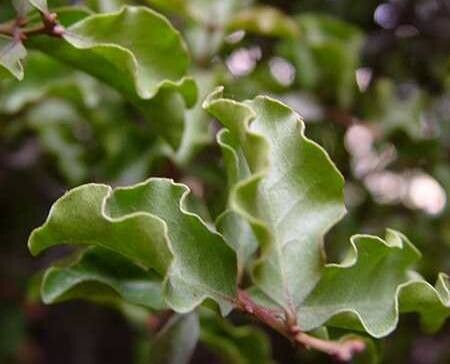
Hello fellow garden enthusiasts! Today, we’re diving into the wonderful world of Euclea undulata, or as some of us affectionately call it, the “Natal Holly.” If you’re looking for a tough, beautiful evergreen that offers lovely glossy leaves and sometimes even a scattering of berries, you’ve come to the right place. Euclea undulata is a fantastic choice for adding texture and structure to your garden, and the thrill of coaxing a brand new plant into existence from a snippet of an existing one is truly unmatched. Now, is it a beginner-friendly plant to propagate? I’d say it leans towards being moderately easy—with a little patience and the right approach, you’ll be successful!
The Best Time to Start
The sweet spot for propagating Euclea undulata is generally in the late spring to early summer. This is when the plant is actively growing, meaning it has plenty of energy reserves to put into developing brand new roots. Waiting until after the flush of new growth has hardened off a little bit, but before the heat of midsummer sets in, is often your best bet for strong cuttings that are more likely to root.
Supplies You’ll Need
Before we get our hands dirty, let’s gather our trusty tools:
- Sharp pruning shears or a craft knife: For clean cuts that heal well.
- Seedling trays or small pots: Choose something around 4-6 inches deep.
- Well-draining potting mix: A good blend of perlite, coarse sand, and peat moss works wonders. You can also find specialized “cutting mixes.”
- Rooting hormone (optional but recommended): A powder or gel to give cuttings a helping hand.
- Clear plastic bags or a propagator: To create a humid environment.
- Watering can with a fine rose: For gentle watering.
- Labels and a marker: To keep track of your precious propagations!
- A dibber or pencil: To make planting holes.
Propagation Methods
We’ll focus on the most reliable method for Euclea undulata: stem cuttings.
-
Take Your Cuttings: On a mild day, select a healthy, non-flowering stem from your parent plant. You’re looking for wood that is semi-ripe – firm but not completely woody. Aim for cuttings about 4-6 inches long. Make a clean cut just below a leaf node (where a leaf attaches to the stem). Remove any lower leaves from the cutting, leaving about two to three leaves at the top.
-
Prepare the Cuttings: Dip the cut end of each stem into your rooting hormone, tapping off any excess. This step is optional, but I often find it gives my cuttings a real boost.
-
Pot Them Up: Fill your pots or seedling trays with your well-draining potting mix. Use your dibber or pencil to make a hole in the center of the soil for each cutting. Gently insert the rooting hormone-treated end of the cutting into the hole, ensuring the lower leaf nodes are nestled in the soil. Firm the soil gently around the base of the cutting.
-
Create Humidity: Water the soil thoroughly but gently. Then, cover each pot or the entire tray with a clear plastic bag. You can use a propagator lid if you have one. Make sure the leaves don’t touch the sides of the bag, as this can encourage rot. If you’re using individual pots, you might support the bag with a few sticks.
-
Placement: Place your pots in a bright spot but out of direct sunlight. A windowsill that gets indirect light is perfect.
The “Secret Sauce” (Pro Tips)
Here are a few little tricks that I’ve learned over the years that can really make a difference:
- Bottom Heat is Your Friend: If you have a heated propagator or a heating mat, adding a little bottom heat can significantly speed up root development. It mimics the warmth of spring soil and gives those nascent roots a cozy environment to thrive in.
- Don’t Drown Them: While humidity is crucial, overwatering is the enemy. Ensure your potting mix stays consistently moist but not soggy. If you see tiny droplets forming on the inside of your plastic bag, that’s a good sign. If there’s standing water, carefully tip out any excess.
- Patience with the Leaves: If any leaves start to yellow or drop, don’t panic immediately. However, if they turn mushy or black, that’s a sign of rot. Remove any diseased material promptly to prevent it from spreading to other cuttings.
Aftercare & Troubleshooting
Once you start to see new leaf growth appearing on your cuttings, that’s a fantastic sign that roots have formed! You can gently tug on a cutting to feel for resistance. Gradually acclimate your new plants to normal humidity by opening the plastic bag for increasing periods each day over a week or two. Once they seem happy and are growing well, you can transplant them into slightly larger pots.
The most common sign of failure is rot. If your cuttings turn black and mushy, it’s usually due to too much moisture or not enough air circulation. Sadly, these are usually beyond saving. But don’t be discouraged if a few don’t make it! Gardening is a learning experience for all of us.
A Little Encouraging Word
Propagating Euclea undulata is such a rewarding endeavor. It’s a chance to connect with nature on a deeper level and multiply your garden’s beauty. Remember to be patient, observe your cuttings closely, and celebrate every small sign of progress. Happy propagating, and may your new Natal Hollies grow strong and true!
Resource:
https://identify.plantnet.org/k-world-flora/species/Euclea%20undulata%20Thunb./data