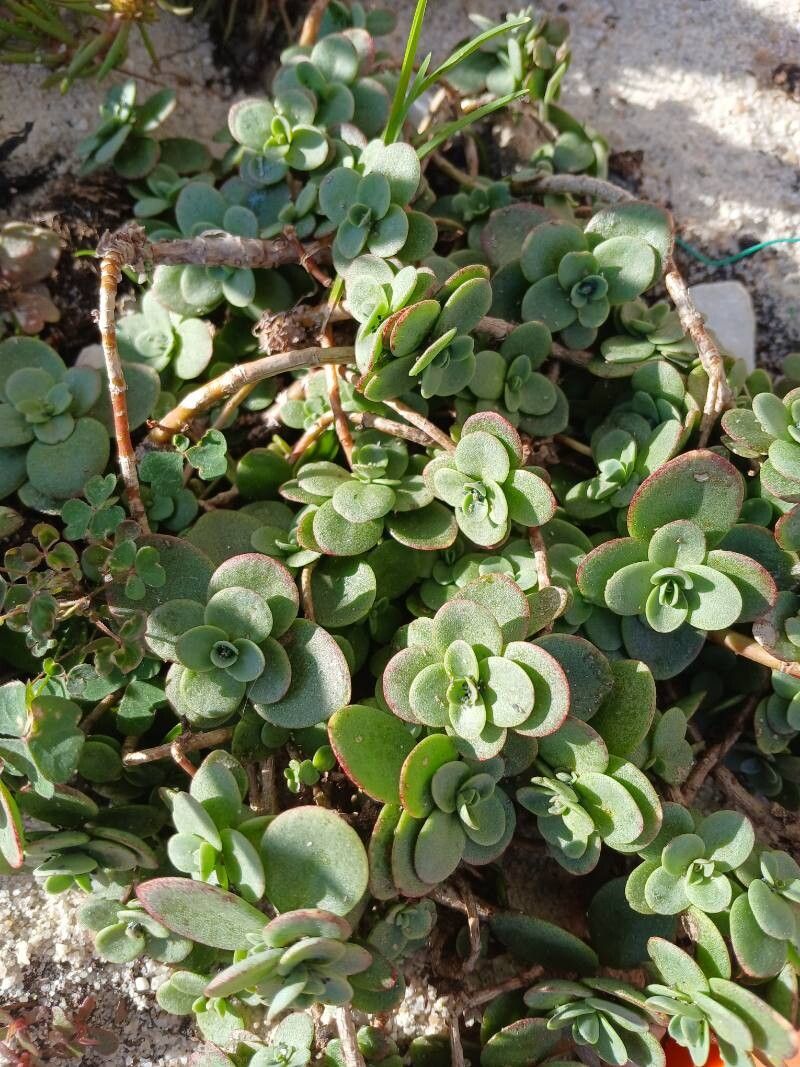
Hello fellow plant lovers! Today, we’re diving into the wonderfully accessible world of propagating Crassula multicava, also known as the Fairy Crassula. I’ve been growing these beauties for years, and honestly, they’re one of my absolute favorites for sharing the plant joy. Their delicate, star-shaped flowers and graceful, cascading leaves make them a charming addition to any collection.
The best part? Propagating them is a breeze! It’s a fantastic way to multiply your stock, cheer up friends with a living gift, or even just experiment and see if you can grow a whole jungle of your own. If you’re new to the plant propagation party, Crassula multicava is an excellent plant to start with. Seriously, you’ll be a pro in no time.
The Best Time to Start
When it comes to getting the most bang for your propagation buck, spring and early summer are your golden ticket. This is when the plant is actively growing and has plenty of energy reserves. You’ll find that cuttings taken during this time root much faster and more reliably. You can also propagate in the fall, but expect things to move a bit slower.
Supplies You’ll Need
Gathering your supplies beforehand makes the whole process much smoother. Here’s what I always have on hand:
- Sharp pruning shears or a clean knife: For making clean cuts.
- Well-draining potting mix: A succulent or cactus mix is ideal. You can also make your own by combining potting soil with perlite or pumice in a 1:1 ratio.
- Small pots or trays: With drainage holes, of course!
- Rooting hormone (optional): It can speed up root development, but it’s not strictly necessary for Crassula multicava.
- Spray bottle: For gentle watering.
- A sunny windowsill or bright, indirect light source.
- Labels or markers: To keep track of your propagations.
Propagation Methods
Crassula multicava is pretty forgiving, and there are a few easy ways to multiply it.
Stem Cuttings
This is my go-to method. It’s incredibly effective and yields new plants quickly.
- Select a healthy stem: Look for a mature stem that’s not too woody but has at least a few sets of leaves.
- Make the cut: Using your sharp shears or knife, make a clean cut just below a leaf node (where a leaf attaches to the stem).
- Remove lower leaves: Gently pull off the bottom few leaves from the cutting. This exposes the nodes where roots will form.
- Let it callous: This is crucial! Place the cutting in a dry, airy spot away from direct sunlight for 3-5 days. You want the cut end to dry out and form a protective callus. This prevents rot.
- Plant the cutting: Once calloused, gently insert the cut end into your prepared, slightly damp potting mix. You can push it in deep enough so the nodes where you removed leaves are below the soil surface.
- Water sparingly: Water only when the soil is completely dry, using your spray bottle to dampen the surface. Avoid overwatering!
Water Propagation
This method is fascinating to watch!
- Prepare the cutting: Follow steps 1-3 from the stem cutting method.
- Place in water: Put the cutting in a small glass or jar of clean water. Make sure no leaves are submerged in the water; they’ll just rot if they are.
- Change water regularly: Refresh the water every few days to keep it clean and oxygenated.
- Provide bright, indirect light.
- Plant when roots appear: Once you see roots about an inch long, carefully transfer the cutting to a pot with well-draining soil, just like you would with a calloused cutting.
Division
If your Crassula multicava is getting a bit crowded in its pot, division is a great option.
- Remove the plant from its pot: Gently tip the pot and slide the entire root ball out.
- Inspect the root ball: Look for natural breaks where the plant seems to be forming distinct clusters.
- Gently pull or cut apart: You can usually gently pull the root ball apart with your hands. If it’s stubborn, use your clean knife or shears to cut through the roots and stems, making sure each new section has roots attached.
- Pot the divisions: Plant each division in its own pot with fresh, well-draining soil.
- Water thoroughly once: After planting, give the newly divided plants a good watering to help settle the soil around the roots. Then, let the soil dry out completely before watering again.
The “Secret Sauce” (Pro Tips)
After years of fiddling with plants, I’ve picked up a few tricks that really seem to make a difference.
- Humidity helps, but not on the leaves! While rooting, a little ambient humidity is lovely, but never mist the leaves directly. If you notice your cuttings looking a bit sad, you can place the pot in a plastic bag with ventilation holes to create a mini-greenhouse effect. Just keep the leaves from touching the bag’s interior.
- Bottom heat can be a game-changer. If you have a seedling heat mat, placing your pots on it can significantly speed up root formation, especially if your room is on the cooler side. It mimics the warmth of spring soil.
- Don’t be afraid of the callus. That drying period for cuttings isn’t just a suggestion; it’s vital. Skipping it is the fastest way to invite rot. Patience here pays off tenfold.
Aftercare & Troubleshooting
Once your cuttings have developed roots (you can gently tug on them – if there’s resistance, they’ve rooted!), it’s time to treat them as established plants.
- Continue with well-draining soil.
- Water only when the soil is dry to the touch. Overwatering is the most common killer of new propagations.
- Gradually introduce them to more light. Start in bright, indirect light and slowly move them towards a sunnier spot, watching for any signs of stress (like scorched leaves).
The biggest sign of failure you’ll encounter is rot. If your cutting looks mushy, discolored, or has a foul smell, it’s likely rotted. This usually happens if the cutting was planted before it calloused, or if the soil stayed too wet. If you catch it early, you might be able to cut off the rotted part and try to re-root the healthy section.
A Little Patience Goes a Long Way
Propagating plants is a journey, and sometimes it takes a little longer than you expect. Don’t get discouraged if one method doesn’t work right away. Keep experimenting, be patient with your little green charges, and most importantly, enjoy the process! There’s a unique satisfaction in watching a tiny cutting transform into a thriving new plant. Happy propagating!
Resource:
https://identify.plantnet.org/k-world-flora/species/Crassula%20multicava%20Lem./data