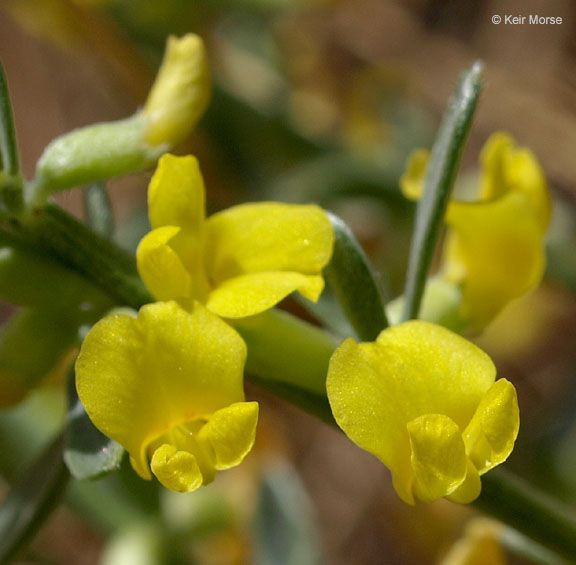
Hello there, fellow garden enthusiasts! Today, I want to chat about a beauty that’s been gracing my garden for years: Acmispon procumbens, or as it’s affectionately known, the creeping or dwarf broom. If you’re looking for a low-growing, cheerful plant that spills beautifully over pots and along borders, you’re in for a treat. Its bright yellow, pea-like flowers are an absolute delight, and the best part? Propagating this little charmer is surprisingly straightforward. I’ve found it to be a wonderfully rewarding plant to multiply, and I think you will too! For beginners, it’s a fantastic plant to start with.
The Best Time to Start
The sweet spot for propagating Acmispon procumbens is typically in late spring or early summer. This is when the plant is in its active growth phase, meaning it’s full of energy and ready to produce new shoots. You’ll want to select stems that are semi-hardwood. This means they are no longer floppy and green, but not yet woody and old. They should still have some flexibility.
Supplies You’ll Need
Here’s what I always have on hand when I’m ready to get my hands dirty with these beauties:
- Sharp pruning shears or a clean knife: For clean cuts, which are crucial for success.
- Rooting hormone powder or gel: While not strictly necessary for Acmispon procumbens, it can definitely give your cuttings a helpful boost.
- A well-draining potting mix: I often use a mix of perlite, peat moss, and a bit of compost. You want something that doesn’t hold too much moisture.
- Small pots or seed trays: Clean, small containers are perfect for starting your new plants.
- Plastic bags or a clear propagator lid: To create a humid environment.
- Water: For misting and watering.
- A sunny windowsill or bright, indirect light spot: Where your cuttings can thrive.
Propagation Methods: Let’s Get Growing!
There are a couple of excellent ways to propagate your Acmispon procumbens. I find stem cuttings to be the most reliable and quickest method.
Stem Cuttings
- Take your cuttings: Using your sharp shears or knife, take cuttings that are about 4-6 inches long from healthy, vigorous stems. Make your cut just below a leaf node (where the leaves attach to the stem).
- Prepare the cuttings: Gently remove the lower leaves from the cutting, leaving just a few at the top. This prevents them from rotting in the soil. If you’re using rooting hormone, dip the cut end into the powder or gel, tapping off any excess.
- Plant your cuttings: Fill your small pots or trays with your well-draining potting mix. Make a small hole in the center with a pencil or your finger, then carefully insert the prepared cutting. Gently firm the soil around it.
- Water and cover: Water the soil thoroughly but gently. Then, cover the pot with a plastic bag or propagator lid to create a mini greenhouse. This will keep the humidity high, which is vital for the cuttings to develop roots.
- Place in good light: Find a spot that receives bright, indirect light. Avoid direct sun, as this can scorch the delicate cuttings.
Water Propagation (A Bit More Experimental, But Fun!)
While I prefer soil for these, you can try water propagation.
- Prepare your cuttings: Similar to the soil method, take 4-6 inch cuttings and remove the lower leaves.
- Place in water: Put the cuttings in a clean jar or glass filled with fresh water. Make sure no leaves are submerged below the water line—this is important to prevent rot.
- Change water regularly: Change the water every few days to keep it fresh and oxygenated.
- Wait for roots: Keep the jar in a bright spot out of direct sun. You should start to see tiny roots forming in a few weeks. Once the roots are about an inch long, you can carefully transplant them into a pot with your well-draining potting mix.
The “Secret Sauce” (Pro Tips)
Now, for a few little tricks I’ve learned over the years that can really make a difference:
- Cleanliness is key: Always use sterilized tools and pots. This prevents disease from spreading to your precious new plants. A quick wipe with rubbing alcohol does wonders!
- Bottom heat is your friend: If you have a propagator, gentle bottom heat can significantly speed up root development. A heat mat set to a low temperature is perfect. It mimics the warmth of spring soil.
- Don’t rush them: I know it’s tempting, but resist the urge to pull on your cuttings to check for roots too early. You could damage the delicate new growth. Wait until you actually see new leaves forming or feel a gentle resistance when you tug ever so slightly.
Aftercare & Troubleshooting
Once you start to see new leaf growth on your cuttings – ah, that’s a glorious moment! – it’s a good sign that roots are developing nicely. Continue to keep them in bright, indirect light and water them consistently, allowing the soil to dry out slightly between waterings.
The most common issue you might encounter is rot. This usually happens if the soil is too wet or the humidity is too high without enough air circulation. If you see your cutting turning mushy or black, it’s likely rot. Unfortunately, this usually means it’s a lost cause. The best prevention is good drainage and not overwatering. If your leaves are yellowing and dropping, it could be a sign of too much water or not enough light. Adjust accordingly.
A Little Patience Goes a Long Way
There you have it! Propagating Acmispon procumbens is a lovely way to fill your garden or share a bit of its cheer with friends. Don’t get discouraged if your first few attempts aren’t perfect. Gardening is a journey, and every gardener has had their share of… learning experiences! Be patient, enjoy the process of nurturing these new life forms, and soon you’ll have a whole collection of these cheerful creeping brooms. Happy planting!
Resource: