Oh, hello there, fellow plant lover! Grab a mug, let’s chat about a little green gem that’s been bringing smiles to my garden for years: Abildgaardia ovata. You might know it as a lovely, tufted sedge with those charming, ovate leaves that add such a wonderful texture to shady spots. It’s a real trooper, and honestly, a joy to propagate. If you’re looking to fill in some bare patches or share the love with friends, this is a fantastic plant to get your hands dirty with. For beginners? I’d say it’s quite forgiving, which is always a good sign when you’re first starting out with boosting your plant collection.
The Best Time to Start
When you’re aiming for the highest success rate with Abildgaardia ovata, spring is your best friend. Think of it as when everything in nature is waking up and ready to grow with gusto. Starting in early spring, as new growth begins to emerge, gives your new plantlets the longest possible season to establish themselves before things cool down.
Supplies You’ll Need
You don’t need a whole shed full of fancy gadgets, just a few essentials:
- Sharp pruning shears or a clean, sharp knife: For making clean cuts.
- A well-draining potting mix: I like a blend of equal parts peat moss or coco coir, perlite, and a bit of compost. This keeps things airy and prevents soggy roots.
- Small pots or seed trays: Anything that can hold your new baby plants and allow for good drainage.
- Labels and a permanent marker: Trust me, you’ll thank yourself later!
- (Optional) Rooting hormone: While not strictly necessary for Abildgaardia ovata, it can give an extra boost.
Propagation Methods
For Abildgaardia ovata, I find division is hands down the easiest and most successful method. It’s like giving your established plant a little haircut and getting new plants out of it!
Here’s how I do it:
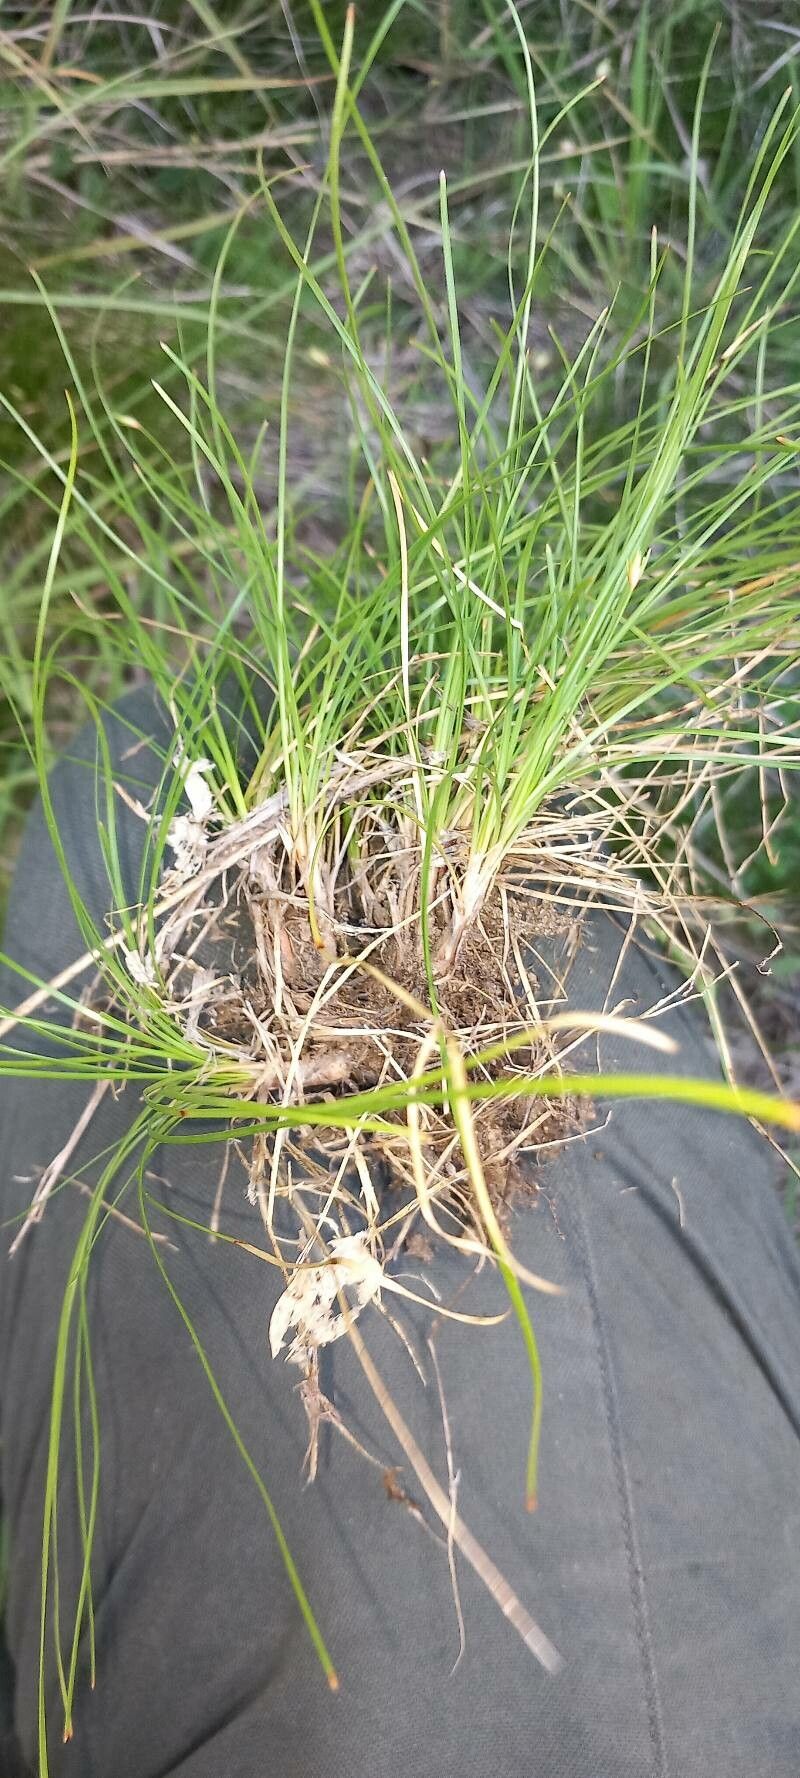
- Gently excavate your plant: Carefully lift your Abildgaardia ovata from its pot or the ground. If it’s in the ground, dig around it, loosening the soil before gently pulling it free.
- Clean off excess soil: You want to be able to see the root structure clearly. Gently brush away as much soil as you can with your hands or a soft brush.
- Locate natural divisions: Look for where the plant naturally wants to split. You’ll see clumps of stems arising from separate root sections.
- Divide the root ball: This is the crucial step! You can often do this by hand. Gently pull the clumps apart. If it’s a bit stubborn, use your clean pruning shears or knife to cut through the root ball. Aim to get at least 2-3 healthy stems with a good amount of root attached to each division.
- Pot them up: Place your divisions into their new pots, filling with your prepared potting mix. Make sure the base of the stems is at soil level.
- Water thoroughly: Give each new pot a good watering to help settle the soil around the roots.
The “Secret Sauce” (Pro Tips)
Now, for a couple of little tricks I’ve learned over the years:
- Don’t over-pot: Resist the urge to put a tiny division into a huge pot. A smaller pot will actually encourage the roots to fill it out more effectively, and there’s less risk of the soil staying too wet.
- Mimic the environment: Abildgaardia ovata loves a bit of humidity. After potting, I like to loosely cover the pots with a clear plastic bag or a propagation dome. This creates a mini greenhouse effect, keeping moisture in and reducing stress on the newly divided plant. Just make sure there’s a little air circulation to prevent mold.
Aftercare & Troubleshooting
Once your divisions are potted, place them in a bright, indirect light spot. Avoid direct sunlight, as it can scorch those tender new leaves. Keep the soil consistently moist but not waterlogged. Think of it like a well-wrung sponge.
You’ll know your plant is settling in when you start to see new leaf growth. This can take anywhere from a few weeks to a couple of months.
What if things go wrong? The most common issue is rot, which is usually caused by too much moisture and poor drainage. If you see stems turning mushy and brown, or a foul smell from the pot, it’s a sign things are too wet. At that point, it’s often best to discard the affected bit and try to salvage any drier parts. Make sure your soil is free-draining and don’t water too frequently.
A Encouraging Closing
So there you have it! Propagating Abildgaardia ovata is a wonderfully rewarding process. Don’t be discouraged if your first attempt isn’t perfect; gardening is all about observation and learning. Be patient, enjoy the quiet satisfaction of nurturing a new plant from an old one, and soon you’ll have a whole army of these charming sedges to enjoy! Happy propagating!
Resource:
https://identify.plantnet.org/k-world-flora/species/Abildgaardia%20ovata%20(Burm.f.)%20Kral/data