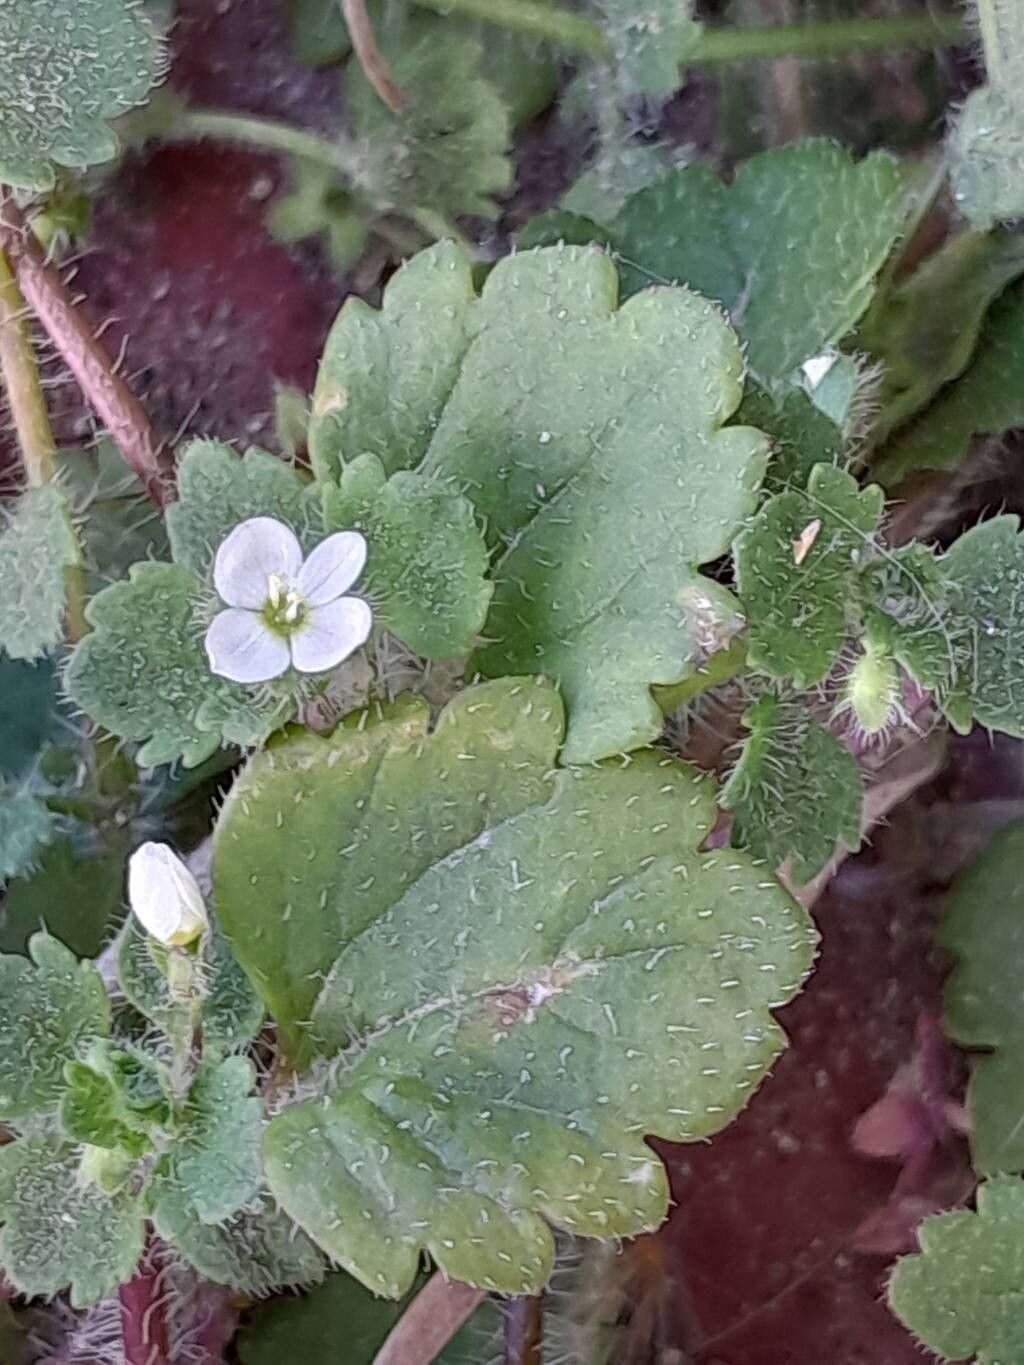
Hello fellow garden enthusiasts! It’s so lovely to have you join me for a chat about a truly delightful plant: Veronica cymbalaria, often called creeping speedwell. If you adore carpets of lovely, soft blue flowers that bring a touch of whimsy to your garden beds or containers, you’re going to fall in love with this little gem. And the best part? It’s surprisingly easy to propagate, making it a fantastic project for both seasoned gardeners and those just starting to dip their toes into the world of plant creation. Watching a tiny cutting transform into a thriving new plant is one of the most rewarding feelings in gardening, isn’t it?
The Best Time to Start
For Veronica cymbalaria, spring is your golden window. Once the danger of frost has passed and the days are starting to lengthen, your plants will be full of vigorous new growth. This is the perfect time to take cuttings, as they have plenty of energy to dedicate to root development. You can also often get away with taking cuttings in early summer, but spring usually gives you the best bang for your buck.
Supplies You’ll Need
Gathering your tools beforehand makes the whole process smooth sailing. Here’s what you’ll want:
- Sharp, clean pruning shears or a sharp knife: For making clean cuts.
- Potting mix: A light, well-draining mix is crucial. I like to use a blend of seed starting mix and perlite – about a 50/50 ratio. This ensures good aeration and prevents waterlogging.
- Small pots or seed trays: With drainage holes, of course!
- Rooting hormone (optional but recommended): This really gives your cuttings a boost. Look for a powder or gel formulation.
- A clear plastic bag or propagator dome: To create a humid environment.
- Watering can or spray bottle: For gentle watering.
Propagation Methods
Let’s get our hands dirty! The most straightforward way to propagate Veronica cymbalaria is through stem cuttings.
- Select your parent plant: Choose a healthy, actively growing Veronica cymbalaria. Look for stems that are not flowering right now, as the energy can be diverted from root production. You want nice, non-woody stems.
- Take your cuttings: Using your sharp shears or knife, make a clean cut just below a leaf node. A leaf node is that little bump on the stem where leaves emerge. Aim for cuttings that are about 3-4 inches long. Remove the lower leaves, leaving just a few at the top.
- Prepare the cutting: If you’re using rooting hormone, dip the cut end into the hormone powder or gel. Gently shake off any excess.
- Plant your cuttings: Fill your small pots with your prepared potting mix. Make a small hole in the center of the soil with your finger or a pencil. Insert the cut end of the Veronica cymbalaria cutting into the hole, ensuring the nodes where you removed the leaves are buried. Gently firm the soil around the stem.
- Water and cover: Water the pot gently to settle the soil. Then, cover the pot with a clear plastic bag or propagator dome. This traps humidity, which is vital for cuttings to develop roots. Open it up for a few minutes each day to allow for air circulation and prevent mold.
The “Secret Sauce” (Pro Tips)
Here are a few little tricks I’ve picked up over the years that can really make a difference:
- Don’t crowd your cuttings! Give them a bit of space in the pot. This helps with air circulation and reduces the risk of disease.
- Bottom heat is your friend. If you have a heated propagator or can place your pots on a warm windowsill (but not in direct, scorching sun), it can significantly speed up root formation. The warmth encourages the plant to put energy into developing those roots.
- Mist regularly. Even with the plastic cover, misting your cuttings occasionally with a fine spray of water can keep them happy and prevent them from drying out.
Aftercare & Troubleshooting
Once your Veronica cymbalaria cuttings have been in their humid little homes for a few weeks, you’ll start to see signs of life.
Rooting takes time, often 3-6 weeks. You can give them a gentle tug. If you feel resistance, congratulations – you’ve got roots! Once roots have formed, remove the plastic cover gradually to help the new plants acclimate to normal humidity. Continue to water them regularly, allowing the top inch of soil to dry out between waterings. Treat them like young seedlings.
The most common problem you might encounter is rot. This usually happens if the soil is staying too wet and there isn’t enough air circulation. If you see a cutting turning black and mushy, it’s best to discard it to prevent it from spreading to others. Good drainage and proper watering are your best defenses against this.
A Encouraging Closing
So there you have it – a simple way to multiply your gorgeous Veronica cymbalaria and bring its charm to even more corners of your garden. Don’t be afraid to experiment and learn as you go. Be patient with your new propagations; they’re working hard to establish themselves. Most importantly, enjoy the journey. There’s a unique satisfaction in nurturing something from a tiny snipping of a stem into a plant that will brighten your world for years to come. Happy gardening!
Resource:
https://identify.plantnet.org/k-world-flora/species/Veronica%20cymbalaria%20Bodard/data