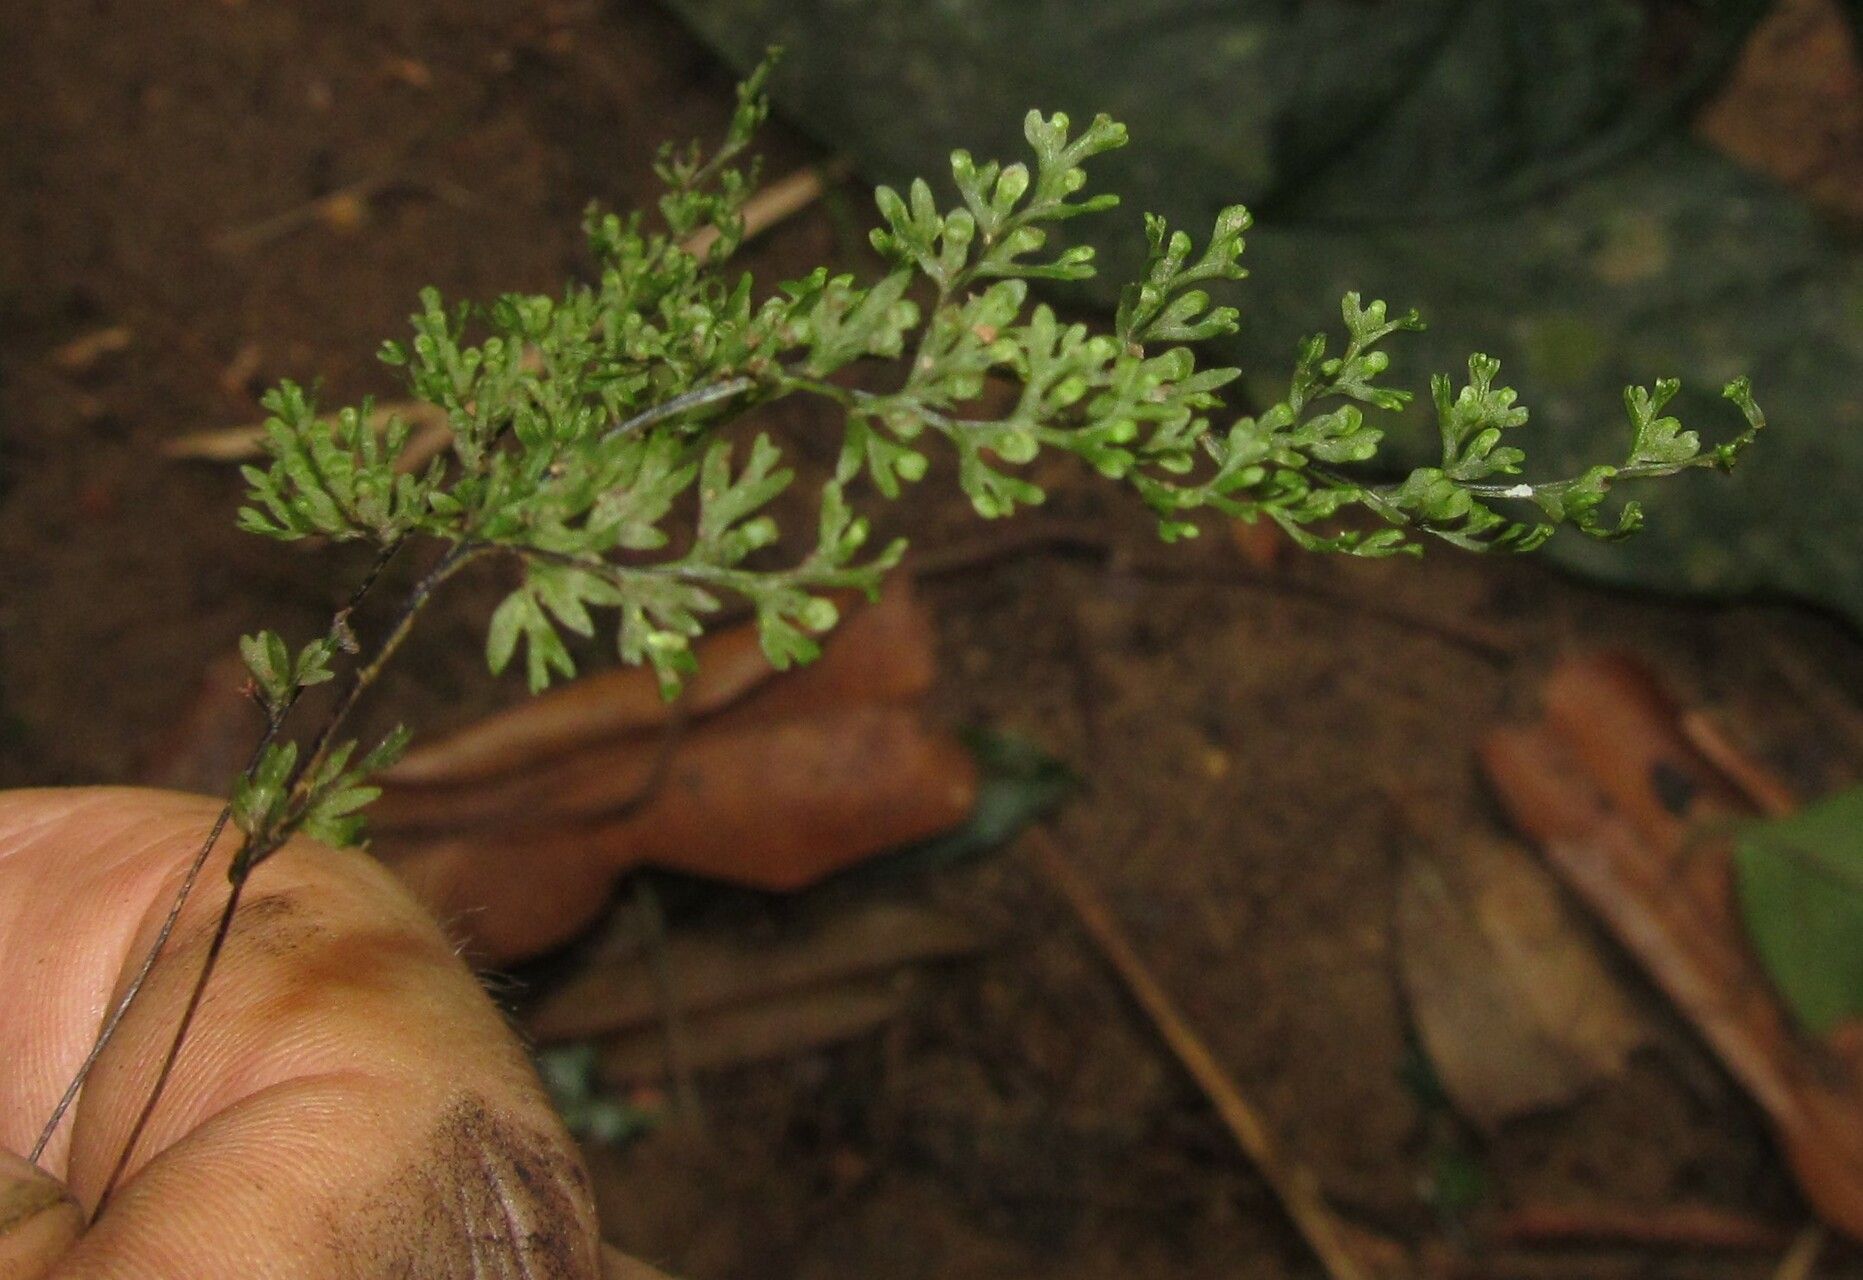
Oh, Hymenophyllum kuhnii, what a gem! It’s one of those ferns that just whispers tranquility, with its delicate, almost lace-like fronds that unfurl with such grace. If you’ve ever admired its ethereal beauty and thought, “I wish I had more of those!”, you’re in for a treat. Propagating this lovely fern is a truly rewarding experience. It’s not exactly a beginner’s plant to propagate, mind you, but with a little patience and the right touch, you’ll be well on your way to success. Think of it as a delightful horticultural puzzle.
The Best Time to Start
For Hymenophyllum kuhnii, the sweet spot for propagation is during active growth periods. This typically means late spring through summer. When the plant is energized and putting out new fronds, it has the best resources to dedicate to developing new roots. Trying to propagate when it’s dormant or stressed will just lead to disappointment, and we don’t want that!
Supplies You’ll Need
To get your Hymenophyllum kuhnii off to a flying start, gather these essentials:
- Sharp, sterile pruning shears or a clean knife: For making precise cuts.
- A peaty, well-draining potting mix: A good blend for ferns often includes sphagnum moss, perlite, and a bit of orchid bark.
- Small pots or propagation trays: Clean containers are key to preventing disease.
- Plastic bags or a propagation dome: To create a humid microclimate.
- Watering can with a fine rose or a mister: For gentle watering.
- Rooting hormone (optional, but can be helpful): Look for one formulated for stem cuttings.
- Bottom heat source (optional, but highly recommended): A seedling heat mat can make a big difference.
Propagation Methods
While Hymenophyllum kuhnii is a bit particular, the most reliable method I’ve found is division when the plant is mature enough. Stem cuttings can be tricky with this fern as their rhizomes are quite delicate.
Division: Sharing the Wealth
This method involves carefully separating a mature fern into smaller, viable sections.
- Gently remove the fern from its pot. Turn it on its side and tap the pot firmly to loosen the root ball. If it’s really stuck, you might need to gently ease it with a clean trowel around the edges.
- Inspect the root ball and rhizome. Look for natural growing points. You want to see where the rhizome is branching out, with healthy-looking roots and perhaps even emerging fronds on each section.
- Carefully tease the fern apart. You can use your fingers for this, gently pulling sections away from each other. If they’re stubborn, use your sterile pruning shears to carefully cut through the rhizome, ensuring each new division has a good portion of roots and at least one new frond. Don’t be tempted to make tiny divisions; aim for sections large enough to support themselves.
- Pot up your new divisions. Use your well-draining fern mix in small pots. Plant each division so that the top of the root ball is level with the soil surface.
- Water gently. Water thoroughly until you see water draining from the bottom of the pot.
- Create a humid environment. Place the pots inside a clear plastic bag, being careful not to let the bag touch the fronds, or cover them with a propagation dome. This humidity is crucial.
The “Secret Sauce” (Pro Tips)
Here are a couple of tricks I’ve learned over the years that can significantly boost your success with Hymenophyllum kuhnii:
- The importance of air circulation: While we’re aiming for high humidity, stagnant air can be the enemy of delicate cuttings and divisions. Once your divisions start to show signs of new growth, carefully vent the bag or dome for a few hours each day. This helps prevent fungal issues.
- Bottom heat is your friend: As I mentioned in the supplies, a seedling heat mat set to a gentle temperature (around 70-75°F or 21-24°C) can really encourage root development. It mimics the warmth of the soil surface and gives those new roots a real kickstart. Just make sure the pots aren’t sitting in water on the mat.
Aftercare & Troubleshooting
Once your Hymenophyllum kuhnii divisions are potted up, treat them as you would a young fern:
- Keep them consistently moist, but not waterlogged. The soil should feel like a wrung-out sponge.
- Provide bright, indirect light. No direct sun whatsoever! Think dappled shade.
- Maintain that high humidity. You can gradually reduce the humidity cover over the next few weeks as the plant establishes.
If you see browning or wilting fronds, it’s often a sign of too much dryness, too much direct light, or stress from the division. Dark brown or black soggy spots can be a sign of rot, usually from overwatering or poor air circulation. If you suspect rot, you might need to remove the affected part and adjust your watering and ventilation. Patience is key here; it can take several weeks for new growth to appear, signaling that your division has taken well.
A Little Patience Goes a Long Way
Propagating Hymenophyllum kuhnii might require a bit more finesse than a common pothos, but the reward of creating new life from a plant you love is immense. Don’t be discouraged if your first attempt isn’t perfect. Each time you try, you’ll learn something new. So, gather your supplies, find that perfect spot, and enjoy the quiet satisfaction of watching new ferns emerge. Happy propagating!
Resource:
https://identify.plantnet.org/k-world-flora/species/Hymenophyllum%20kuhnii%20C.Chr./data