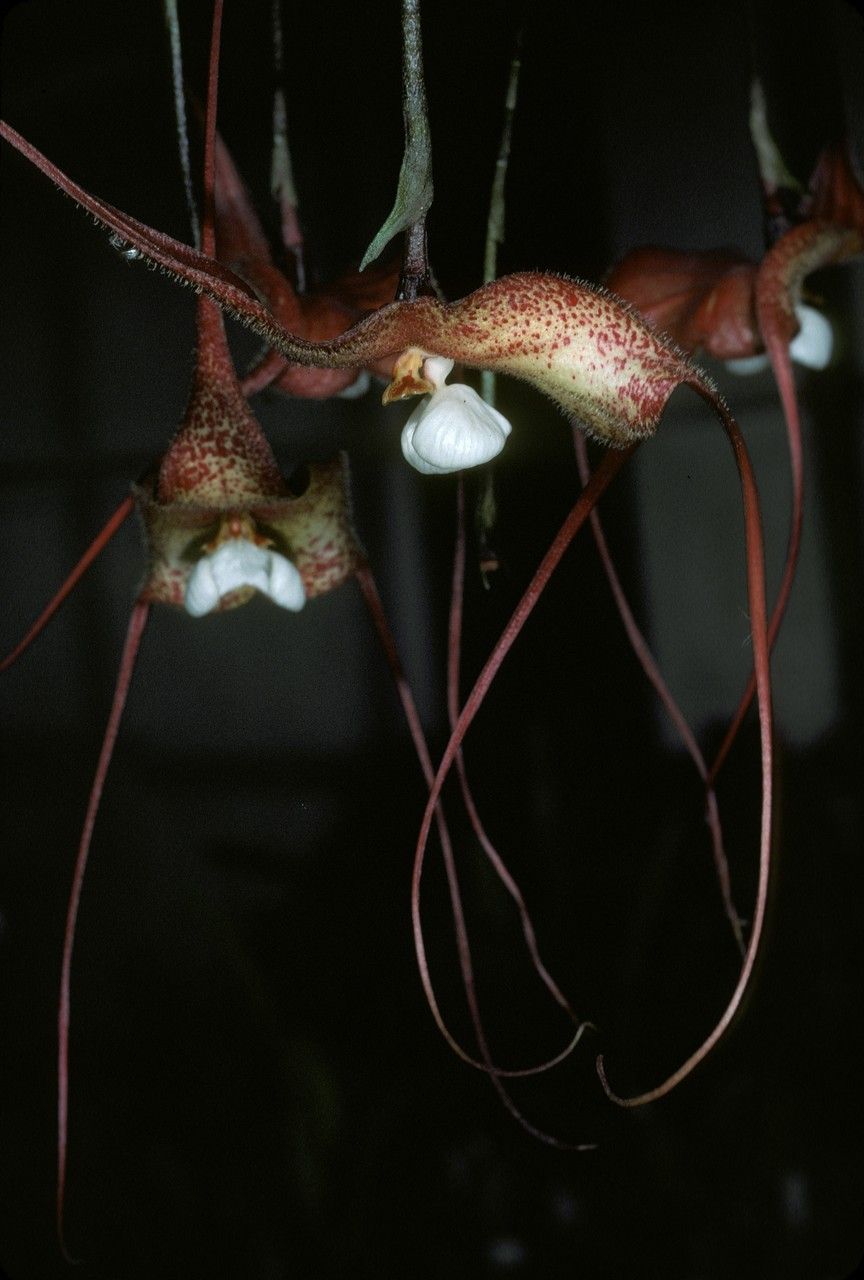
Hey there, fellow plant lovers! Today, we’re going to dive into something truly special: propagating Dracula bella. If you’ve ever marveled at this orchid’s striking, almost otherworldly blooms, you’re not alone. Getting more of these beauties to grace your home is incredibly rewarding, a real thrill for any plant parent. Now, full disclosure – Dracula bella isn’t the absolute easiest plant to prop, but with a little patience and this guide, you’ll be well on your way to success.
The Best Time to Start
When it comes to Dracula bella, the sweet spot for propagation is generally during its active growth phase. For most folks, this means spring or early summer. You want to catch the plant when it’s feeling energetic and ready to put out new roots. Avoid propagating when the plant is stressed, like during extreme heat or dormancy.
Supplies You’ll Need
Here’s a little stash of goodies to get you going:
- Sharp, sterile pruning shears or a clean knife: Essential for making clean cuts. We don’t want any nasty infections introducing themselves!
- Sphagnum moss: This is your best friend for keeping things moist and airy.
- Small pots or propagation trays: Whatever you have that can hold your cutting and a bit of substrate.
- Perlite or orchid bark (fine grade): For adding drainage and aeration to your potting mix.
- Rooting hormone (optional, but helpful): Especially if you’re a bit nervous about those roots forming.
- Distilled or rainwater: Dracula bella is sensitive, so tap water is a no-go.
- Clear plastic bags or a propagation dome: To create that humid environment cuttings adore.
Propagation Methods
Let’s get our hands dirty! For Dracula bella, division is usually the most successful and straightforward method.
Division
This is essentially splitting your established plant into smaller sections.
- Gently remove the plant from its pot. If it’s really stuck, you might need to carefully loosen the edges of the pot or even break it apart.
- Carefully tease away the old potting medium to expose the root system and pseudobulbs (those bulb-like structures at the base of the leaves).
- Inspect the plant. Look for natural divisions where there are at least two or three healthy pseudobulbs with attached roots.
- Using your sterile pruners or knife, make a clean cut to separate a healthy division from the mother plant. Try to ensure each division has plenty of roots.
- If you see any really old, desiccated roots or pseudobulbs, you can trim those away.
- Let the cut surfaces callous over for a few hours or overnight. This helps prevent rot.
- Pot up your new divisions. Use a well-draining orchid mix that includes sphagnum moss, perlite, and fine bark. Plant them so the base of the pseudobulbs are just at or slightly above the surface.
- Water lightly with distilled or rainwater.
The “Secret Sauce” (Pro Tips)
I’ve learned a thing or two over the years, and here are a couple of tricks up my sleeve that make a difference for Dracula bella:
- Don’t drown them! While Dracula bella loves humidity, soggy conditions are its nemesis, especially when it’s trying to root. Ensure excellent air circulation around your cuttings. If you’re using sphagnum moss, make sure it’s damp, not soaking wet.
- Bottom heat is your friend. If you have a seedling heat mat (often used for vegetables), placing your pots on it provides gentle warmth from below, which really encourages root development. It mimics the warmth of a greenhouse floor and makes a surprising difference.
Aftercare & Troubleshooting
Once your divisions are potted up, tuck them into a shady spot with good humidity. A clear plastic bag lightly tented over the pot or a propagation dome works wonders to create that mini-greenhouse effect. Keep the medium consistently moist but not waterlogged.
Now, what if things go wrong?
- Rot: This is the most common culprit. If you see a cutting turning mushy, brown, or black, it’s likely rot. This is usually due to overwatering or poor air circulation. If you catch it early, you can try to trim away the affected parts and repot in fresh, dry media.
- No new growth: Patience is key here! It can take several weeks, or even months, for new roots or leaves to appear. Don’t panic and keep overwatering. A lack of new growth can also simply mean the plant is still establishing its root system.
A Encouraging Closing
Propagating orchids, especially treasures like Dracula bella, is a journey. There will be moments of triumph, and maybe a few learning experiences along the way. Just remember to be patient with your new plants and even more patient with yourself. Enjoy the process, celebrate each new root and every emerging leaf. Happy propagating!
Resource:
https://identify.plantnet.org/k-world-flora/species/Dracula%20bella%20(Rchb.f.)%20Luer/data