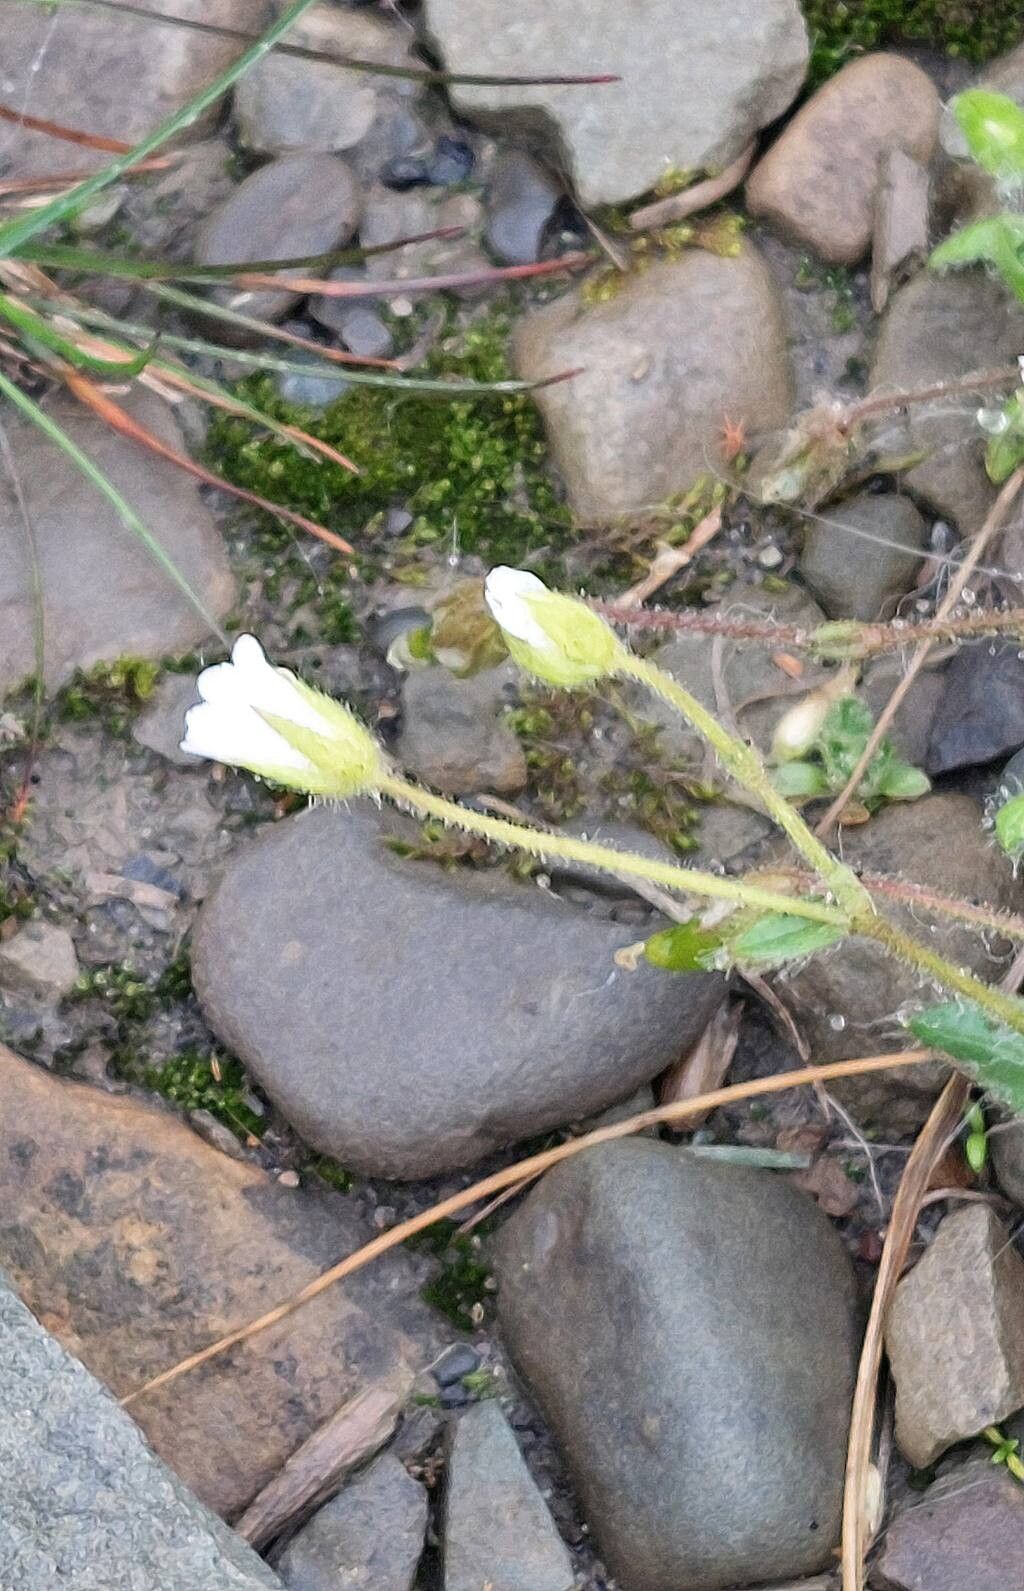
Oh, hello there! Come on in, the kettle’s just boiled. Let’s chat about one of my personal favorites: Cerastium arcticum, or Arctic Mouse-ear Chickweed. If you’ve ever seen this delightful little plant gracing a rock garden or a crevice, you’ll know its charm. It’s a low-growing carpet of silvery-green leaves, dotted with dainty, star-shaped white flowers that just shout ‘alpine meadow.’
Propagating these beauties is a wonderful way to expand your collection or share them with fellow garden enthusiasts. It feels like capturing a little piece of magic. Now, I won’t lie to you – Cerastium arcticum can be a tad fussier than your average geranium, but with a little patience and a few key techniques, I promise you can do it. It’s a project that’s definitely rewarding for those willing to give it a thoughtful go.
The Best Time to Start
For the highest success rate with Cerastium arcticum, I always aim for late spring or early summer. This is when the plant is actively growing, and the new shoots are plump and full of life. Starting around May or June gives those cuttings plenty of time to establish roots before the cooler weather sets in. You want nice, semi-hardwood stems, not the brand-new, super-soft ones of early spring, nor the woody, established stems of late summer.
Supplies You’ll Need
Gathering your supplies beforehand makes the whole process much smoother. Here’s what I usually have on hand:
- Sharp Pruning Shears or a Clean Knife: For making clean cuts.
- Rooting Hormone: A powder or gel will do. It really gives those new roots a helpful boost.
- Small Pots or Seed Trays: With drainage holes, of course!
- Propagation Mix: I like a gritty, well-draining mix. A blend of perlite, coarse sand, and a little peat moss works wonders. You can also buy pre-made cactus or succulent mixes, which are often a good starting point.
- Watering Can or Mister: A gentle touch is key.
- Plastic Bags or a Mini Greenhouse: To create a humid environment.
- Labels and a Marker: To keep track of what you’ve planted and when.
Propagation Methods
While you can try from seed, I find stem cuttings to be the most reliable and straightforward method for Cerastium arcticum.
- Take Your Cuttings: In late spring or early summer, look for healthy, non-flowering stems that are about 3-4 inches long. Using your sharp pruning shears or knife, make a clean cut just below a leaf node (where a leaf attaches to the stem). Remove the lower leaves from the cutting, leaving just a few at the very tip.
- Dip in Rooting Hormone: Gently dip the cut end of the stem into your rooting hormone, tapping off any excess. This is like giving your cutting a little “start-up kit” for root development.
- Plant Your Cuttings: Moisten your propagation mix in your pots or trays. Make a small hole in the mix with a pencil or dowel. Insert the cut end of the stem into the hole, up to the first set of remaining leaves. Gently firm the mix around the stem to ensure good contact.
- Create a Humid Environment: Water the pots lightly. Then, cover them with a clear plastic bag or place them in a mini greenhouse. This traps humidity, which is crucial for preventing the cuttings from drying out before they can form roots. Ensure the plastic doesn’t touch the leaves of the cuttings.
- Provide Good Light and Warmth: Place the pots in a bright spot that receives indirect sunlight. Avoid direct sun, as it can scorch the delicate cuttings. A little warmth can help too; placing them on a heat mat set to a low temperature can speed things up, but it’s not strictly necessary if your room is naturally warm.
The “Secret Sauce” (Pro Tips)
Here are a couple of little tricks I’ve picked up over the years that make a real difference:
- Don’t Let the Leaves Touch the Water (when forming cuttings): If you’re trying water propagation (less common for this plant, but possible!), ensure the leaves are well above the water line. Rot sets in quickly when leaves are submerged, and we want to avoid that at all costs. With stem cuttings in soil, this same principle applies – make sure no leaves are buried in the wet soil.
- A Sprinkle of Cinnamon: This might sound a bit old-fashioned, but a tiny dusting of ground cinnamon on the cut end before dipping in rooting hormone can act as a natural antifungal. It’s a little extra insurance against any nasties that might try to take hold. Just a light dusting is all you need!
Aftercare & Troubleshooting
Once your cuttings have been planted, be patient! Check on them regularly. You’ll know they’re starting to root when you see new leaf growth appearing. This can take anywhere from a few weeks to a couple of months. Gently tugging on a cutting—if it resists, that’s a good sign roots are forming.
Signs of failure usually point to rot. If your cuttings turn black and mushy, or develop a fuzzy mold, it’s likely they’ve gotten too wet or haven’t had enough air circulation. If this happens, remove the affected cuttings immediately and try again, perhaps using a drier mix or ensuring better ventilation. Sometimes, poor rooting is simply due to the cutting being too old or too young, or not enough humidity.
Once you see good root development, you can gradually acclimate your new plants to lower humidity by opening the plastic cover a little more each day. Once they’re looking robust, you can carefully pot them up into their own small containers with a well-draining potting mix, similar to your propagation mix but perhaps with a touch more compost.
Happy Propagating!
Seeing a tiny stem transform into a thriving new plant is one of gardening’s greatest joys. Don’t be discouraged if your first attempt isn’t perfect. Every gardener has had their share of cuttings that didn’t make it. Just keep trying, observe your plants, and enjoy the process. Before you know it, you’ll have a lovely little patch of Cerastium arcticum to admire, and maybe even some to share! Happy gardening!
Resource:
https://identify.plantnet.org/k-world-flora/species/Cerastium%20arcticum%20Lange/data