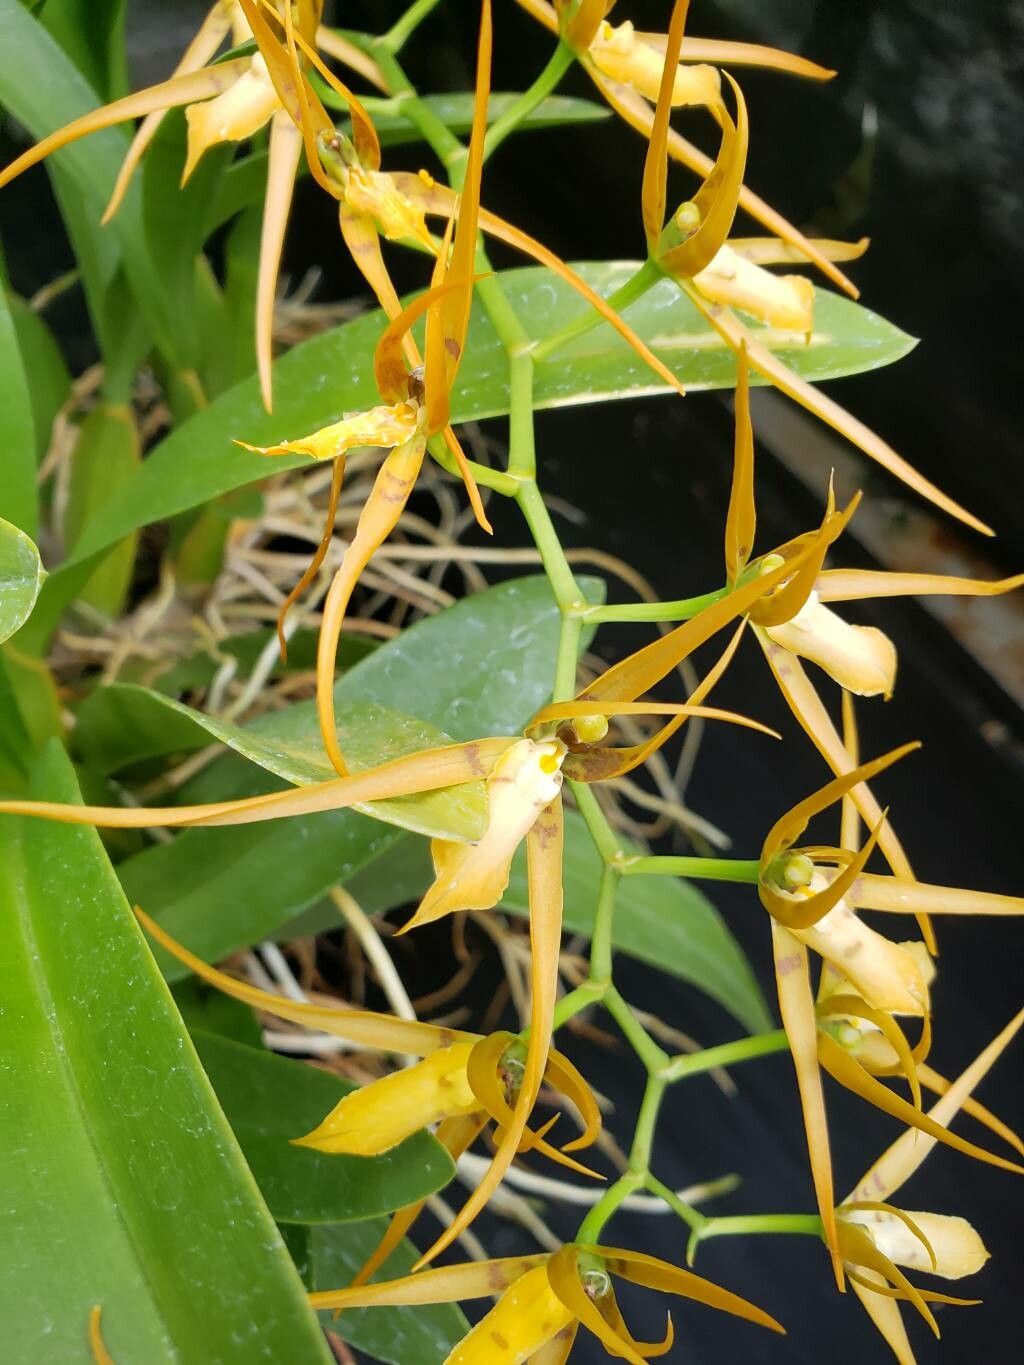
Hey there, fellow plant enthusiasts! If you’ve got a Brassia jipijapensis gracing your home, you know just how magical those delicate, spidery blooms can be. They have this ethereal charm that just brightens any space. And you know what’s even more rewarding than admiring one? Creating more of them! Getting new plants from your existing treasures is a truly special feeling. Now, while Brassia jipijapensis isn’t the absolute easiest plant to propagate for a brand new beginner, I promise you, with a little care and a few guiding hands (that’s me!), you can absolutely succeed. It’s more about understanding their needs than inherent difficulty.
The Best Time to Start
For Brassia jipijapensis, the sweet spot for propagation is generally when the plant is actively growing, which often means spring or early summer. You’ll see new shoots emerging, and the plant has plenty of energy to dedicate to rooting. Trying to propagate when the plant is resting or stressed is just setting yourself up for disappointment.
Supplies You’ll Need
Gathering your tools beforehand makes the whole process smoother. Here’s what I usually have on hand:
- Sharp pruning shears or a clean knife: For making precise cuts. Sterilize them with rubbing alcohol between cuts if you’re working with multiple plants.
- Well-draining potting mix: I like a blend of orchid bark, perlite, and a bit of sphagnum moss. You want excellent aeration for these guys.
- Small pots or propagation trays: With drainage holes, of course!
- Rooting hormone (optional but helpful): This can give new cuttings a little boost.
- Clear plastic bag or propagation dome: To create a mini-greenhouse environment.
- Water: Clean, room-temperature water.
- Spray bottle: For misting.
Propagation Methods
Brassia jipijapensis is best propagated through division. These plants tend to grow in clumps, and separating these clumps is the most reliable way to get new plants.
- Gently remove the plant from its pot. If it’s a bit stuck, you might need to gently squeeze the sides of the pot or run a knife around the edge.
- Inspect the root ball. Look for established pseudobulbs (those swollen, cane-like structures) that have at least two or three pseudobulbs and some healthy roots attached. This is crucial for a successful division.
- Using your sterilized pruning shears or knife, carefully separate the clumps. Try to make clean cuts, ensuring each new division has good roots. Sometimes the roots are quite intertwined, so be patient. You might need to gently tease them apart with your fingers.
- Trim away any dead or damaged roots or leaves.
- Pot up each division. Use your well-draining orchid mix. Plant them so the top of the pseudobulbs are just at or slightly above the soil line.
- Water thoroughly after potting.
The “Secret Sauce” (Pro Tips)
Here are a couple of tricks of the trade that have helped me over the years:
- Think like a sprout: When potting up divisions, make sure the newest growth point (the tip of the pseudobulb where new leaves emerge) is facing outwards and has a little room to grow. It’s like giving it space to stretch its legs!
- Humidity is king (but not soggy feet): Creating a humid environment for your newly divided plants is vital for them to establish. I pop them into a clear plastic bag or under a propagation dome. However, and this is a big one, ensure there is good air circulation inside – you don’t want moisture sitting on the leaves or pseudobulbs for too long, as this can lead to rot. I often prop the bags open a little or vent the dome daily.
Aftercare & Troubleshooting
Once your divisions are potted, keep them in bright, indirect light. Water them when the top inch of soil feels dry. Don’t let them sit in soggy conditions, as this is the quickest way to invite rot. Mist the leaves occasionally if you’re not using a dome, but again, avoid waterlogging.
Keep an eye out for signs of stress. Yellowing leaves or a mushy base are usually indicators of overwatering or rot. If you see this, immediately remove the affected parts with your sterile tool and allow the cut to dry before repotting in fresh, dry mix if necessary. Conversely, if the pseudobulbs start to shrivel significantly, they might be too dry. Ensure consistent moisture without being waterlogged, and a little humidity can help bounce them back. It can take a few weeks to a couple of months for them to really settle in and show new growth.
A Encouraging Closing
Creating new life from your beloved plants is such a rewarding journey. Be patient with your Brassia jipijapensis divisions. They’re getting used to their new homes, and that takes time. Enjoy the process, celebrate the tiny signs of new growth, and before you know it, you’ll have even more of those beautiful, spidery blooms to admire! Happy propagating!
Resource: