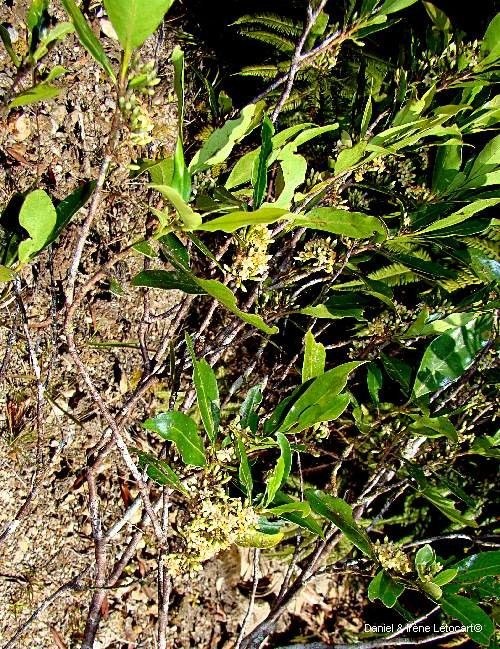
Oh, hello there! Come on in, grab a mug, and let’s chat about a truly delightful plant: Aidia vieillardii. Now, I know what you might be thinking – another botanical name to wrestle with. But trust me, this one is worth getting to know. Aidia vieillardii is a gem, often boasting lovely foliage that can bring a unique texture and color to our indoor jungles. It’s not overly fussy, and the sheer joy of watching a tiny cutting transform into a vibrant new plant? Pure magic. For beginners, I’d say it’s moderately easy. A little patience and a few key steps, and you’ll be a pro in no time.
The Best Time to Start
My absolute favorite time to get my hands dirty with propagation, and especially with plants like Aidia vieillardii, is during its active growing season. For most of us, that means late spring through early summer. The plant is energized, putting out new growth, and has more oomph to rally after being nudged into making new roots. You’re looking for healthy, semi-ripe stems – not the brand new, floppy green shoots, but not the thick, woody old growth either. Think of it as the perfect balance.
Supplies You’ll Need
Here’s a little toolkit that will make your propagation journey a breeze:
- Sharp Pruning Shears or a Clean Knife: Essential for making clean cuts that heal well.
- Well-Draining Potting Mix: I like a blend of peat moss or coco coir, perlite, and a little bit of regular potting soil. The goal is aeration so those delicate new roots don’t drown.
- Rooting Hormone (Optional but Recommended): This isn’t magic, but it gives your cuttings a significant head start, encouraging faster and stronger root development.
- Small Pots or Propagation Trays: Choose something that fits your cuttings comfortably.
- Plastic Bag or Clear Dome: To create a mini-greenhouse effect, keeping humidity high.
- Watering Can with a Fine Rose: For gently misting or watering.
- Labels and a Pen: Trust me, you’ll thank yourself later for keeping track of what you’ve planted and when!
Propagation Methods
Let’s dive into how we can multiply our beloved Aidia vieillardii. I find stem cuttings to be the most reliable and straightforward method for this particular plant.
- Take Your Cuttings: Select a healthy stem. With your sharp shears or knife, make a clean cut just below a leaf node (that little bump where a leaf grows from the stem). You’re aiming for cuttings that are about 4-6 inches long and have at least two to three leaf nodes.
- Prepare the Cuttings: Gently remove the leaves from the bottom node, leaving just a couple of healthy leaves on the top. This prevents leaves from rotting when they’re buried.
- Apply Rooting Hormone: Dip the cut end of the stem into your rooting hormone. Give it a gentle tap to remove any excess. This step is where that encouraging boost comes in.
- Plant Your Cuttings: Fill your small pots or trays with your well-draining potting mix. Make a hole in the center with your finger or a pencil, and gently insert the cutting. Firm the soil around it so it stands upright.
- Create a Humid Environment: Water the soil gently until it’s moist but not soggy. Then, cover the pot with a clear plastic bag or a propagation dome. This traps humidity, which is crucial for the cuttings to stay hydrated and begin rooting.
The “Secret Sauce” (Pro Tips)
Here are a couple of things I’ve learned over the years that really make a difference:
- Don’t Let Those Leaves Touch the Water (if you’re doing water propagation): While some plants are happy to root in water, Aidia vieillardii cuttings are much happier in a damp potting medium. If you are experimenting with water, ensure absolutely no leaves are submerged. They will turn mushy and rot the cutting very quickly.
- Bottom Heat is Your Friend: If you have access to a seedling heat mat, placing your pots on it can significantly speed up root formation. It mimics the warmth of spring soil and gives those roots a gentle nudge to start exploring. Keep the temperature around 70-75°F (21-24°C).
- Be Patient with Your Rooting Hormone: While it helps, rooting hormone isn’t an instant fix. Some plants can take weeks, even months, to show significant root development. Don’t be tempted to tug on your cuttings to check for roots too early!
Aftercare & Troubleshooting
Once you see new growth appearing, that’s a great sign that roots are forming! You can slowly acclimate your cuttings to normal humidity by gradually opening the plastic bag or dome over a few days. Continue to keep the soil consistently moist but not waterlogged.
The most common problem you might encounter is rot. This usually happens if the soil is too wet, the air circulation is poor, or if leaves are in contact with decaying moisture. If you notice a cutting turning black and mushy at the base, unfortunately, it’s likely not going to make it. Just remove it to prevent any potential spread and learn from it for your next attempt. Overwatering is the usual culprit, so Err on the side of slightly too dry rather than too wet.
A Little Encouragement to Finish
Propagating plants is a journey, not a race. There will be successes, and sometimes, there will be failures. But each attempt teaches you something new about your plant and about your own gardening intuition. So, take a deep breath, gather your supplies, and give it a go. Watching those first tiny roots unfurl and seeing your new Aidia vieillardii thrive is incredibly rewarding. Enjoy the process, my green-thumbed friend!
Resource:
https://identify.plantnet.org/k-world-flora/species/Aidia%20vieillardii%20(Baill.)%20Ridsdale/data