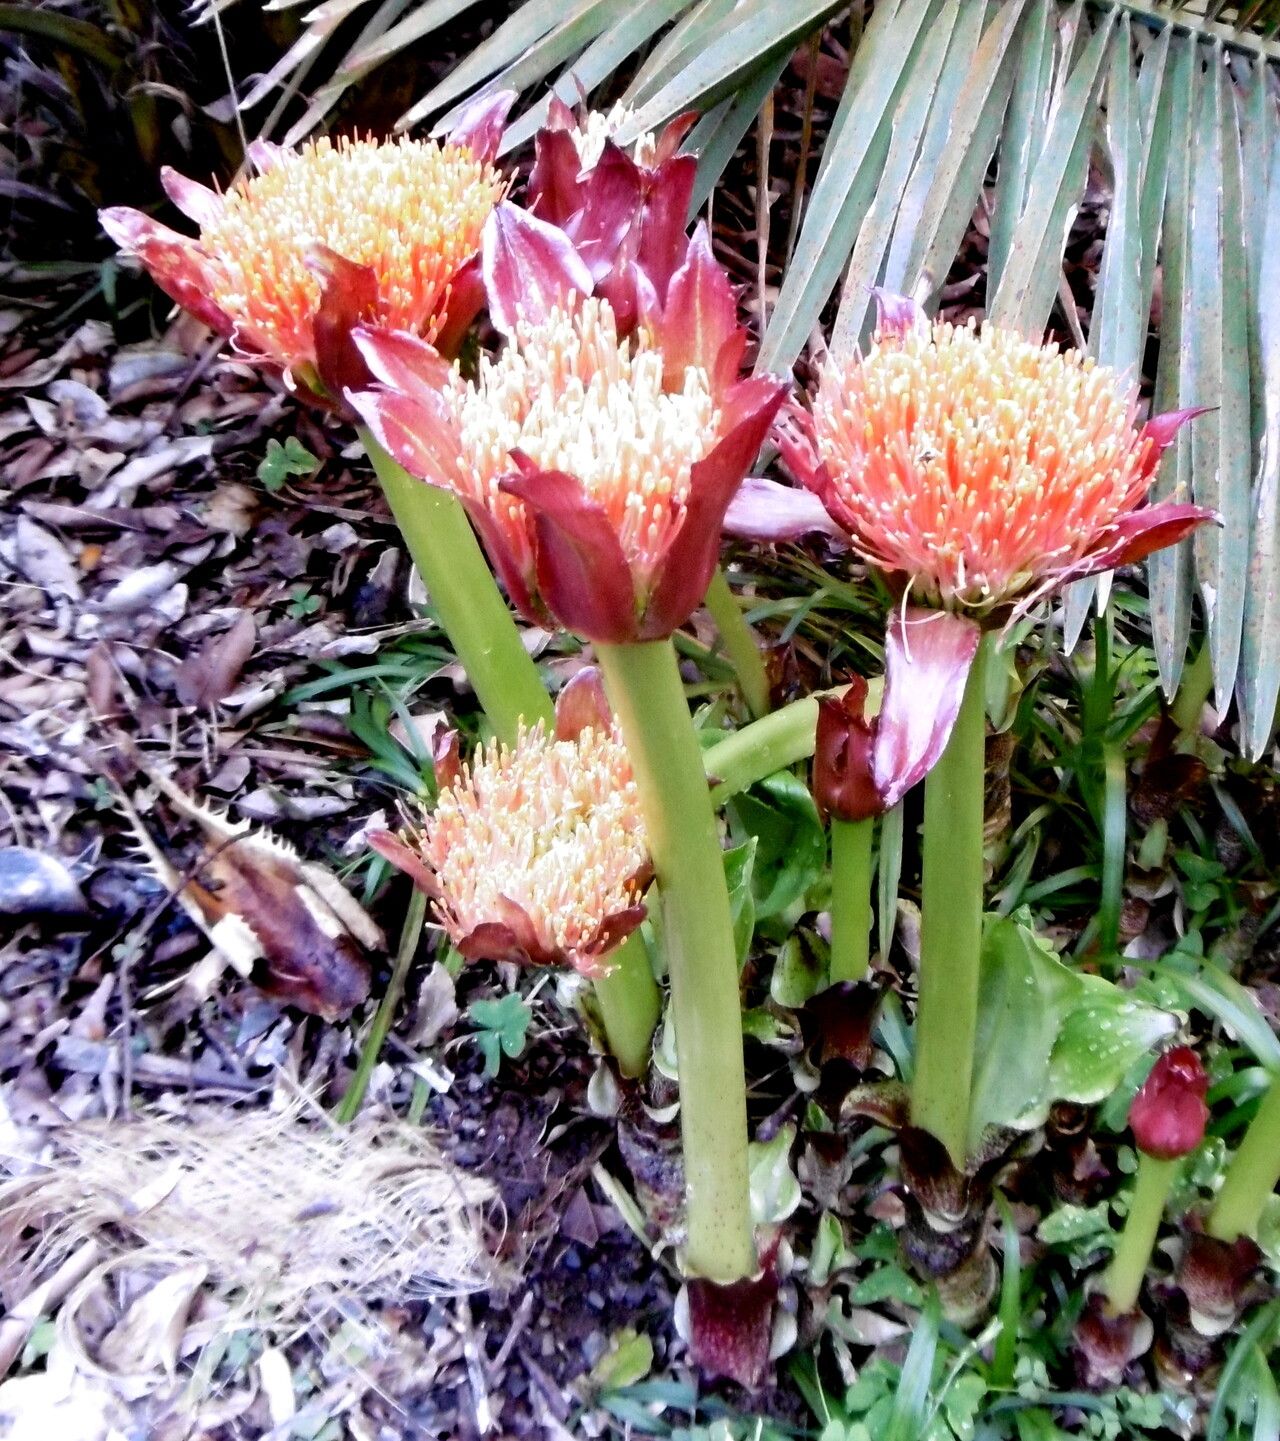
Oh, Scadoxus puniceus! What a truly spectacular plant to bring into your home. Often called the Blood Lily, this African native boasts these incredible, vibrant red flower umbels that look like miniature fireworks exploding. They’re quite dramatic and add such a delightful splash of color, especially when they decide to bloom – and when they do, oh boy, it’s a showstopper.
Propagating them yourself is such a rewarding experience. It’s a fantastic way to multiply these beauties and share them with fellow plant lovers. Now, are they a breeze for absolute beginners? I’d say they’re moderately easy. You’ll need a little patience and attention, but it’s certainly achievable!
The Best Time to Start
The absolute best time to propagate Scadoxus puniceus is during its active growing season. For most of us, this means spring and early summer. You’ll want to wait until the plant is actively putting out new leaves and looking robust. This is when it has the most energy to dedicate to creating new roots.
Supplies You’ll Need
Here’s what you’ll want to have on hand before you begin:
- Sharp, clean pruning shears or a knife. Sterilize them with rubbing alcohol to prevent disease.
- Well-draining potting mix. A good blend for me is 50% perlite and 50% standard potting soil, or a pre-made cactus/succulent mix.
- Small pots or trays with drainage holes.
- Rooting hormone (optional but helpful).
- A watering can or spray bottle.
- Labels and a marker to keep track of your cuttings.
- A tray or shallow dish if you plan on using water propagation.
Propagation Methods
Scadoxus puniceus are most commonly propagated by division. This is a fantastic method because you’re essentially working with a mature piece of the plant that’s already ready to go.
Division:
- Gently remove the plant from its pot. You might need to loosen the edges with your knife if it’s stuck.
- Inspect the root ball. You’re looking for distinct bulbs or offsets that are attached to the main corm. These are your new plants!
- Carefully separate the offsets. Use your sterilized shears or knife to cut into the root system where the offset attaches. Try to get as much of the offset’s own root system as possible. If it’s a small offset with no roots, that’s okay – it will grow them.
- Allow the cut surfaces to air dry for a day or two. This helps prevent rot when you replant. You can place them on a paper towel in a dry, shaded spot.
- Pot up the divisions. Plant each offset in its own small pot filled with your well-draining potting mix. Make sure the top of the bulb is just at or slightly above the soil surface.
- Water sparingly. Water just enough to settle the soil. Don’t drench it. You’ll water more deeply once you see signs of new growth.
While division is king, some people have success with leaf cuttings, though it’s a slower process and not guaranteed.
Leaf Cuttings:
- Take a healthy, mature leaf. Cut it cleanly at its base, ensuring you get a little of the green part where it attaches to the corm.
- Dip the cut end in rooting hormone (optional).
- Insert the cutting into your prepared potting mix. You want to push it down deep enough so it stands upright, about 1-2 inches.
- Mist the soil lightly. Keep the soil consistently (but not soggy) moist. Avoid letting water pool around the base of the leaf.
- Patience is key. It can take months for new growth to appear.
The “Secret Sauce” (Pro Tips)
Here are a couple of things I’ve learned from trial and error:
- Don’t overwater dormant divisions. When you first pot up your divisions, they might not look like much. Resist the urge to give them a big drink! Too much moisture at this stage can lead to rot before roots even have a chance to form. Let them dry out a bit between waterings.
- Consider bottom heat for leaf cuttings. If you’re trying the leaf cutting method, placing the pot on a gentle seedling heat mat can really speed things up. It encourages root development from the base. Keep the temperature around 70-75°F (21-24°C).
Aftercare & Troubleshooting
Once you see new leaves emerging, it’s a great sign! Water more thoroughly, but still ensure good drainage. You can begin fertilizing with a diluted liquid fertilizer once the plant is actively growing, maybe once a month.
The main thing to watch out for is rot. If your cutting turns mushy at the base or the leaves yellow rapidly and fall off, it’s usually a sign of too much moisture or a fungal issue. Discard any rotted material immediately and ensure the remaining cuttings have better airflow and are not sitting in wet conditions. If you used rooting hormone and the cutting still fails, don’t beat yourself up; sometimes it just doesn’t take.
A Encouraging Closing
Propagating Scadoxus puniceus is such a joyful little project. It’s a testament to the resilience and wonder of plants. Be patient, enjoy the journey, and celebrate every new sprout and leaf. Happy growing!
Resource: