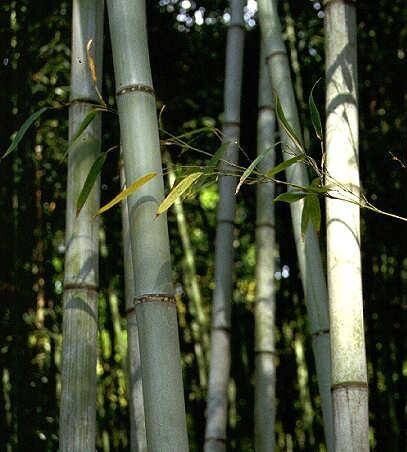
Hey there, fellow plant lovers! Today, we’re diving into the wonderful world of Phyllostachys dulcis, or as many of us know it, sweet shoot bamboo. There’s something so satisfying about seeing a clump of bamboo gracefully sway in the breeze. And even better? The feeling you get when you’ve successfully coaxed new life from an existing plant. Propagating Phyllostachys dulcis is a fantastic way to share this beauty or simply expand your own collection without breaking the bank.
Now, if you’re new to the plant world, don’t you worry. While some bamboos can be a touch fussy, Phyllostachys dulcis is generally quite forgiving. It’s a rewarding project, and I’m here to guide you every step of the way.
The Best Time to Start
Timing is everything with plants, and for Phyllostachys dulcis, the sweet spot is generally during its active growing season. Think late spring and early summer. The plant is full of energy then, making it more receptive to forming new roots. You’ll see new shoots emerging, and this vigor translates beautifully to propagation.
Supplies You’ll Need
Gathering your tools before you begin will make the whole process much smoother. Here’s what I like to have on hand:
- Sharp Pruning Shears or a Saw: Clean cuts are crucial.
- Rooting Hormone (Optional but Recommended): This gives your cuttings a little boost.
- Well-Draining Potting Mix: A blend of peat, perlite, and compost works wonders. Or, a commercial mix specifically for propagation.
- Pots or Containers: Small pots, seed trays, or even recycled yogurt containers with drainage holes will do.
- Watering Can or Spray Bottle: For gentle watering.
- Plastic Bags or a Propagator: To create a humid environment.
- Labeling Stakes: To keep track of your projects!
Propagation Methods
For Phyllostachys dulcis, the most successful and straightforward method is division. It’s like giving your established bamboo a helpful haircut and a new home.
Division
This is really the star of the show for this type of bamboo.
- Assess Your Plant: Look for a mature clump that’s growing well. You want to divide an area that has healthy rhizomes and culms (the hollow stems).
- Prepare the Area: Gently water the mother plant a day or two before you plan to divide. This helps the soil cling to the roots, making the separation easier.
- Dig It Up: Use a sharp spade or shovel to carefully dig around the perimeter of the clump. You want to lift the entire root ball out of the ground or container. If it’s in a pot, you might need to tap the sides of the pot firmly or even use a knife to loosen it.
- Examine the Rhizomes: Once it’s out, you’ll see the underground rhizomes, which are the key to new growth. These are thick, woody structures.
- Separate Sections: Using your sharp pruning shears or a saw, carefully cut through the rhizome to separate sections. Aim for divisions that have at least two or three healthy culms attached to a good portion of the root system. Make sure each section has some of the white, fleshy roots attached.
- Pot Up Your Divisions: Plant each division in its own pot filled with your prepared, well-draining potting mix. The top of the rhizome should be just at or slightly below the soil surface.
- Water Thoroughly: Give each new pot a good watering to settle the soil around the roots.
The “Secret Sauce” (Pro Tips)
Having done this for a while, I’ve picked up a few tricks that really make a difference.
- Don’t Over-Water Early On: After division, your new plants won’t have as many roots to soak up water. It’s tempting to drench them, but it’s better to keep them consistently moist rather than waterlogged. Overwatering at this stage is a fast track to rot.
- Give Them a Humid Hug: Bamboo loves humidity. After potting your divisions, lightly mist the culms and leaves, and then cover the entire pot with a clear plastic bag. Poke a few small holes in the bag for ventilation. This creates a mini greenhouse effect, keeping the moisture in and encouraging root formation.
- Consider Bottom Heat: If you have an unheated space or it’s still a bit cool outside, placing your potted divisions on a heating mat can significantly speed up root development. Just make sure it’s a gentle warmth, not scorching hot.
Aftercare & Troubleshooting
Once your divisions are potted and tucked into their humid little homes, the nurturing continues.
- Keep Them Moist, Not Soggy: Check the soil moisture regularly by sticking your finger about an inch down. Water when the top layer feels dry.
- Gradual Acclimation: After a few weeks, when you see signs of new growth (which usually means a new shoot emerging or the leaves looking perkier), you can gradually remove the plastic bag over a few days. This helps them adjust to normal humidity.
- Watch for Rot: The most common issue is rot, which often looks like the culms turning mushy and black. This is usually a sign of too much moisture and not enough air circulation. If you see this, remove the affected parts immediately, try to let the soil dry out a bit more, and ensure good airflow around your plants.
- Patience is Key: Don’t be discouraged if you don’t see dramatic results immediately. Rooting can take several weeks, even months, for some plants. Trust the process and your plant.
A Encouraging Closing
Propagating Phyllostachys dulcis is such a rewarding journey. It connects you more deeply with your plants and allows you to share their beauty with others. Be patient with yourself and your new plant babies. Enjoy the quiet satisfaction of watching new life emerge. Happy gardening!
Resource:
https://identify.plantnet.org/k-world-flora/species/Phyllostachys%20dulcis%20McClure/data