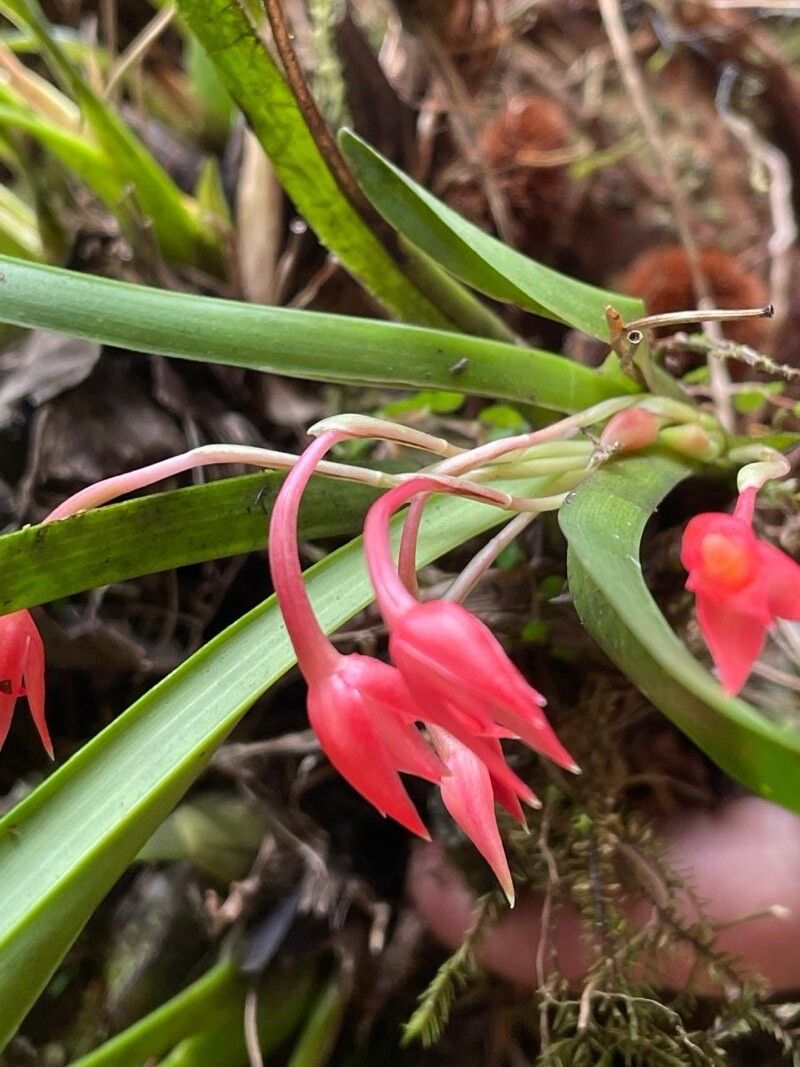
Hello, fellow plant lovers! Today, I want to talk about a little gem that brings serious joy to any orchid collection: Maxillaria coccinea. If you’ve ever seen its fiery red blooms, you know exactly what I mean. They’re like tiny embers, and they just make you feel happy.
Propagating Maxillaria coccinea might sound a bit intimidating, especially if you’re new to the orchid world. But honestly, I’ve found it to be quite manageable with the right approach. It’s a deeply satisfying experience to coax a new life from an established beauty.
The Best Time to Start
For Maxillaria coccinea, the sweet spot for propagation is usually in the spring or early summer. This is when the plant is actively growing and has plenty of energy reserves to put into developing new roots and shoots. You’ll want to wait until your orchid has finished its blooming cycle and you can clearly see new growth emerging.
Supplies You’ll Need
Here’s what you’ll want to have on hand:
- Sterilized pruning shears or a sharp knife: Clean tools are crucial to prevent disease.
- A good orchid potting mix: I prefer a bark-based mix with good drainage. Something with perlite or charcoal mixed in works wonderfully.
- Small pots or seedling trays: Enough for your new divisions or cuttings.
- Rooting hormone (optional but recommended): This can give your cuttings a helpful boost.
- Watering can with a fine spray: Gentle watering is key.
- Patience! This is perhaps the most important tool of all.
Propagation Methods
The most common and successful way to propagate Maxillaria coccinea is through division.
- Gently remove the orchid from its pot. If it’s happy and healthy, it might be a bit snug, so ease it out.
- Inspect the root ball. You’re looking for natural divisions within the plant. These are typically sections that have multiple pseudobulbs (those swollen stem-like structures) and their own set of roots.
- Using your sterilized shears or knife, carefully separate the divisions. Aim for sections with at least two to three pseudobulbs and a healthy root system. Try not to damage the existing roots more than you need to.
- If you opted for rooting hormone, dip the cut end of the division into it.
- Pot each division into its own small pot using your prepared orchid mix. Make sure the pseudobulbs are sitting at the surface of the mix, just as they were before.
- Water lightly. You don’t want to soak it right away. Just a gentle mist or a light watering is enough.
The “Secret Sauce” (Pro Tips)
Here are a few things I’ve learned over the years that can make a big difference:
- Don’t be afraid to gently tease apart the roots. Sometimes, the plant wants to grow as one, and you need to gently untangle those roots to get a clean division. A soft brush can be helpful here.
- Bottom heat can be your best friend. Placing your newly potted divisions on a seedling heat mat can significantly speed up root development. Just make sure the mat isn’t too hot – a gentle warmth is what you’re after.
- Keep humidity high, but airflow even higher. New divisions are susceptible to drying out, so a bit of extra humidity is good. However, stagnant air can invite fungal issues. I like to place my divisions in a mini-greenhouse or cover them loosely with a plastic bag, making sure to open it daily for fresh air.
Aftercare & Troubleshooting
Once your Maxillaria coccinea divisions are potted, treat them gently. Keep them in bright, indirect light and water them only when the potting mix is almost dry. You’re looking for signs of new pseudobulb growth or elongation of existing ones – these are great indicators that roots are forming.
The most common issue you might encounter is rot. This usually happens if the plant is kept too wet or if there isn’t enough airflow. Signs of rot include soft, mushy pseudobulbs or blackening roots. If you see this, don’t despair! You might be able to cut away the rotten parts with your sterilized tool and try to re-establish the healthier section.
A Encouraging Closing
Propagating plants is a journey, and Maxillaria coccinea is a lovely one to embark on. Be patient with your new babies. It takes time for them to establish themselves. Watch for those tiny signs of life, celebrate every new leaf and root, and enjoy the process of nurturing these beautiful blooms. Happy growing!
Resource: