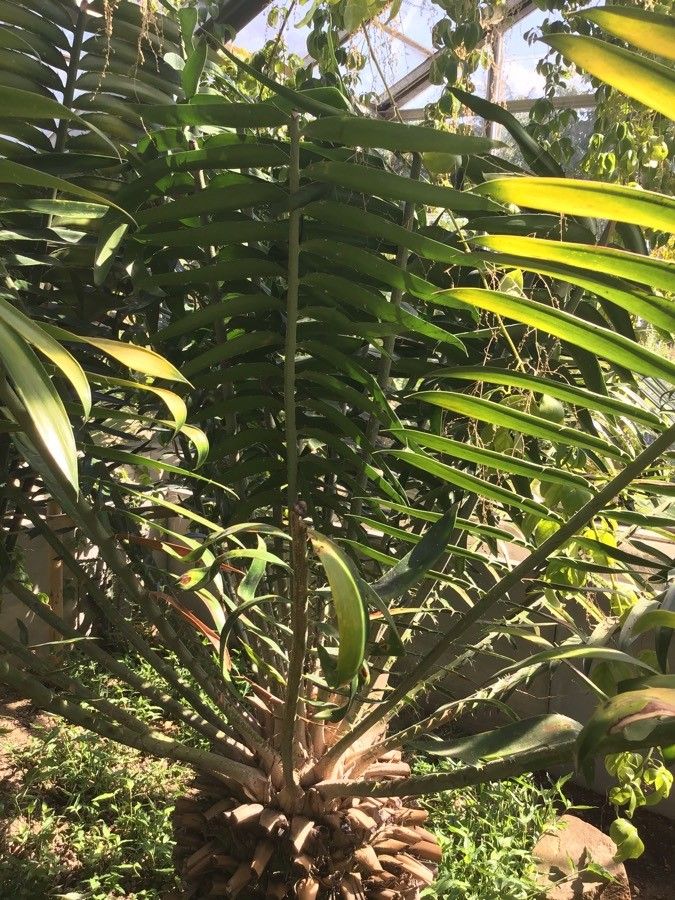
Oh, hello there! Pull up a chair and let’s chat about one of my absolute favorites: Encephalartos gratus. If you’ve ever seen this beauty, you know what I mean. Its elegant, feathery fronds have a certain architectural grace that just draws you in. And the little cones? Simply stunning. Propagating these cycads is a truly rewarding endeavor. It’s not the absolute easiest plant to get started with for a complete novice, but with a bit of guidance and patience, you’ll be well on your way to creating your own little forest of gratus.
When to Get Your Hands Dirty
Alright, so timing is key with most things in the garden, and propagating Encephalartos gratus is no exception. The absolute best time to start is during its active growing season, which for most of us means late spring through summer. This is when the plant has the most energy to put into new growth and root development. If you’re taking offsets, wait until they’re a decent size, at least a few inches across, and ideally have their own small root system forming.
Your Propagation Toolkit
Let’s gather our supplies. Think of this as getting ready for a little gardening adventure:
- Sharp, clean pruning shears or a very sharp knife: We need clean cuts to prevent disease.
- Rooting hormone powder: This is a lifesaver for encouraging root formation.
- Well-draining potting mix: A 50/50 blend of perlite and coarse sand works wonderfully. You could also use a cactus and succulent mix.
- Small pots or containers: Nothing too large to start with; think 4-6 inch pots.
- Gravel or grit: For that extra drainage boost at the bottom of pots.
- Gloves: These plants can be a bit spiny, so protect your hands!
- Watering can with a fine rose: Gentle watering is crucial.
- Optional: A small heating mat: This can be a game-changer.
Bringing New Life: Propagation Methods
Encephalartos gratus most commonly propagates from offsets, which are like baby plants that grow from the base of the mother plant. They are much easier to propagate than trying to grow from seed, which can be a long and complex process.
- Locate the Offsets: Gently clear away some of the soil around the base of your mature Encephalartos gratus. You’re looking for those little pups that have emerged from the main trunk.
- Careful Separation: Using your sharp knife or pruning shears, carefully sever the offset from the mother plant. Try to get a clean cut as close to the main stem as possible. If there are any small, nascent roots attached to the offset, that’s a bonus!
- Curing the Cutting: This is a vital step! You need to let the cut end dry out and callous over. Place the offset in a dry, shaded spot for 1-2 weeks, or even longer if it’s humid. You want to see a firm, dry scab form where you made the cut. This prevents rot.
- Rooting Hormone Application: Once the end is calloused, dip the cut surface into your rooting hormone powder. Tap off any excess.
- Potting Up: Fill your chosen pots with your well-draining mix. Make a small hole in the center of the mix with your finger or a pencil.
- Planting the Offset: Gently place the calloused and powdered end of the offset into the hole. You want it to stand upright, so you might need to firm the soil around it. Don’t bury it too deeply; the base of the offset should be just at the soil surface.
- Initial Watering: Water very lightly after planting, just to settle the soil. We don’t want to waterlog it.
The “Secret Sauce”: Insider Tips
I’ve learned a thing or two over the years, and here are a few tricks that have really made a difference:
- The Power of Bottom Heat: If you’re serious about faster rooting, place your pots on a heating mat set to a gentle warmth (around 70-75°F or 21-24°C). This encourages roots to form from the bottom up, almost like the plant is thinking, “Ooh, nice and cozy, time to get growing!”
- Patience for the Dust Test: Don’t be tempted to pull your offset out too soon to check for roots! The best way to know if it’s rooted is when you feel gentle resistance when you lightly tug on it. Treat it like a tiny seedling – it’s fragile!
- Air Circulation is King: While we want to keep the soil moist (but not wet), ensuring good airflow around the plants is critical for preventing fungal issues. If you have multiple pots, consider placing them where there’s a gentle breeze, not stiflingly close together.
Aftercare and What to Watch For
Once your Encephalartos gratus offsets are showing signs of rooting (that gentle resistance!), you can increase watering slightly. Continue to keep them in bright, indirect light. Avoid direct, scorching sun, which can burn their delicate new growth.
Now, what if things go wrong? The biggest culprit is rot. If your offset starts to turn mushy, darken, or smell foul, it’s likely succumbing to rot. This usually happens from overwatering or not allowing the cutting to callous properly. Unfortunately, once rot sets in, it’s very difficult to save the plant. If you catch it very early, you might be able to cut away the rotten parts and try to re-callous the healthy section, but it’s a long shot.
Another sign of struggle might be that the leaves start to wither and dry out excessively. This could mean it’s just not rooting, or it’s not getting enough moisture. Stick with the gentle watering; it’s better to err on the side of too dry than too wet.
Go Ahead and Grow!
Propagating Encephalartos gratus is a journey that teaches you a lot about the resilience and beauty of these ancient plants. Don’t get discouraged if your first attempt isn’t a roaring success. Every gardener has had their share of wilting leaves and forgotten watering schedules! Be patient, enjoy the process of nurturing something new, and soon you’ll have the joy of sharing these magnificent cycads with friends, or simply admiring your expanded collection. Happy gardening!
Resource:
https://identify.plantnet.org/k-world-flora/species/Encephalartos%20gratus%20Prain/data